Related Posts Widget for Blogs by LinkWithin

Sunday, February 06, 2011

Oats Encrusted Chicken with Wild Rice

Oats Encrusted Chicken with Wild Rice

Boneless skinless chicken breasts seem easy to cook and they make a lean yet protein-rich meal, plus it happens to be D's favorite. Along with a vegetable side and some sort of carb, this seems like a nice meal option.

Start the wild rice in the rice cooker. Marinate the chicken breast pieces for about 10-15 minutes, while assembling and cooking the side, which in this presentation happens to be cabbage. I like to cut the chicken breasts into 1 inch thick strips so they cook faster. Press into rolled oats, and bake in a 400°F oven for about 20 minutes. All three items are done within 30-40 minutes if cooked in parallel.

This cabbage side is one of the staples in my kitchen: coarsely chop a variety of cabbages (I used Napa, red and green cabbage), some carrots, celery, and maybe onion if preferred. Heat a teaspoon of vegetable oil in a pan, throw in the chopped veggies, cover and allow the cabbage to cook a bit in its own water just for a few minutes so it is crunchy yet not too raw. Off heat sprinkle some allspice or nutmeg, add some salt or low-sodium soy sauce to taste. Stir well before serving.

Drizzle the cooked chicken pieces with a quick vinaigrette for extra moisture and flavor. Here I used my favorite Agave Nectar and Ginger Vinaigrette.

Ingredients
1 cup rolled oats
2 boneless skinless chicken breasts, cut into 1-inch thick pieces
seasoning salt
1 Tbsp oil

Marinade:
red wine vinegar, aka miso (or salt), lemon juice, agave nectar

Preparation
  1. Marinate the chicken pieces in the marinade for about 10-15 minutes, longer if preferred
  2. Pre-heat the oven to 400°F; In a shallow bowl mix the oats and seasoning salt; Keep a greased cookie sheet or roasting pan handy
  3. Press the chicken pieces into the oats to coat it, and place in the greased roasting pan
  4. Bake in a 400°F oven for about 20 minutes; thicker/larger pieces will take longer, of course
  5. Check the internal temperature of the largest piece; if it reads about 165°F to 170°F I consider it done
  6. Remove from oven, allow to rest for a few minutes, drizzle with sauce or vinaigrette, serve warm with cooked seasoned wild rice and cabbage side

Labels: , , ,

Friday, February 04, 2011

Sauerkraut or Choucroute

home made sauerkraut pickled cabbage

Vegetable fermentation is not a recent phenomenon. Age-old techniques have survived, with perhaps some help from modern equipment. And the benefits of (properly) fermented vegetables is well-documented.

Some of the store-bought sauerkraut I tried for the first time a decade ago did not appeal to me and I had written off sauerkraut from my diet. Until Sandor Ellix Katz's Wild Fermentation came into my hands. (Thanks Mom!)

After making crock after crock of sauerkraut at home over the last year or so, we've hit upon a recipe we like - especially my five-year-old daughter, who sometimes asks for this "pickled cabbage" for breakfast! We just add a sprinkling of dill weed for the low salt version.

I still remember the huge 'jaadi' (large ceramic crock/container/wide-mouthed jar) full of tiny tender baby mangoes swimming in brine and fermenting, developing the characteristic sourness before some were scooped out for making "Kadugu Maangaa Oorugai" by my mom.

About 4 weeks is all it takes to get a crock of sauerkraut ready, the longer the better. And as we eat just a couple of tablespoons at a time, it lasts a while.

We don't make it back-to-back and have it every day religiously, but, between regular dose of Kimchi and Sauerkraut, it feels like the body is getting something good for absolutely no effort - Nature does the real work.

The picture doesn't do justice to its many virtues. The green bits are dill.

home made sauerkraut pickled cabbage

Low salt version is what I like - the more the salt the slower the fermentation and sourer the result. But, too much salt doesn't allow the good microorganisms to grow.

A jar that fits into the crock, filled with water, helps weight the cabbage down so it doesn't float to the top and get moldy due to exposure to air.

No strict measurements needed - simply sprinkle salt on each layer of shredded cabbage as we chop and pack it into the crock. Press down hard and add some weight - a container or zipper lock bag filled with water. If not enough water comes out of the cabbage within a day or so, add some salt water to keep the chopped cabbage immersed. Keep the weight on and leave it to ferment. Check every couple of days.

By about 4 weeks it is ready to be enjoyed. The sauerkraut "juice" is incredibly delicious and is a wonderful digestive tonic.

In winters, I leave the crock out and let the cabbage continue to ferment after the 4 weeks while we take a bit each day. It can be refrigerated if preferred.

The crunch of the cabbage thanks to the salt, the sourness due to acidity, plus the dill and salt has made this a favorite in our home.

Labels: , , ,

Friday, January 28, 2011

Vegetarian Tamales: Steamed Corn-husk Wrapped Snack with Tempeh

Vegetarian Tamales: Steamed Corn-husk Wrapped Snack with Tempeh

Tamales are not unfamiliar here in North America. And there probably is some version of it in different cultures around the world. Delicacies wrapped and steamed in banana leaves is quite common in India and parts of SE Asia. Not too long ago, while sharing the sweet Elai Adai recipe, I couldn't help noting its similarity with savory Tamales.

There are many standard/authentic recipes on the web and in cook books for tamales. But, experimentation and fusion cuisine being my personal slant, my recipe here is atypical, to say the least.

Since banana leaves/corn husks are not as handy or ubiquitous as they used to be when I was growing up, it is not often that I get to make these wrapped steamed dishes. However, every once in a while when I visit the Lebanese/Hispanic/Asian and other international markets, I tend to stock up.

Speaking of which, I had Olive pickle from Bangladesh recently - not the kind pickled in vinegar/brine, no, these were made in the typical Indian style with spices, packed in oil - and loved it! I am digressing...

Anyway, during one of the recent outings, I picked up some dried packaged corn husks expressly for making these tamales.

The dough uses flours and meals I usually have at home, no lard, and the filling is made with tempeh.

Sweet Boli, something I intensely disliked when I was young and seem to miss right now, brings back memories... assisting my mom reluctantly, mumbling and grumbling about how I could be doing something else rather than sit there and flatten out the elastic yellow dough, stuff it with the sweetened chana dal (kadala paruppu), ball it up neatly, pat it flat again now that it has the sweet filling, oiling my palms heavily to avoid sticking...

I never realized how much I learnt being a sous chef in my mom's kitchen! Karadayan Nonbu Adai, Modhakam/Poorna Kozhakattai, Suhiyan, Boli, not to mention Muthusaram, Thenkuzhal, Mysore Pak - I wouldn't dream of making them today were it not for all the work she put me to when I was young. And I thank her for it. (Amma, if you are reading this - I probably have called you a dozen times reminding you to - hope you realize how sincerely grateful I am!)

Ingredients
For the dough wrapper:
¼ cup fine corn meal
¼ cup all purpose flour
½ cup rice flour
¼ cup canola oil
¼ cup water (plus a few Tbsp as needed)
salt and chili powder to taste

For the Tempeh Filling:
onions, bell peppers, celery finely chopped
taco seasoning -OR- cumin, coriander, oregano powder -OR- any other favorite spices
1 pkt Organic Multi-grain Tempeh
salt to taste
1 Tbsp canola or vegetable oil

Preparation
  1. Soak the dried corn husks in warm water for at least 30 minutes or per package instructions to soften it and get it ready for wrapping
  2. Dough: Combine the dry ingredients for the dough in a bowl, make a well in the center, add the oil and a little water at a time, and knead to form a non-sticky, soft dough; set aside while the making the filling
  3. Filling: Heat the oil in a pan, add the onions, celery, bell peppers, a pinch of salt, sauté a bit; then add the tempeh, spices, adjust salt to taste and pan-fry it to desired brownness
  4. Assembly: Drain the corn husks; make long strips out of one of the corn husks to act as ties/strings; Take one or two layers of corn husk, lay it flat and pat it dry; Pinch off a ball off the dough about 1.5 inches in diameter and pat it flat on the corn husk wrapper; spoon some filling in the center and wrap like a package, tie with the strip
  5. Cook: Steam in the food steamer that comes with the rice cooker, or in any other handy steaming apparatus. I use my Idlee Cooker, and run it for 2 cycles - about 20-22 minutes
  6. I typically "sacrifice" one of them to see if they are done - simply open one up and taste if the dough feels cooked enough... it turns translucent when cooked through so that the filling shows through
  7. Enjoy warm with dipping sauce if preferred. (I like Maggi™ Hot & Sweet Tomato Chilli Sauce with these)

Labels: , , , , , , ,

Friday, January 21, 2011

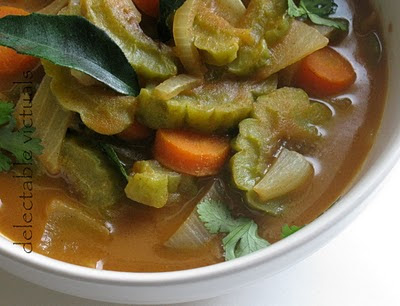
Ridge Gourd and Lentil Soup

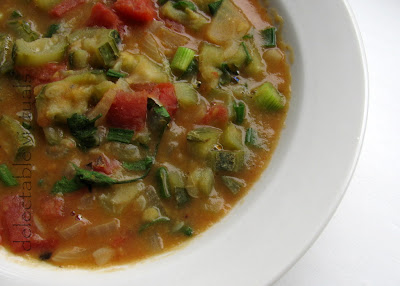
Ridge Gourd and Lentil Soup Peerkanga peerakkai beerakaya dal stew indian vegetarian

Ridge gourd was one of my least favorites when I was growing up. But, over the last few years, since it is available at the local Asian stores, I've come to rediscover and enjoy this strange vegetable.

Ridge gourd is usually spongy inside with not much flesh/meat, so, I use 2 or 3 large ones to make a reasonable quantity of this dish that showcases the vegetable. Much like chayote squash or opo squash and some of the summer squashes, ridge gourd doesn't have much of its own strong personality/flavor. It turns translucent when cooked even though it starts out spongy and white.


Peerkanga peerakkai beerakaya


The best part about ridge gourd for me is its peel, its ridged almost thorny skin: I use it for making Ridge Gourd Peel Chutney (Peerkangai Tholi Thogayal), which is a family favorite - goes well with dosai, roti and even rice.


Ingredients:
1-2 long tender ridge gourd
1-2 medium tomatoes, diced
1 medium yellow onion, diced
2 cups cooked, mushy Toor (Tuvar) Dal
1 Tbsp canola oil
2 Tbsp Madras Curry Powder
1 tsp turmeric powder
1 Tbsp brown sugar
2 Tbsp lemon juice
1 Tbsp fresh grated ginger
4-6 cloves of garlic (optional)gin
salt to taste
water as needed
some curry leaves, cilantro, spring onions for garnish

Preparation:

  1. Skin the ridge gourd and save the skin for Ridge Gourd Peel Chutney; dice the ridge gourd, set aside
  2. heat oil in a pan, add the onions, ginger, a pinch of salt, turmeric and sauté till onions turn translucent
  3. add the tomatoes, spices, brown sugar, ridge gourd, cooked toor dal, a cup of water (adjust as needed)
  4. cover and allow to cook till ridge gourd is done - usually doesn't take very long, it cooks up fast
  5. adjust salt to taste; increase water for a runny soup (I prefer thick stew that can be scooped up in the spoon)
  6. garnish with curry leaves and serve warm as-is or with rice or indian flat breads

Labels: , , , , ,

Tuesday, January 11, 2011

Pan-fried Plantain Wedges and Plantain Chips

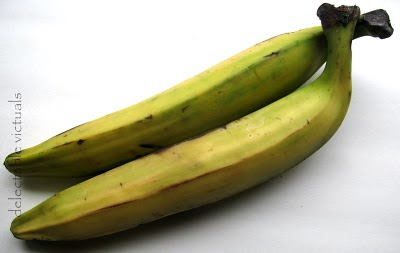
Pan-fried Plantain Wedges and Plantain Chips vazhakkai podimaas vazha poduthuval

Unlike Bananas which are enjoyed as-is ripe and sweet, Plantains are best for cooking when raw/unripe and firm. I grew up with a variety of bananas and plantains, some of which still stir happy memories - like ripe Rasthali and Nendran - and thanks to my mom, we had quite an array of dishes made with green plantains - mezhukuvaratti, podimaas, varuval and so on during my childhood which established a liking for this vegetable/fruit.

For this recipe, it is best for the plantains to be firm but almost ripe, not too raw and green, else it doesn't cook through well before the outside is crisped. To adjust for this, I par-cook the plantain wedges in the microwave, then pan-fry.

Pan-fried Plantain Wedges and Plantain Chips vazhakkai podimaas vazha poduthuval

The flavoring spices can be varied - sometimes I prefer simple salt and chili powder, or black pepper; sometimes, smoked paprika, cumin, coriander; can even toss it around with some brown sugar and pan-fry to caramelize for a mildly sweet snack.

Plantain chips are just deep fried in canola oil and sprinkled with salt.

Pan-fried Plantain Wedges and Plantain Chips vazhakkai podimaas vazha poduthuval

Ingredients
2 plantains, cut into wedges or rounds
salt and spices as needed
a few teaspoons of oil for pan-frying

Preparation
  1. Toss the par-cooked plantain wedges with salt and spices and some oil
  2. Heat a teaspoon or two of oil in a pan, add the coated wedges, allow to develop a crisp skin on each side, turning only to get all sides browned, not too often

Labels: , , , , ,

Sunday, January 09, 2011

Keys to Good Cooking

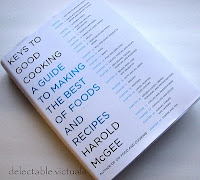
Keys to Good Cooking harold mcgee
Keys to Good Cooking
A Guide to Making the Best of Foods and Recipes
by Harold McGee

Does pan size influence the cooking process? How to keep wooden (or plastic) cutting boards clean? Different starches have different thickening power, which ones to use for what? Why is it that beans give people gas, how to minimize it? Does covering raw foods with oil allow botulism bacteria to grow?

Most cooks pick up a lot of information regarding food safety, cooking methods, useful tools and apparatus, in addition to recipes, good ingredients and basic methodology. This book collects a wide array of facts and tips and explanation that even an experienced cook might want to refer to on and off.

The comprehensive volume by the author, On food and Cooking: The science and lore of the kitchen, is a fantastic reference for the avid cook who is not all about recipes. While On food and Cooking might come across as sterile and scientific, Keys to Good Cooking distills scientific findings and presents it in an easy-to-digest form, practical and to-the-point.

I fell in love with this book as it focuses on providing an understanding of cooking, the whole cooking field. Being an intuitive cook with a chronic inability to follow recipes to the T, I look for general methodology and combination of ingredients and flavors rather than exact measures and step-by-step instructions for cooking a dish.

In that sense, the chemistry lessons from high school came in handy when I first started making dishes that use raising agents - use acid (like citric acid or lemon juice or even buttermilk) + alkali (baking soda) to release CO2 gas for that extra fluff. When to use baking powder versus baking soda and why... cast-iron skillet versus stainless steel pan for cooking - flow of heat energy... hot-soak the beans before cooking, (add bay leaves) - bio-chemistry... I am digressing.

A recent Xmas present, this book is much-loved already and will be well-used, possibly not dog-eared as I can't stand it, but, certainly treasured over the years.

Labels: ,

Monday, January 03, 2011

Bittergourd Paruppusili

Bitter gourd Paruppusili

Since D and I like bitter gourd, I try to cook it up in a few different favorite ways to enjoy. Bitter gourd paruppusili is not very different from other paruppusilis, except the flavoring: tamarind paste, with some brown sugar and chilli powder. The hot-sour-sweet combination goes well with the bitterness.

Ingredients:
1 or 2 medium Foo Gwa or Bitter gourd, cleaned and diced

½ tsp tamarind paste
½ tsp hot chilli powder
1 Tbsp brown sugar
salt, as needed
water, as needed

oil, as needed

tempering: 2 Tbsp oil, 1 tsp mustard seeds, 1tsp cumin seeds (optional)

garnish: curry leaves and cilantro (optional)

steamed and pan fried lentils as in the Kovakkai Paruppisili

Preparation
  1. Heat the oil in a pan, add the diced bitter gourd, some water, tamarind, chili powder and brown sugar, salt, cover and simmer till the bitter gourd is cooked though but not mushy
  2. Sit in the pan fried lentils, garnish with curry leaves, serve warm with rice and sambar

Labels: , , , ,

Friday, December 24, 2010

Curry Leaf Kuzhambu

Curry Leaf Kuzhambu

Curry Leaf, known as Karuveppelai in Tamil, is ubiquitous in south Indian dishes either as garnish or as part of spice paste or even on its own in Curry Leaf Chutney.

Kuzhambu/Kozhambu is a south Indian thick and spicy stew served with rice. While Sambar typically has cooked mashed toor dal and vegetables in it to add some body and protein, Kozhambu is typically made when dal and seasonal vegetables are not handy, relying mostly on herbs and such for a bold flavor - garlic (Poondu Kozhambu), ginger (Inju Kozhambu), Molagu Kozhambu (Black pepper Kozhambu), Curry leaves as in this Curry Leaf Kozhambu...

I add vegetables to some of the kozhambu I make, but is usually optional... sometimes even some lentils like the Pottu Kadalai Kozhambu or Paruppu Urundai Kozhambu.

And this Curry Leaf Kozhambu features cauliflower, but can be omitted, or substituted with any other favorite vegetable.

Asafoetida is a staple in most south Indian kitchens, a pinch here with tempering, a pinch there in the simmering pot... a small jar of it lasts quite a while in my kitchen, thanks to its strong aroma and taste.

Ingredients
For the Curry Leaf Paste:
1 cup fresh curry leaves, chopped coarsely
1 Tbsp whole black pepper
2 to 4 dry red chilies (fewer if preferred)
1 Tbsp freshly grated ginger (optional)
4 Tbsp dry grated (unsweetened) coconut

For the kuzhambu:
1 cup Cauliflower florets
½ medium onion, finely chopped
1 tsp tamarind paste (I like Tamicon™ paste)
Cornstarch or rice flour for thickening
salt to taste
6 cups of water

Tempering: 1 Tbsp oil, ½ tsp asafoetida powder, 1 tsp mustard seeds, 1 tsp chana dal, 1 tsp urad dal

Preparation
  1. Combine the curry leaf paste ingredients together, grind to a smooth paste, set aside
  2. Tempering: Heat the oil in a large enough pot for making the kuzhambu, add the chana dal, then urad dal and when they turn golden brown, add the mustard seeds, and when they pop, add the asafoetida
  3. At this point, can reserve some of this tempering for garnish or simply proceed with the kuzhambu
  4. Add the onions, sautée till translucent, then add the kuzhambu ingredients, (except cornstarch or rice flour), cover and simmer till it is reduced in volume by one-third
  5. Add the curry leaf paste, adjust salt to taste and simmer about 5 minutes longer
  6. Thicken: mix a teaspoon of cornstarch or rice flour in cold water, add to the simmering kuzhambu, stirring constantly to thicken

Labels: , , , ,

Wednesday, December 22, 2010

Bittergourd Sambar

Bittergourd Sambar

Sambar is a south Indian stew-like dish typically eaten with hot rice.

Sambar can be made with any seasonal vegetable, any combination of them, although my mom would probably dislike certain combination of vegetables - like ash gourd and bitter gourd together, or for that matter pearl onion and cranberries that I like to make on and off during Fall/Winter.

Sambar Powder is the spice mix that flavors this dish. And practically every south Indian family has its own version of the best sambar powder formula which is probably tweaked a bit down the generations. For instance, my mom's traditional sambar powder recipe is a bit different from mine and yet they use pretty much the same base ingredients.

easy recipe home made sambar powder

The sambar powder can be made ahead of time in a larger quantity and stored in air tight container much like any other spice powders. Typically, just a couple of tablespoons of the powder is all it takes to make a pot of sambar. Simply dry roast the ingredients till aromatic, allow to cool a bit, grind to smooth powder, and store.

Indian bitter gourd or Chinese Foo Gwa have a distinct bitterness that can be an acquired taste, but has well-documented health benefits. Thanks to my mom making bittergourd sambar and pachadi and deep-fried and pan-fried poduthuval when I was little, I ended up liking it a lot when I "grew up", despite turning up my nose on it then.

Tempering is an integral part of many south Indian dishes, my mother wouldn't dream of serving sambar without it, but, can be omitted here if preferred. Certain dishes start with the tempering first and get layered flavors built as the dish progresses, whereas certain dishes have the tempering as garnish added right at the end when the dish is ready to be served. I prefer adding tempering at the end for sambar, but start off with tempering for poduthuvals and curries.

Ingredients

Sambar Powder spices (this is a slightly non-traditional mix):
1 cup coriander seeds
½ cup dry red chilies(up to 1 cup if preferred fiery and red)
½ cup chana dal
¾ cup toor dal
½ cup fenugreek seeds
2 Tbsp whole black pepper
2 2" piece of chinese/indian cinnamon bark
2-4 dry bay leaves
1 tsp poppy seeds
½ cup dry roasted curry leaves (optional)

For the Sambar:
1 tsp tamarind concentrate (I like Tamiconā„¢ is rich, thick and dark)
6 cups of water
1 large bitter melon, chopped (I like Foo Gwa from Asian stores)
1 large carrot, chopped
1 medium onion, chopped
2 to 3 Tbsp Sambar powder
1 Tbsp brown sugar
salt to taste
1 cup cooked mashed toor dal
Cilantro leaves for garnish

Tempering: 1 Tbsp oil, 1 tsp mustard seeds, 1 tsp urad dal, 3 or 4 fresh curry leaves

Preparation
  1. Tempering: Heat oil in a small pan, add urad dal and allow it to turn a mild golden brown, add the mustard seeds and let them pop; cover with a perforated lid if preferred as the mustard seeds will spatter all over when they pop; add the fresh curry leaves, remove from heat and keep aside
  2. Combine the sambar ingredients, all except cooked toor dal, cover and simmer till vegetables are cooked but not mushy; stir in the cooked mashed toor dal, adjust salt to taste and simmer for about 5 minutes more over medium low heat
  3. Garnish with fresh cilantro leaves and the tempering

Labels: , , ,

Tuesday, December 14, 2010

Wilted Spinach Sandwich, Cabbage Paruppusili, Spicy Chicken

Wilted Spinach Sandwich, Cabbage Paruppusili, Spicy Chicken

While the combination of Wilted Spinach Sandwich, Cabbage Paruppusili, and Spicy Chicken probably sounds odd, the meal was anything but.

Sometimes leftovers make a wonderful dinner platter. Small amounts of Cabbage Paruppusili and Spicy Chicken chunks in tomato-based gravy leftover from a weekend lunch made a simple yet filling meal that night, with a quick sandwich to round it out.

Wilted Spinach Sandwich
  1. Wilt some baby spinach in olive oil, splash some pomegranate red wine vinegar off heat, toss in some feta and capers, allow to marinate till ready to serve.
  2. With kids around, String Cheese (Mozzarella sticks) is always handy. I like to cut up the string cheese into smaller chunks and microwave them for about 30 - 35 seconds (depending on the microwave power level) so it melts an stars browning at the edges. Makes a perfect cheese layer for sandwiches. (can use any favorite cheese or leave it out)
  3. When ready, toast the bread slices, squeeze out excess liquid from the marinated spinach, add the melted cheese, serve right away

Wilted Spinach Sandwich, Cabbage Paruppusili, Spicy Chicken

Cabbage Paruppusili: The recipe is the same as any other paruppusili like Green Beans Paruppusili - substitute cabbage for green beans.

Spicy Chicken:
  1. Make a paste of onions, tomatoes, garlic, ginger, dry red chilies
  2. Pre-heat the oven to 400°F
  3. Marinate the chicken chunks in the masala paste for about 10 minutes (longer if desired)
  4. Combine the chicken chunks and the masala paste, some salt, brown sugar, and some Frank's Red Hotā„¢ sauce and bake in 400°F oven for about 25 minutes or until chicken is cooked through

Labels: , , ,

Thursday, December 09, 2010

Rolled Bread Sandwiches

Rolled Bread Sandwiches

Sandwiches are sandwiches. Two pieces of bread with something in-between. While thinking of a way to make a simple meal more attractive, these rolled bread sandwiches came about.

Any favorite sandwich fillings/fixings would work, as long as it is cohesive and not too soggy. These rolled sandwiches here use feta, sun-dried tomatoes, pepperoncini, red onions and some Monterey Jack cheese to hold them together. Any other favorite cheese that melts well would be fine - Colby Jack, Mozzarella, even Cheddar.

The sandwiches are served with hot gumbo.

Preparation
  1. Cut out the crust from two slices of bread; slightly overlap one edge and roll the bread slices out with a rolling pin to make a larger flatter bread piece
  2. Place some Monterey Jack along the short edges and toast in the toaster oven till cheese just starts to melt
  3. Remove from the toaster oven, pile some filling on one end, roll as tight as possible, letting the melted Monterey Jack cheese seal the roll
  4. Toast in the toaster oven till desired brownness on the outside

Labels: , , , , ,

Tuesday, December 07, 2010

Sweet Potato and Red Cabbage Croquettes

Sweet Potato and Red Cabbage Croquettes

Some dishes just come into existence out of the need to use up small bits of remaining vegetables. Half a sweet potato and a small wedge of red cabbage came together for these surprisingly interesting croquettes. Some were deep-fried unbreaded, and some were breaded and pan-fried.

The croquettes, along with pan-fried polenta cakes and lightly steamed broccoli, made quite a filling dinner.

Ingredients
½ large sweet potato
½ to ¾ cup finely chopped red cabbage
2 to 3 high fiber whole wheat bread slices
1 tsp Cajun seasoning salt (more to taste)
½ tsp cumin powder (optional)
½ tsp coriander powder (optional)

Canola or vegetable oil for frying

Preparation
  1. Microwave/Steam the sweet potato till soft, drain and pat dry; mash it along with the rest of the ingredients, adding enough bread to be able to shape the dough; shape into small logs
  2. Heat a tablespoon of oil in a grill-pan over medium-high heat, place the shaped logs, allow to brown, turn around and brown all sides; if breadcrumbs are handy, bread the logs before shallow pan-frying
  3. Alternately, deep fry

Labels: , , , , , ,

Monday, December 06, 2010

Sweet Potato and Green Apple with Marshmallows

Sweet Potato and Green Apple with Marshmallows

Sweet Potatoes or Yams along with slightly tart green apples, dusted with some brown sugar, cinnamon and nutmeg, baked till done, dotted with marshmallows at the end so it turns gooey, hot off the oven, is certainly a late fall treat I don't make often.

While not my favorite, this casserole is certainly a nice addition to Thanksgiving or Christmas menu. I prefer the white marshmallows, but, kids liked the pastel colored ones which is what I used in this recipe.

I par-cook the yams/sweet potatoes in the microwave first to cut down on baking time.

Ingredients
1 large Sweet Potatoes or Yam, sliced
1 large Green Apples, sliced
1 tsp Pumpkin Pie Spice Mix -or- ½ tsp each ground cinnamon, ginger, nutmeg
¼ cup brown sugar (more if preferred)
½ cup mini marshmallows
a few Tbsp evaporated milk (optional)

Preparation
  1. Pre-heat the oven to 350°F
  2. Arrange the yams or sweet potato slices in a 9-inch baking dish, add about ¼ cup of water, cover and microwave till par-cooked, drain excess water
  3. Add the apple slices, spices, brown sugar, and some evaporated milk, stir well, pack down firmly and bake in a 350°F oven for about 30-35 minutes, checking for doneness/charring
  4. Dot with marshmallows and place under broiler for a minute or so till gooey, remove from heat, allow to sit for a few minutes, and serve warm

Labels: , , , , , ,

Tuesday, November 30, 2010

Pumpkin Pie

pumpkin pie

Pumpkin and mildly sweet winter squashes are a few of my favorite winter vegetables - soups, poduthuvals, dals, risotto - I like to add them to dishes as often as I can. Pumpkin is a rich source of nutrients, high in fiber with an inherent mild sweet taste that goes well with most dishes, including sambar and pachadi - South Indian staples.

Pumpkin Pie, Apple Pie, Moo-less Chocolate Pie, Banana Cream Pie (and any sortof smooth-textured pudding-like pie filling), Strawberry Pie Glace are some of the kids' favorites, Cherry Pie being the least favored one.

I don't make pies often. Typically, something about the Holiday Season, with shorter days and colder weather inspires me to bake cookies, breads, and pies more often.

We made a Pumpkin pie during the Thanksgiving holidays recently. The recipe is the classic one found on the label of Libby's Canned Pumpkin.

The only simple changes I make to this famous recipe (as I have a chronic inability to follow a recipe exactly) are:
  1. substitute brown sugar instead of sugar
  2. only ½ cup of brown sugar instead of ¾ cup
  3. use ready-made Pumpkin Spice mix
If making pie shell from scratch, I follow the standard single-crust pie pastry recipe, cook it, cool it before filling it and baking the Pumpkin pie.

Labels: , , ,

Sunday, November 28, 2010

Green Bean Casserole

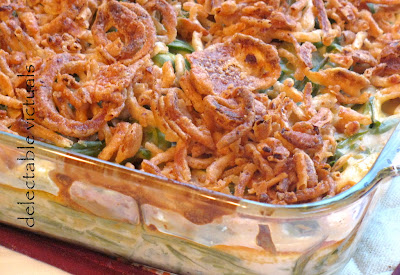
Green Bean Casserole recipe

Green bean casserole is one of my favorites, especially for Thanksgiving dinner. However, this year, I have made it quite a few times in the last few months, not just on Thanksgiving Day, possibly because casseroles are a great alternative to soups for quick and easy weeknight dinners.

Nothing special about this recipe - very much like what comes on the label of Campbell'sā„¢ soup cans. I change the seasoning a bit, and prefer Cream of Asparagus soup rather than Cream of Celery.

Frozen French cut green beans and canned soup makes for a quick meal that cooks under 30-35 minutes. If in season, fresh green beans cut into 1" pieces and blanched, along with a creamy sauce from scratch is a nice alternative (adjust cooking time as needed).

While Green bean casserole is typically served as a side dish, I make it a main meal especially on cold fall and winter nights. Seasoning and flavors can be adjusted to taste - I keep it fairly simple for the kids, and add a few drops of Tabascoā„¢ sauce or Franksā„¢ Red Hot for myself and D.

Ingredients
16 oz of frozen French-cut beans, thawed
1 can (10¾ oz) Cream of Asparagus (or Broccoli or Potato) soup
6 oz evaporated milk
1 tsp garlic powder
1 tsp lemon thyme seasoning (optional)
1 Tbsp French Onion Dip mix
2/3 can of French fried onions (about 4 oz)

Preparation
  1. Pre-heat the oven to 375°F; reserve half of the French-fried onions to use as topping at the end
  2. In a 9-inch square baking dish, combine all the ingredients, stir well and bake for about 25 minutes till bubbly; if preferred, use about 4oz of evaporated milk (+ a few Tbsp water) instead of 6oz, for a thick casserole
  3. Top with the reserved French-fried onions and bake another 3 or 4 minutes to crisp the French-fried onions, taking care not to char them
  4. Serve warm

Labels: , , ,

Friday, November 19, 2010

Brown Rice Vegetable Soup


The weather being chilly and wet, I've been making soups, casseroles, breads for dinners. Soups are a good way for me to use up leftover barley or quinoa or rice , along with a favorite combination of vegetables and spices.

Thai soup spices is my default flavoring, but, this recipe has a tomato base with a small amount of evaporated milk for creaminess. We had harvested the last of cherry tomatoes from the home garden a while back.

And now that cold has set in, we harvested the green tomatoes as well, which probably wouldn't turn ripe red anymore...

Ingredients
Vegetables: baby corn, snap peas, bell peppers, onions, cherry tomatoes, carrots, lima beans
1½ to 2 cups cooked brown rice
6-8 cups water or vegetable stock
2 Tbsp lemon juice
¼ to ½ cup evaporated milk (optional)

½ medium onion finely diced
2 Tbsp tomato paste
2 Tbsp sambal oelek
2 Tbsp minced garlic
1 Tbsp brown sugar (more if preferred)
2 Tbsp canola oil
salt to taste

Preparation
  1. Heat the oil in a pan, add the onions, garlic and tomato paste, stir and cook till onions are translucent and tomato paste turns darker and aromatic, then add sambal oelek and brown sugar
  2. Add the vegetables, stock, brown rice, some salt, stir well, cover and allow to simmer till it all comes together
  3. Stir in the lemon juice, taste and adjust flavors if preferred; off-heat stir in the evaporated milk for a creamier texture

Labels: , , , , , , ,

Sunday, November 14, 2010

Buckwheat Soba, Teriyaki Chicken and Blanched Green Beans

Buckwheat Soba, Teriyaki Chicken and Blanched Green Beans

This Buckwheat Soba, Teriyaki Chicken and Blanched Green Beans is a simple meal combination, another one of D's favorites.

Soba and the green beans are flavored with a dash of Ponzu sauce after cooking and draining. Teriyaki chicken is very much like the usual recipe I follow, nothing new.

Ingredients
for the Teriyaki sauce and glaze:
¼ cup shoyu, or dark soy sauce
¼ cup mirin (or, sherry, if mirin is not handy)
¼ cup sake
1 Tbsp brown sugar (or, superfine caster sugar, if handy)

2 medium frozen skinless boneless chicken breasts, thawed
1 Tbsp sesame oil, or canola oil

Garnish: strips of nori, toasted sesame seeds

Preparation
  1. Heat the teriyaki sauce ingredients gradually till sugar dissolves; off heat, let it cool
  2. Cut the chicken breast into bite size pieces and marinate in some of the cooled teriyaki sauce, for about 15-20 minutes
  3. Heat the oil in the pan to high heat, drain the marinated chicken pieces, toss them into the hot pan and stir them around; alternately, pre-heat grill or broiler and grill or broil the chicken; I prefer to pan-fry
  4. Toss around, turning all sides, over medium high heat, adding teriyaki sauce a little at a time to glaze the chicken pieces; cook till chicken is done, still juicy and tender; usually close to 170°F

Labels: , , ,

Sunday, November 07, 2010

Oven-roasted Kale

Oven-roasted Kale

Kale koottu/dal, Kale soup, sautƩed Kale (much like radish greens), marinated Kale salad, Kale pasta, Kale with Cannelloni beans (much like collard greens), Kale paruppusili, even as pizza topping, not to mention just tossing it in with other suitable recipes, this nutritious greens is a favorite, much like collard greens, spinach, mustard greens and chards.

This oven-roasted kale is quite easy to make and can be snacked on as-is, or served as a side. The spices can be adjusted to taste.

Ingredients
1 bunch kale, cleaned and chopped
2 Tbsp Olive oil
1 or 2 garlic cloves, minced
1 tsp salt (more if preferred)
½ tsp cumin powder
½ tsp coriander powder
½ tsp cayenne pepper (optional)

Preparation
  1. Pre-heat oven to 350°F
  2. Toss the ingredients together, spread on a cookie sheet to a flat thin layer
  3. Bake in the 350°F oven for about 15 to 20 minutes, checking once or twice for crispness
  4. Top with toasted sesame seeds, or popped mustard seeds (much like in tempering

Labels: , , , ,

Thursday, November 04, 2010

Pimientos y Pollo con Tortilla

Pimientos y Pollo con Tortilla Chicken Fajitas
While Pimientos y Pollo con Tortilla is just a Spanish translation of the primary ingredients, it somehow sounds more exotic than Chicken and Bell Peppers with Tortilla :)

And, that's all this recipe is. Much like a wrap. We simply call it fajitas at home for convenience even if it is technically incorrect as it refers to a specific cut of beef that was originally used to create this dish.

Cooked on a cast iron skillet, with a couple of drops of Liquid Smoke (I use Wright's Hickory Seasoning) and spicy McCormick'sā„¢ Taco Seasoning, these bell peppers and chicken and onions make a wonderful filling to wrap in a tortilla and enjoy.

I like to start the chicken and onions first on the skillet and add the bell peppers when chicken is nearly cooked so they can all finish together. While corn tortillas are traditional, I like the high-fiber (low-carb) wheat tortillas for the wraps.

We've been enjoying more of the usual soups with home-made dampers and breads, South Indian rasam with Poduthuvals and home-made pizzas for the last few weeks - just quick meals - nothing elaborate, nothing new and exciting to share here...

Labels: , , , , ,

Wednesday, October 27, 2010

Beans and Rice, Potatoes, and Steamed Cabbage

Beans and Rice, Potatoes, and Steamed Cabbage
As unimaginative as Beans and Rice, Potatoes, and Steamed Cabbage sounds, it represents a comfort meal at home. Since we don't eat out much, I like to present "dinner plates" with portioned out variety of menu items. Not only does it help me keep track of what I eat, it also provides a nice gauge for D and the kids, not to mention a nice presentation.

Food Court eateries aren't quite gourmet usually, but, certain menus there satisfy certain moods for me. One such pick I default to when I find myself in a Food Court at lunch time is this combination of Beans and Rice, Potatoes, and Steamed Cabbage+Carrots, topped with some chili sauce. This almost always turns out greasier than I like, but very filling.

The recipe here is nothing exciting: cook the favorite beans and rice together with seasoning, pan-fry some par-boiled and sliced potatoes with onions, steam some green cabbage and julienned carrots. All this can be done in parallel, leading to a quick yet sumptuous meal.

I like black beans and basmati rice for this, but, kidney beans with long grain rice would be good too. Typically, over weekends, I steam some potatoes in the steamer that comes with the rice cooker and store it in the fridge/freezer for later use so it is handy.

For this presentation, I like the rice and beans to be fairly dry, not runny like I prefer the Red Beans and Rice dish. Garnish with cilantro and serve warm.

Labels: , , , , ,

Wednesday, October 20, 2010

Flaky Parathas


Paratha is an unleavened Indian flatbread made with wholewheat flour. It is usually pan-fried on the griddle and served hot with a few different sides - like curries, chutneys and raita.

To get the flaky layers, it can be rolled out, folded over on itself and rolled out four or five times before pan-frying, spreading a layer of ghee in between. Home-made Ghee is traditional, but, I like to use Smart Balance Omegaā„¢ Light.

Stuffed parathas used to be my favorite when I was young. Stuffing can be any leftover vegetables like potatoes, peas, carrots which incorporate well into the dough and can be rolled out without falling apart.

Served here is a South Indian side called Ellu Pachadi, made with home-garden butternut squash and zucchini.


Ingredients
3 cups whole wheat flour
2 Tbsp Smart Balance Omegaā„¢ Light
1 cup warm water, more or less
1 tsp salt (more if preferred)
Oil for pan frying

Preparation
  1. Combine the flour, salt, and Smart Butter; add a little water at a time and knead till the dough comes together, not stiff but quite elastic; let it sit for 15-20 minutes
  2. Divide into balls and roll out one at a time, folding over a few times to create layers, not thicker than 4 or 5 millimeters (else it takes a lot longer to cook through)
  3. Pan fry on a medium-hot pan, with a touch of oil to crisp the sides, maybe a couple of minutes on each side depending on the thickness of the paratha and heat of the pan

Labels: , , , , ,

Tuesday, October 19, 2010

Black Beans and Brown Rice Patties


Leftover black beans, brown rice, plus baked or steamed potatoes come together to make these delicious patties. Simply add favorite spices, mash them together, and pan-cook to desired crispness.

Serve as bean burgers in mini buns with favorite fixings, or enjoy as-is with favorite dipping sauce or ketchup.

Ingredients
1 cup cooked black beans, drained well
1 cup cooked brown rice
1 medium potato, cooked
a few slices of bread, preferably heels :)
1 Tbsp coriander powder
1 Tbsp brown sugar
1 Tbsp sambal oelek or Tabasco™ sauce (or any favorite chili paste or sauce)
1 tsp garlic powder
salt to taste

A few tablespoons of Olive oil for pan frying

Preparation
  1. Mash the ingredients together, adding just enough bread slices to make a dough that can be shaped easily; taste and adjust seasoning
  2. Heat a few tablespoons of oil in a pan, shape the patties and fry both sides till firm and done

Labels: , , , ,

Thursday, October 14, 2010

Vegetarian Philly Cheesesteak Sandwich


Smothered in sautƩed onions and bell peppers, dripping with melted cheese, on a whole-wheat hoagie roll, makes this mock Philly Cheese "Steak" sandwich an incredibly tasty and simple meal.

The wheat-meat recipe is the same as my usual one in principle, but, I vary the flavors/spices a bit here. While the Tandoori paste is a great marinade, I use it here for both color and flavor.

And usually, this is a great way to use up leftover wheat-meat pot roast: simply cut into strips, and sautƩ with onions and bell peppers, add preferred cheese.

Sloppy Joe: Another option is to grind the cooked wheat-meat strips, add some ketchup or tomato paste (I prefer tomato paste) while sautƩing with onions and peppers, and serve as Slushburgers or Wimpies on toasted buns.

Ingredients
for wheat meat:
1 cup vital wheat gluten
¾ cup warm broth
spices:
1 tsp each cumin powder, coriander powder, cayenne pepper, salt
1 Tbsp Patak'sā„¢ Tandoori masala paste
1 tsp brown sugar

onions and bell peppers, sliced thin - as much as preferred
1 Tbsp canola oil

optional: 1 or 2 drops Liquid Smoke (I use Wright's Hickory Seasoning)

for the simmering broth:
4 to 6 cups broth+water
1 cup carrots and cabbage, chopped coarsely
1 Tbsp crushed red peppers
1 Tbsp garlic powder
1 Tbsp thyme
1 Tbsp canola oil
1 tsp allspice

Cheese:
1 cup low-fat part-skim Swiss cheese, shredded
1 cup low-fat part-skim Mozarella, Shredded

Preparation
  1. Start the simmering broth in a pot large enough to hold the loaf, reserving the liquid smoke to add at the end, if using
  2. Combine gluten and spices for the wheat meat, add warm broth and stir with a spoon right away till it comes together to form a dough. Knead a few times and shape into a flat, roughly 1-inch thick, rectangle
  3. Heat the oil in a cast iron skillet or pan large enough to hold the loaf, sear the sides of the shaped pot roast, remove from pan and add to the simmering broth, cover and allow to simmer for about 30 to 45 minutes
  4. Meanwhile, sautƩ the onions and bell peppers adding some of the same spices as used in wheat-meat or simmering broth
  5. When wheat-meat is done (or if using leftovers), cut into strips and add to the onions and bell peppers
  6. Sprinkle the grated cheese on top, turn off heat, cover and let it sit till cheese melts
  7. Scoop as much as desired into a toasted hoagie roll and enjoy!

Labels: , , ,

Monday, October 11, 2010

Lentil Barley Soup


Lentil Barley soup is quite a sumptuous weeknight meal, especially for the rainy autumn nights we've been having lately. Any combination of vegetables and spices will work, for that matter any type of lentils - red, brown, green, even yellow split peas, which is what I use here.

Rather than stove-top, I've come to like cooking barley and split peas in the rice cooker - roughly 1 part barley+split peas to 3 parts water. This way, I can set it and forget it, or even make ahead and store it in the fridge till I am ready to make the soup.

Thaw gently and add to the stock, along with other vegetables and spices. For a chunky stew, I add whatever winter squash is handy.

Ingredients
1 cup cooked split yellow peas
1 cup cooked barley
2 cups chopped turnip greens
1 red bell pepper, sliced
1 medium onion sliced
6 cups stock or water
6 to 8 ripe sweet cherry tomatoes
salt to taste

spices:
1 Tablespoon cumin powder
1 teaspoon cumin powder
1 Tablespoon brown sugar
1 Tablespoon Madras curry paste (I use Patak'sā„¢)
1 Tablespoon canola oil or olive oil
chopped cilantro for garnish
1 cup evaporated milk (optional)

Preparation
  1. Heat the oil, sautƩ the onions, add the barley, split peas, turnip greens, stock, cover and simmer till green are almost done, and barley and split peas are soft
  2. Add the bell peppers and tomatoes, cook till as soft as preferred, garnish and serve warm
  3. For a creamier texture, stir in the evaporated milk

Labels: , , ,

Monday, October 04, 2010

Green Bean Salad with Marinated Feta and Roasted Red Bell Peppers

Green bean Salad with Marinated Feta and Roasted Red Bell Peppers

Crisply blanched green beans drizzled with my favorite Aka Miso and Blue Agave Nectar Dressing makes a wholesome side for a weeknight meal. When tossed with roasted red bell peppers and marinated feta, this becomes a meal in itself.

Feta can be used without marinating, but, I like to let it sit in a mixture of pomegranate red wine vinegar and olive oil for about 10 minutes while getting the green beans ready.

Store-bought roasted red bell peppers (packed in water) sautƩed with some onions can be tossed in with the blanched green beans before drizzling the dressing.

Top with sliced almonds and serve at room temperature.

Labels: , , , , , ,

Newer›  ‹Older