Related Posts Widget for Blogs by LinkWithin

Tuesday, October 03, 2017

Home Garden Veggies


This is not a recipe post per se, but, it seemed like a good time to bid adieu to the spring and summer garden which is a mini-indulgence for me.

I am not a die-hard gardener, nor am I gifted with a superb green thumb, but, I love plants of all sorts. I've managed to get by for the last decade or so working on a small patch in the backyard early spring through end of autumn, learning a little each year and getting a little better at it.

Some plants in the garden are perennial, of course, and they've been returning every year for a few years now without much coaxing from me.

And some are what I choose to plant each year - staples being eggplant, tomatoes, chilies, greens, peas, beans, and squashes - both summer and winter ones. Plus, a handful that catch my fancy -- like, kohlrabi, collard greens, cauliflower, cucumber that I planted this year.

Planting certain herbs and veggies in close proximity to each other tends to help - like basil with tomatoes and peppers, catnip near squashes, chilies with eggplant, sunflower near just about every patch, plus onions and garlic shoots wherever I can squeeze in a few, to keep aphids in check.

Composting is a way of life, and I've been experimenting with Lasagna gardening. We don't use pesticides, so the yield is unpredictable. When possible I try using natural repellents like chili powder garlic spray as needed to keep the cabbage moths away.

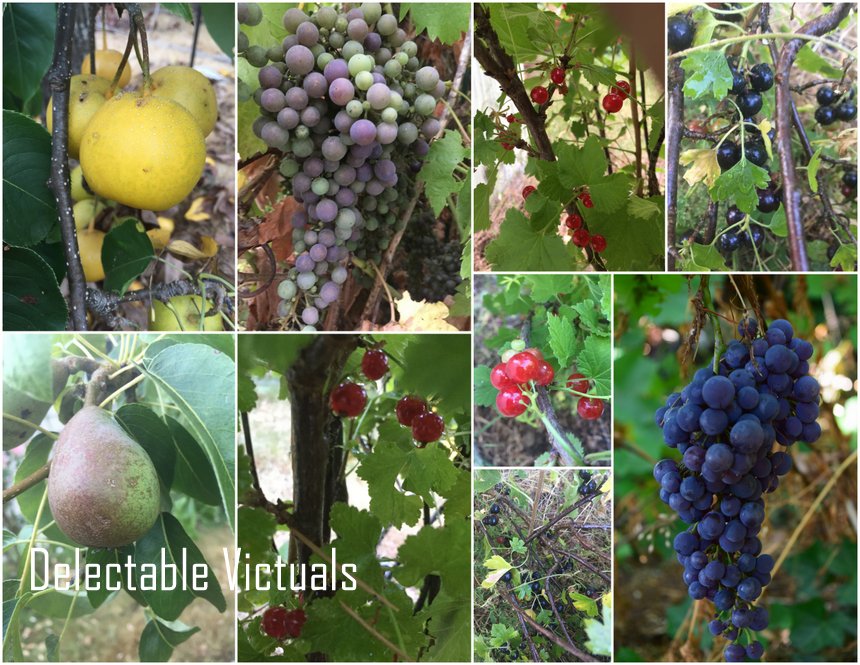
The picture collages shared below are not as stunning to behold as the plants were in the garden at peak season, but, they capture the essence of summer for me so I can stash away the memories of walking into the backyard and picking what's ready and making a meal out of it most days.


There was the usual herbs and garnishes like mint, oregano, fennel, basil, Thai basil, and spring onions...


Peas, peas, peas when it was colder in spring time... and, am hoping that fall peas survive and yield fine as well...


Greens both tender and fairly mature -- like, fenugreek, mustard greens, rainbow chard, kale, collard greens, beet greens, Romaine lettuce...


Green beans and wax yellow beans....


Some potatoes...


Tomatoes of a few favorite kinds...


Eggplant -- Ichiban being my favorite...


Zucchini and winter squash....


Chilies - Kung pao, Lemon drop, Thai red, and Ghost peppers!


Red currants, black currants, grapes, pears...


Some of the fall crop is surviving, and maybe I will get to post an update in a month or so about the kohlrabi, Brussels sprouts, garlic, spinach, chard, kale, collard greens, peas, and lettuce growing in the garden.

For now, it seems like all I can do is save the seeds to plant next year and hope that I have the energy and interest to do some gardening again next growing season.

Labels: , ,

Thursday, December 31, 2015

Recipe Index


A small sampling of recipes grouped under convenient categories. 

As always, cataloging and presenting the 750+ recipes here that keeps growing, is quite the challenge.


Labels: ,

Sunday, May 20, 2012

Sauteed Watercress, Radish Greens and Radish Seed Pods

watercress and edible radish seeds pods

After saving some for next year's garden, I decided to use up the radish seed pods any which way I can. So, here's another impromptu recipe that turned out very satisfying.


Watercress is one of those greens that I never really grew to love raw. I mean, I like it in salads in trace amounts and they make nice garnish for some stews and such, but, that's about it. However, when lightly sautéed with a few other veggies, it turns quite addictive - mostly the texture and the added hint of flavors.

Ingredients

1 bunch watercress, roots trimmed and chopped stem and all
a bunch of radish greens (as much or as little as preferred)
1 carrot, cut into 1 inch sticks
1 or 2 broccoli stem, trimmed and cut into 1 inch sticks
½ cup radish seed pods
¼ cup chopped snow peas
1 Tbsp oil
salt, fresh ground pepper, and a pinch of ground turmeric and asafoetida (optional)
chopped spring onions for garnish

Preparation

  1. Heat the oil in a pan, add the asafoetida and turmeric, allow to bloom for about 20 seconds, then add the watercress, carrots, broccoli stems, snow peas, some salt; cover and allow to cook over medium heat for about 4 or 5 minutes till watercress is wilted and the carrots and broccoli stems are cooked but not mushy
  2. Serve warm with moong-dal rice: When I cook rice in the rice cooker, I add a handful of moong dal or toor dal as a boost for kids. 

Labels: , , ,

Monday, April 23, 2012

Easy Home-made Garlic Herb Breadsticks

easy recipe home-made garlic herb breadsticks

Wet Wintry Weekends strongly urge me to bake something if only to keep the oven on so the kitchen area where I hang out is warm, not to mention the hearty aroma that draws the kids to the dining area even if they are engaged in their own activities.

I had visions of clicking these shiny brown and dapper breadsticks, twirling and beckoning from a lean tall basket set among an earthen bowl of steaming Tomato Florentine soup and a rustic plate of crispy Romaine leaves, with some lush tomatoes and herbs strewn about an aged wooden cutting board, along with my unbleached muslin napkin...

Of course, in the rush to serve the kids, I usually end up using the same old blasé white dish that I always use for clicking my food pictures... No matter. Food Styling & Photography can wait, but eager little tummies don't have to.

It has become such a cliché at home about me photographing everything I cook that it didn't surprise me when the seven year old patiently explained to the 4 year old on her own birthday, "Not yet, Oggie, my cake is not ready yet. Mama has not taken a picture, see? It is in the nook, on her photo table. That means we have to wait till she has taken the pictures before we get to eat it."

Not that Guilt is in short-supply for my mind, but, this sort of sends me into self-chastising mode. And then I remind myself that someday when my little girl asks me how to make those amazing breadsticks I seem to whip up, I can send her right here to Delectable Victuals.

Top the breadsticks with favorite herbs/spices, or with cinnamon sugar for that breakfast/dessert dish, twist it as I did or roll it into the traditional cigar shape, braid it or lay it out in a spiral like cinnamon rolls... these breadsticks are a lot of fun to make.

Allow for plenty of time to rise in a warm place. I typically start breads and such right after breakfast on weekend mornings to have it ready for dinner. Some recipes, I let it rise overnight to bake it fresh on a  Sunday morning.

I typically add flaxmeal and nutritional yeast to my recipes, but can be omitted. Substitute these with flour as the recipe calls. And, although baking is an art and a science, requiring care and precision on the measurements, I tend to be a bit lax about it and be satisfied with what turns out.

Ingredients
¾ cup milk
1 Tblsp sugar
2 tsp salt
1 Tblsp butter or shortening, softened

¼ cup warm water (about 110° F)
2¼ tsp active dry yeast

¼ cup whole wheat flour
¼ cup flaxmeal
2 Tblsp Nutritional yeast
2½ cups sifted unbleached flour (more or less)

Oil for greasing

Topping: 1 egg white, coarse salt, minced garlic, dried parsley, sesame seeds

Preparation

Scald milk in a pan, off heat stir in sugar, salt and butter and cool to lukewarm.

In a large mixing bowl, add the warm water and sprinkle yeast, stir; allow to sit till bubbly.

Add the milk mixture and the flaxmeal, whole wheat flour and about 1 cup flour to the yeast mixture and beat at medium speed till smooth.

Add more flour, a little at a time, and knead till a smooth elastic dough forms.

Grease the large bowl, shape the dough into a ball, coat it with the oil and allow to rise in the greased bowl till doubled in volume.

Roll the risen dough into about ¾ inch thick rectangle; cut 1" strips about 6" or 8" long.

Twist or roll the strips and place them in a greased baking sheet and allow to rise again for about 20-25 minutes.

Top with the garlic herb egg wash for that shiny golden top.

Bake in a 400°F oven for about 8-10 minutes till done.


Labels: , , , ,

Sunday, April 15, 2012

Home-made Cheese Bread

home-made cheese bread


This simple bread is wonderful when toasted, but just amazing fresh from the oven on a nippy Spring morning. It freezes well so can be made ahead and warmed up when needed.

Leave out the cheese, or add any other favorite herbs to make a customized loaf that satisfies your taste.

Ingredients
2 Tbsp butter
1¾ cup milk
4 Tbsp sugar
2 tsp salt
2 to 3 cups shredded cheese - Colby Jack, Cheddar, Parmesan
Optional Herbs: parsley, marjoram, rosemary

2¼ tsp active dry yeast
¼ cup warm water (110 F)

1 cup whole wheat flour
4 cups unbleached flour
4 Tbsp flax meal (optional)
2 Tbsp nutritional yeast (optional)

1 to 2 Tbsp oil for greasing


Preparation

Scald the milk, remove from heat, stir in sugar, butter, salt and cheese; cool to lukewarm.

In a  large mixing bowl, sprinkle the yeast on warm water, stir to dissolve and set aside for 5 minutes till bubbly.

Into the yeast mixture, add the milk mixture, 2 cups of flour and beat at medium speed, scraping down the sides.

Add the remaining flour a little at a time, stirring and incorporating it in with a spoon or spatula, till a smooth elastic dough forms.

Knead the dough on a floured surface for about 8 minutes, shape into a ball, set it in a greased bowl turning over to grease all of the dough ball, cover and let it rise in a warm place for about 2 hrs until doubled in size.

Pre-heat the oven to 375° F.

Divide the dough to fit into loaf pans, shape into 3 loaves, allow to rise again for 1 hour.

Bake in a 375° F oven for about 40 minutes till brown on the outside and done on the inside. If the outside browns too fast, cover with Aluminium foil.

Cool for about 10 minutes before slicing and serving.

The bread freezes well - wrap it up in an air-tight bag when completely cooled and leave it in the freezer. To warm and serve, simply pre-heat the oven to 400° F and allow to warm up all the way through, about 8 to 10 minutes.

Labels: , ,

Wednesday, April 04, 2012

Stir-fried Yellow and Green Beans with Pan-fried Tofu and Chevre

Stir-fried Yellow and Green Beans with Pan-fried Tofu and Chevre

Being primarily vegetarian, a plateful of vegetables completely satisfies my appetite. 'Primarily vegetarian'? I caught myself asking as I typed, and then started wondering how it might come across. Well, I do taste the poultry and fish I cook for the family (no beef, pork, lamb etc), but I don't relish it as a meal, having spent the first 3 decades of my life as a vegetarian. So, while no strict rules about it, I do tend to avoid eating meat.

Well, now that we've gotten that bit of trivia out of the way, this plate full of stir-fried veggies made quite a sumptuous meal that I wanted to share here.

Pan-fried tofu is a great option for adding protein to a vegetarian meal (well, unless there is some soy intolerance and other health reasons). When we buy a block or two, I tend to bake/pan-fry a batch and have it handy in the fridge/freezer.

The flavoring for the baked tofu is carried through to the vegetables in this recipe via the marinade. Of course, feel free to substitute any other favorite marinade/dressing.

Ingredients
Extra Firm tofu
a variety of green beans and baby carrots, par-cooked
peeled and sliced garlic cloves
Chèvre - Goat Cheese
Crushed roasted peanuts
vegetable oil

Marinade:
Soy sauce
Balsamic vinegar
Minced garlic
Agave nectar (just a tiny bit)
Hot sauce (I used Tapatio Salsa Picante which was handy, but prefer Sambal Oelek)

Preparation
  1. Pre-heat the oven to 400° F
  2. Stir or blend the marinade well; make enough for tofu as well as vegetables, and maybe save some for drizzling right before serving
  3. Slice the block of tofu into 1cm thick slices, drench in marinade and bake for about 45 minutes, flipping half way though and basting with marinade as needed; remove from oven, allow to cool and cut into strips
  4. Heat oil in a pan, add the par-cooked beans, some marinade, sliced garlic, and stir fry; toss in strips of tofu as well
  5. Off heat, stir in crushed roasted peanuts, drizzle extra marinade if preferred, dot with tangy clean-tasting chèvre to balance the flavors and serve at room temperature


Labels: , , , , ,

Monday, January 09, 2012

Mayocoba Beans in Acorn Squash Puree with Okra Brown Rice


Pinto, Black Turtle, Red Kidney, Black-eyed, Navy, Garbanzo, Adzuki, Cannellini, Lima, Fava, Hyacinth... we've been incorporating so many bean varieties into our diet over the years, just what we are able to find at the local markets, nothing exotic.

And, for the first time, a couple of weeks ago, I noticed the Mayocoba or Peruano beans at the grocery store, and promptly bought some to try. Turns out there was some controversy over these beans regarding patents.


These yellow-tinged off-white Peruano or Mayocoba beans are as large as pinto beans. At first, I thought they might taste much like cannellini or navy beans. But, I was pleasantly surprised to taste the rich flavor and meatier feel, which makes for good refried beans.

I soaked it overnight, and cooked it on stovetop, with some salt and brown sugar, till soft and firm but not mushy - about 30-40 minutes for 1½ cups of dry beans in 4 cups water. For refried beans, I prefer to pressure cook it till mushy.

Sometimes, I find it handy to cook and puree the squashes and add them to soups/curries/stews as a base/gravy. I had some acorn squash purée handy which I used here. But, tomato purée or even roasted red bell pepper purée, or a combination of them might taste fine too.

Ingredients
For the Mayocoba beans:
1 cup acorn squash purée
1 cup cooked Mayocoba beans
1 small yellow onion diced finely
1 small carrot, shipped (optional)
1 tsp Madras Curry powder
1 tsp cayenne pepper powder
1 tsp brown sugar
salt to taste
cilantro for garnish
water as needed

Sauté the onions, add the beans and the rest of the ingredients, cover and simmer till flavors meld, garnish and serve warm with bread or rice.

For the Okra Brown Rice:
2 cups cooked brown rice
1 small red or yellow onion, diced
1 tsp minced garlic
6 medium okras cut on a bias to 1-inch pieces
1 small carrot chopped
Spice Mix: 1 tsp cumin powder, 2 tsp coriander powder, 1 tsp ground/crushed oregano, 1 tsp cayenne pepper, 1 tsp paprika powder, 2 tsp dried parsley
salt to taste
1 Tbsp olive oil or hazelnut oil or even coconut oil for a strong tropical flavor

Combine the spice mix, stir well and store in an airtight container. Use as much as needed for flavoring the rice.

Heat the oil in a pan, sauté the onions, add the garlic, a tablespoon of spice mix, okra and stir fry till aromatic; add the cooked brown rice, stir well, adjust seasoning to taste. Garnish and serve warm.


Labels: , , , ,

Wednesday, November 02, 2011

Hwyl Gardd: Bye For Now Garden

It has been a while since I cooked anything new that I haven't shared here before already... So Delectable Victuals has been enjoying a quiet vacation.

We did finally get the garden to rest till next spring - got the last of the green tomatoes that won't get a chance to ripen on the vine, chilies are potted and brought back indoors, Rainbow chards are clipped down, radishes are pulled out, grapes are harvested (well, only about 6 reasonable bunches in all)...

As I looked back over the years, I seem to be taking fewer photographs of the garden - much like there are fewer photographs of my kids now that they are not infants anymore. But, here are the few that I managed to click this year.


Labels: , , ,

Thursday, October 06, 2011

Hyacinth Beans with Home-garden Butternut Squash

Hyacinth Beans with Home-garden Butternut Squash

Short, dark, broad, green Hyacinth beans, (Avarakkai in Tamil), used to be a favorite bean variety in my mom's kitchen. Avarakkai poduthuval simply saut ed and tossed in with dry grated coconut + green chilies paste is still one of my favorite sides, not to mention Avarakkai Paruppusili.

The dried seeds of Hyacinth green beans goes by the name of Mocha Kottai in our family. It is versatile - can be used in sambars, curries - but the most I remember it for from childhood is Mocha Kottai Chundal ('Ch' as in chair) / Sundal. It was a staple during Navarathri festival - the nine-nights ten-days long festival which incidentally is going on now, today being the 10th day, Vijayadasami.

Hyacinth Beans with Home-garden Butternut Squash


The first of the half-dozen or so home-garden butternut squash we harvested, together with Hyacinth beans makes this wonderful side which can be served with roti, naan, paratha, rice and sambar.

Ingredients
1 medium butternut squash, peeled, cleaned, diced
1 cup dry Hyacinth beans, soaked overnight, cooked till done but not mushy
1 tsp cayenne pepper powder
½ tsp turmeric powder
1 Tbsp coriander powder
1 Tbsp coconut oil
1 green chili (optional)
tempering (optional): mustard seeds, urad dal
salt to taste

Preparation
  1. Heat the oil in a pan; add the tempering if using and allow mustard seeds to pop and urad dal to turn golden brown
  2. Add the squash, chilies, spices, toss well, add a few Tbsp of water, cover and cook till squash is done but not mushy
  3. Add in the cooked Hyacinth beans, adjust salt to taste, sauté together and allow to brown a bit

Labels: , , , , , , ,

Thursday, September 15, 2011

Home-garden Zucchini Three Ways

Zucchini Tempura Zucchini 65 Breaded Zucchini


After the round of Zucchini breads and soups and curries and grated fritters/hash and what-not, we had one last home-garden Zucchini left from this season's harvest.

Not quite the fan of fried foods (and not because I don't like the taste or anything), I was trying to resist the urge to make a snack feast much like the pakora/bajji my mom used to make on rainy days... it seemed like a perfect overcast day with a hint of Autumn in the air.

Rather than deep frying, I went with shallow frying. And that's how these hot delicacies came into being in my kitchen and disappeared in a short time. I used just one half the large foot-long 4½ inches diameter home-garden zucchini for this and it was plenty.

Zucchini Tempura Zucchini 65 Breaded Zucchini

Technically, they are not cooked up in three different ways, but, three different batters make for an interesting spread. Kids liked the Shredded Wheat one the best as it was the crunchiest for them.

Simply cut into preferred shape about 2 or 3 millimeters thick, dust with flour, keep handy. Prepare the batters and keep handy as well. Shallow fry in batches. Serve with favorite dip/sauce or chutneys. I went with a quick and easy favorite: Combine equal parts of ketchup and Sambal Oelek for a Hot+Sweet Chili Sauce. Kids preferred just the ketchup, of course.

The quick picture I took doesn't justify the taste and the satisfaction it gave us that day.

Zucchini 65: Very much like the Hong Kong Bitter Melon 65 recipe, the rich red light batter seemed like a good first way. So, I shallow fried a batch using much the same batter as before.

Zucchini Tempura: Much like my usual vegetable tempura batter, this is light and crispy and best enjoyed right away. Any standard recipe for tempura batter is fine - prepare the batter just before frying and use it up quickly.

Shredded Wheat Breaded Zucchini: Shredded wheat cereal has lent itself to a few other dishes as a breading ingredient, much like in breaded chicken recipe shared here. I use the unfrosted, plain old shredded wheat, of course. Combine it with some stale old cheese crackers to form a crunchy coating for any breaded-and-fried dish.

What should I do with the last half of the home-garden zucchini? I've been asking myself as I eye the half dozen on more butternut squashes that are ready to be picked in the garden which is getting ready to close down for this year.

Labels: , , , , , ,

Tuesday, August 16, 2011

Hong Kong Bitter Melon Stuffed and Braised


Now that we've found an Asian market that sells Hong Kong Bitter Melon on and off, I've been favoring them to the usual Fu Gwa and Indian Bittergourd. Its milder flavor and thick flesh makes it more versatile than its other two cousins in my book.

The Braised and Stuffed Bitter Melon recipe here is based on the popular Chinese version which uses minced pork for stuffing. I went with a vegetarian stuffing of fragrant Jasmine rice cooked with rich flavors coming from onions, garlic, chilies, tamarind, mint, with a hint of brown sugar.

Ingredients
2 Hong Kong Bitter Melons, cleaned and cut as before into 2-inch rings

3 to 4 cups Tamarind Sauce as shared in the Hong Kong Bitter Melon 65 recipe

2 Tbsp canola oil

For the Stuffing:
2 cups cooked Jasmine rice
1 medium onion finely diced
4-6 cloves of garlic minced
3-6 mint leaves finely chopped
1 Tbsp brown sugar (optional)
½ cup rich Tamarind Sauce
salt to taste

Preparation
  1. Stuffing: heat the oil in a pan, sauté the onions and garlic, add the chopped mint, cooked rice, some salt, about ½ cup water and the tamarind sauce; allow to simmer together at medium-low heat, stirring frequently; The rice gets gooey and thick, light brownish anf flavorful; taste and adjust salt; add a hint brown sugar if preferred
  2. Bitter Melon: Blanch the 2-inch rings of cleaned bitter melon, pat dry and keep handy for stuffing
  3. Stuffing and Braising: Heat oil in a pan; fill each blanched bitter melon ring with the stuffing; place it in the hot pan; sear the bottom and allow to sit for a few minutes; add a little of the tamarind sauce, cover, allow to cook at low heat; when most of the tamarind sauce is gone, add a little more, cover and continue cooking; repeat till bitter melon is softer but not mushy and still holds shape when lifted out of the pan
  4. Serving: Arrange them in a plate, spoon some of the Tamarind sauce over and serve warm or cold


Labels: , , , , ,

Tuesday, August 09, 2011

Hong Kong Bitter Melon Gourd 65


Studies over the years record the anti-diabetic and other wonderful properties of bitter gourd/bitter melon (Momordica charantia) and yet it remains one of the not-so-easily-incorporated foods in daily diet. Possibly its strong bitter taste and lack of versatility are the reasons, along with not-easily-available.

So far I've primarily cooked with two varieties of bitter gourd/bitter melon - the dark skinned, pronouncedly ridged, smaller Indian variety, and the larger, lighter green, smoother-skinned Chinese Fu Gwa. They each have their distinct taste and lend themselves to many dishes that I have shared here.

This time, a third variety - Hong Kong Bitter Melon - was available at the nearby Asian market, inspiring me to cook it in a not-before-cooked way - at least not-before-cooked in my kitchen.


Hong Kong Bitter Melon has beautiful light green skin, smooth with gentle ridges, thick flesh and very mild bitter flavor. Which makes it more versatile in my book.

Inspired by the Cauliflower 65 recipe shared a while back, this Hong Kong Bitter Melon 65 recipe turned out to be a delicious new way to enjoy the benefits of this fruit.


The general theory is that 'Anything tastes good when battered and deep-fried'. And, while I am not much for deep-fried foods, the light non-greasy batter-coated fried Hong Kong Bitter Melon 65 turned out to be quite a snack treat one weekend afternoon. Especially when served with the sweet-and-sour Tamarind Sauce.

Ingredients
2 Hong Kong Bitter Melon
1 tsp red chili powder
a few drops of red food color (optional)
1 Tbsp ginger-garlic paste
2 cups rice flour
salt to taste

Canola or vegetable oil for deep frying

For the Tamarind Sauce:
1 tsp Tamicon™ tamarind paste
2 Tbsp brown sugar
salt to taste
optional: finely diced home-garden pearl onions and onion sprouts, home-garden green chilies
5 cups of water

Preparation
  1. Tamarind Sauce: Combine the sauce ingredients and bring to a boil, lower heat to medium high and continue to simmer till sauce reduces to about 1 cup; it takes quite a long time to get the most delicious flavor and texture for it so I prefer to start cooking the sauce first; taste and adjust flavors for the sweet-sour balance
  2. Hong Kong Bitter Melon: Remove the spongy insides of the bitter melon, slice into rings, salt it an allow to sweat; then drain, pat dry and dust lightly with some rice flour and set aside
  3. Heat the oil in a pan for deep frying
  4. Batter: Combine the ginger-garlic paste, rice four, salt, chilli powder, food color if using, and any other preferred spices, add a little water at a time to make a smooth batter
  5. Dunk the bitter melon rings in the batter and deep fry
  6. Serve hot off the frying pan with the richly flavored Tamarind Sauce

Labels: , , , , ,

Friday, July 01, 2011

Just a quick How Do You Do for now...

While not much is going on this summer - nothing fantastic, nothing too hectic - it seems like I am getting too emotional thanks to visiting my family. After my last trip to India in 2009, I am seeing my parents only now... while intellectually I can understand aging, I refuse to accept it when it comes to my parents.

Seems like I've been on a certain hiatus from this beloved blog of mine thanks to travel thereby away from my kitchen. I am getting to enjoy my mom's cooking again. I should post her recipes here. Or at least the pictures. Or maybe I should just post the hand-made things she has been churning out over the last few weeks...

I hope our home-garden is doing well despite my absence, perhaps there'll be enough to harvest when we get back...

Labels:

Tuesday, May 17, 2011

Preserved Lemons

preserved lemon pickle in brine

Preserved vegetables, either pickled in brine/vinegar, or in spices and oil the Indian way, make a unique accompaniment to meals.

Spicy lemon pickle with chili and garlic is one of my favorites, next only to tender baby mango pickles.

Brined baby mangoes, brined citrons (narthangai) and lemons and limes, sometimes preserved in spices and oil, sometimes dried and packed in earthenware are intimately tied to some wonderful memories of my childhood. Narthangai Oorugai with plain buttermilk rice was a summer time favorite.

Anyway, those memories surfaced when I had preserved some lemons and forgot about them a couple of months ago. Now they are ripe and ready to be enjoyed.

preserved lemonhttp://www.blogger.com/img/blank.gif

Thin skinned lemons work well, but, I had these glossy yellow thick-skinned lemons, (and I prefer the softened preserved thick skin to the tangy mushy flesh), so, these worked out great. Spices can be varied to taste. Once opened, keep refrigerated.

Chop up and mix with rice or risotto; dice the preserved skin finely and use it to make flavored ghee or butter; or jab a fork on a chunk and enjoy it fresh as-is. The tangy saltiness, the mild sweetness balanced by the heat of the peppers, and the unique flavors of coriander, cinnamon, star anise makes this feel like quite an exotic dish.

title=

Ingredients
6 medium to large lemons
3 or 4 Tbsp honey
2 cups salt
1 cup lemon juice
2 cups warm water (plus more for boiling water bath)
4 cinnamon sticks
1 Tbsp coriander seeds
1 Tbsp whole black peppers
6-8 dry red chilies (optional)
6-8 cloves of garlic (optional)
2 star anise (optional)

Preparation
  1. Cut the lemon into chunks, pack in a jar sprinkling with salt generously between layers; add crushed coriander seeds and peppers and cinnamon sticks in between layers as well
  2. Dissolve the honey in warm water, add it into the jar, along with lemon juice, cover tightly with a canning ring lid
  3. Set up a boiling water bath such that the jar is at least half submerged in water, bring water to a boil, leaveit in the boiling water bath for 10 minutes, remove from heat
  4. Set the jar aside in a cool dark place for about 4 to 6 weeks
  5. Enjoy!

Labels: , , , , , ,

Sunday, April 24, 2011

Witlof in Jalapeno-Cheese Sauce

Witlof in Jalapeno-Cheese Sauce

Witlof (Belgium Endive) apparently just translates to "White leaf" in Dutch. It has a nice delicate flavor, crunchy and juicy. I like it lightly sautéed or baked so it retains its crunch and yet is not too raw.

I still fondly remember Witlof and Banana dish a (Dutch) friend made for us up in Winlaw B.C., and I was hoping to make it this time. But, ended up making a cheese sauce with jalapeños that tasted quite like D's favorite Ema Datsi.

Witlof in Jalapeno-Cheese Sauce

The serving here is for two portions - one witlof head per person. Adjust quantities for making a larger batch.

Ingredients:
2 witlofs, cut in half length-wise with root intact
2 jalapeños, seeded, sliced
½ medium onion sliced thin (optional)
1 cup fresh grated Colby Jack cheese
½ cup fresh grated aged Cheddar
¼ cup fresh grated Bergenost cheese (optional, for garnish)
¼ cup milk
¼ cup Smart Butter™ Omega Lite (or butter, if preferred)
1 Tbsp canola oil (or butter if preferred)

Preparation
  1. Heat the milk, butter, cheeses, Smart Butter, jalapeños in a pan over medium low heat, stirring often till cheeses melt and the sauce comes together
  2. Heat the oil in a pan, place the witlof cut side down and allow to brown a bit
  3. Add the cheese sauce and simmer a bit longer
  4. Serve hot off the pan

Labels: , , , ,

Sunday, March 06, 2011

Chicken in Piquant Sauce with Savory Corn Cakes

Chicken in Piquant Sauce with Savory Corn Cakes

It seems like I've been defaulting to salads and simple sandwiches lately. The stormy freezing weather last weekend spurred me to make something warm and substantial for the nicer half and the kids.

The sauce piquant for the chicken is not really hot as I cut back on the chilies and peppers so kids can try some without complaining.

The corn cakes almost tasted like corn fritters even though they are not deep fried. The rice flour gives it the crisp crunch.

Steamed green beans and carrots rounded out this simple meal.

Ingredients
Boneless skinless chicken breasts, marinated in red wine vinegar

For Savory Corn Cakes:
1/3 cup rice flour
1/3 cup all purpose flour
1/3 cup fine cornmeal
2/3 to ¾ cup water, as needed
1 tsp Cajun seasoning (or any other favorite spice mix, check label for salt)
1/3 cup steamed sweet corn kernels
a few tablespoon vegetable oil for pan frying


For the Piquant Sauce:
1 medium onion, sliced thinly
red and green bell pepper, sliced thin, as much as preferred
1/3 cup sweet corn kernels (optional)
2 Tbsp tomato paste
1 cup stewed crushed tomatoes
1 tsp dry crushed oregano
1 tsp dry crushed thyme
1 tsp cumin powder
1 tsp cayenne pepper powder (more if preferred)
salt to taste
1 Tbsp Canola or vegetable oil
1 cup water

Preparation
  1. Corn Fritters: Combine the ingredients to form a slightly thick batter. Heat some oil in a pan or skillet, add spoonfuls of batter and flatten it out; allow to cook till brown around the edges, flip and cook the other side till desired brownness
  2. Piquant Sauce:heat the oil in a pan, sauté the onion and bell peppers, add the tomato paste and allow to cook a bit till rich and darkish red; add the rest of the sauce ingredients, simmer till sauce thickens
  3. Chicken:Heat some oil in a grill pan and brown the chicken pieces and cook part way; then drop them into the simmering sauce to finish cooking

Labels: , , , , ,

Sunday, February 27, 2011

Chicken Paella

Chicken Paella

One pot rice dishes make a filling meal and are easy to prepare. While there are different versions of paella, the Valencian style chicken and vegetables is what I usually end up making, not the seafood paella. Some boneless skinless chicken breasts and Andouille chicken sausages, peas, carrots, bell peppers and onions, to keep it simple. Of course any other vegetable or meat is fine.

Ingredients
2 boneless skinless chicken breasts, cut into large pieces
a few chunks of chicken sausage (optional)
vegetables - frozen peas, carrots, onions, red bell peppers, green beans, broccoli (optional)
fresh or sun-dried tomatoes, as much a preferred
a few prunes (optional)
3 Tbsp vegetable oil
salt

1½ cups rice (I prefer Basmati, but any long grain rice is good)
3 cups water (more or less) or stock

spices
a few strands of saffron
finely chopped fresh rosemary
2 tsp paprika powder
1 tsp cayenne pepper (optional)

Preparation
  1. Heat oil in a large pan, brown the chicken pieces on both sides; add the onions sauté
  2. Add the saffron and water, bring to a simmer, add the rice, rest of the spices, salt to taste, carrots, sun-dried tomatoes, prunes, cover and cook till water is absorbed and rice and chicken are done
  3. Add the browned sausage, frozen peas, broccoli and red bell peppers, stir well, cover and let it rest for about 5 minutes or so
  4. Adjust flavors to taste, garnish with parsley or spring onions, and serve warm

Labels: , ,

‹Older