Related Posts Widget for Blogs by LinkWithin

Tuesday, January 12, 2010

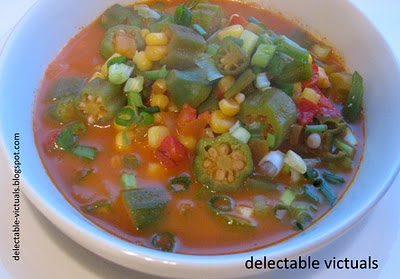
Gumbo

easy vegetarian gumbo recipe

Several years ago, a fellow grad student from Baton Rouge, Louisiana, introduced me to Gumbo. She loved chicken and ham in it, sometimes she liked seafood gumbo. And, not being even half as adventurous back then, I only managed to taste a spoonful every time she made it.

Since then, I have gradually adapted her recipe to make my version of gumbo. Lately, we've been eating gumbo every other week for some reason, so, here's my easy vegetarian version.

Ingredients
Veggies: Okra, corn, tomatoes, red bell peppers, crushed garlic
Optional: Andouille chicken sausage (I leave this out usually)
Herbs & Spices: Cayenne pepper, Black pepper, Paprika, Thyme, Parsley, Bay leaves, Worcestershire sauce‡ (adjust quantity to taste)
Mirepoix: celery, onion, carrots all chopped finely
Garnish: Spring onions, fresh parsley
For the roux: 1 Tbsp all purpose flour, 1 Tbsp Canola oil
4 cups water or broth
1 Tbsp tomato paste
Salt to taste

‡: I use a vegetarian version of Worcestershire sauce that leaves out anchovies; also, for this recipe, can omit Worcestershire sauce altogether, if preferred.

Preparation
  1. Make a dark roux: heat the flour in a pan and allow it to toast, then add the oil while stirring constantly to form a paste/roux
  2. Add the mirepoix and sauté, then add the crushed garlic and tomato paste and sauté some more, adding a bit more oil if needed
  3. Than, stir in the herbs and spices, veggies, sausage if using, and stock/water
  4. Cover and allow to simmer for 25-30 minutes till veggies are cooked; adjust cooking time if using frozen or canned veggies
  5. Garnish with spring onions and parsley and serve hot


Labels: , , , , ,

Friday, January 08, 2010

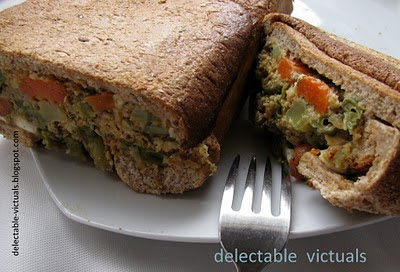
Vegetables Stuffed Bread Loaf

stuffed vegetable bread loaf

There seems to be a theme developing here - of loafs - in my kitchen. This Vegetable Stuffed Bread Loaf recipe is easy to throw together on a weeknight, especially if there is leftover veggies.

My kids are offered steamed corn, peas, broccoli, carrots, green beans, potatoes and so on as sides for most dinners, but, they rarely finish it... and, hoping that today is the day they'll eat it all up and ask for more, I always end up steaming a bunch. After a few days, the saved uneaten veggies start to look boring, so, I throw them together with some spices and herbs, stir in some thick cream of broccoli or cream of celery soup (ready-made, canned) and make a sort of filling and keep it handy to make pot-pie, or casserole of some sort with some pasta, or this stuffed bread loaf.

This is nice towards the end of the week as a clearance item :) I simply use the store-bought sliced bread (flaxseed, wholegrain, the good kind), soaked in a bit of milk, for the encasing and follow the recipe much like the Eggplant Loaf -i.e., layer a greased loaf pan with overlapping bread slices at the bottom and sides, fill with the leftover-veggies filling, cover with more bread slices on top and bake in a 350°F oven for about 25 minutes or so till bread is lightly crisp and done.

Labels: , , ,

Thursday, January 07, 2010

Eggplant Loaf


This Eggplant Loaf is very much like the Chicken loaf recipe... it came about because I am not terribly fond of chicken, but, am unnaturally fond of eggplant :)

Simply layer a greased loaf pan with eggplant slices, fill with favorite veggies,  layer the top with eggplant slices as well, (much like assembling lasagna or eggplant Parmesan) and bake till done, finish off under the broiler for a charred top.

Ingredients
1 globe or black beauty eggplant, sliced, salted, drained and patted dry
salt to taste
cooking spray

herbs and seasoning can be varied to taste:
1 teaspoon vindaloo curry paste,
1 teaspoon cumin powder,
1 Tablespoon coriander powder,
½ tsp brown sugar
all mixed together

Filling: curried collard greens, with optional paneer or pan-fried tofu; but any other filling can be used - say roasted red pepper, onions, feta, sun-dried tomatoes like in the chicken loaf recipe.

Preparation
  1. Slice the eggplant, sprinkle salt, allow to sweat
  2. Filling: Cook the collard greens as preferred - I like them with onions, salt, red pepper flakes, lemon juice and curry powder; set aside
  3. Pat the eggplant slices dry, rub some of the seasoning/herb mixture on both sides of the slices; pre-heat the oven to 375°F
  4. Spray some cooking oil in a loaf pan and arrange the eggplant slices in a single layer, slightly overlapping along the bottom and the sides
  5. Pack down the filling and fold down the sides and cover the top with eggplant slices
  6. Bake in a 375°F oven for about 20-25 minutes, periodically draining liquids that ooze out, if preferred
  7. When eggplant is almost done, place under the broiler for 5-8 minutes to char the top, if desired
  8. Remove from oven and invert it onto a serving plate, garnish, cut into slices and serve warm

This eggplant loaf is fairly soft and not crisped all around, so, slice with care for serving else it will fall apart :)

Labels: , , ,

Tuesday, January 05, 2010

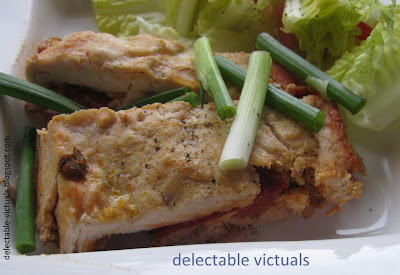
Chicken and Roasted Red Pepper Loaf

Chicken and Roasted Red Pepper Loaf


This Chicken and Roasted Red Pepper Loaf is a simple recipe which is quite flexible in terms of spices/flavors as well as stuffing/filling. I prefer boneless skinless chicken breasts (or chicken breast fillets if available). It is nice to have some in the freezer so I don't have to worry about shelf life.

Anyway, the idea is simple: overlap the thawed breasts and pound them to about ¼ inch thick; layer with cream cheese, roasted red pepper, fresh baby spinach leaves, and marinated onions etc., roll it up gently; then pack it down in a greased loaf pan and bake in the oven till done.

Ingredients
2 large chicken breasts, thawed
1 jar roasted red peppers packed in water, drained and patted dry
¼ cup sun-dried tomatoes
1 to 2 Tablespoon light plain cream cheese
¼ cup Feta, drained and crumbled (optional)
1 cup loosely packed baby spinach leaves
½ cup marinated* onions, drained and patted dry
Spices: Paprika, basil, oregano, marjoram (or any other favorite)
salt to taste
cooking spray
Spring onions for garnish

*if marinated onions are not handy, use plain onions

Preparation
  1. If marinated or vinegar-soaked onions are not handy, simply chop some onions and soak in red wine vinegar, salt, pepper marinade, and set aside
  2. Pre-heat the oven to 350°F
  3. Place the chicken breasts between plastic wraps, slightly overlapping, and pound it with a mallet or rolling pin to flatten it out to a rough rectangle about ¼ inch thick
  4. Spread some cream cheese and start layering with roasted red peppers, sun-dried tomatoes, marinated onions, spinach, and feta, sprinkling the spices/herbs as desired, and roll up the flattened chicken breast
  5. Spray some cooking oil into a loaf pan and pack the rolled up chicken breast into it, pressing down evenly
  6. Rub with herbs/spices/seasoning if desired and bake in the 350°F oven for about 30-40 minutes until done, checking often to drain excess water that seeps out and to make sure the top doesn't dry out
  7. When done, remove from loaf pan, cut into 2-inch slices and serve with a crisp salad

Labels: ,

Friday, January 01, 2010

Pineapple Carrot Cake


A simple cake for the New Year: carrots, pineapple, brown sugar, flour, and eggs.

Ingredients
¼ to ½ cup brown sugar (½ cup is very sweet)
¼ cup canola oil
1 egg
½ cup flour
½ cup grated carrots
¼ cup unsweetened shredded coconut
½ teaspoon baking powder
1 teaspoon cinnamon powder
¼ cup crushed, drained, canned pineapple or fresh grated pineapple

Optional Frosting: 2-3 Tablespoon powdered sugar mixed in a few teaspoon of water; food color if preferred, maybe some sprinkles for the kids

Preparation
  1. Beat brown sugar and canola oil till fluffy, then beat in the egg
  2. Sift flour, cinnamon, baking powder together; fold in the brown sugar+canola oil+egg mixture
  3. Fold in the carrots, coconut and pineapple and pour into a greased baking pan
  4. Bake at 350°F oven for about 30 minutes, turning around midway, till brown and a paring knife inserted in the center comes out clean
  5. Optionally decorate with icing


Labels: , , ,

Monday, December 28, 2009

Oats and Berry Squares

easy recipe for kids' healthy oatmeal and berry bars
We baked a few goodies for the Holiday Season - we meaning me mainly, with my little girl being a fairly willing but rather inexperienced sous chef :)

Mostly Christmas Sugar cookies, some Lemon Butter cookies and a batch of these fairly "healthy" oats and berry squares. I had canned some Blueberry+Raspberry preserves from all the berries we picked over summer which seemed like a good filling for these simple oats and berry bars.

If using butter alternatives like Smart Balance™ or Earth Balance™ they don't behave the same way as traditional butter - they are too soft. If shaping them into cookies, preferably refrigerate for 2-4 hrs before working with it and even then, work really fast... but, as far as these bars go, it seemed fine - we just want a crumbly mixture to pack at the bottom and the Smart Balance™ Omega that I used seemed to work all right.

Ingredients
1 cup firmly packed dark brown sugar
½ cup Smart Balance™ Omega butter or regular unsalted butter
1 cup unbleached all purpose flour
1 cup quick-cooking oats
1 teaspoon baking powder
½ cup berry preserves

Preparation
  1. Beat brown sugar and butter until fluffy
  2. Stir in flour and baking powder till it makes a crumbly mixture; reserve ¼ cup (or more) mixture for topping
  3. Grease an 8-inch baking pan and pat the crumbly mixture at the bottom in a single uniform layer; spread the berry preserve in a single uniform layer over it; top with the reserved crumbly mixture
  4. Bake in a 350°F oven for about 30-40 minutes till brown
  5. Cool on a wire rack and cut into little squares or into rectangular bars. I like to cut it into little squares so it is easy to allow the kids to enjoy a reasonable portion at a time.

easy recipe for kids' healthy oatmeal and berry bars

Labels: , ,

Wednesday, December 09, 2009

Dark Cocoa and Walnut Biscotti

easy recipe biscotti dark chocoa and walnut
Something about the bone-chilling winters here makes me want to bake. Possibly, the aroma of cookies and breads supply the much-needed warmth that the soul craves to keep up with the joys of the season. Not to mention the fact that the body is programmed to accumulate and store fats till Springtime :)

Anyway, this biscotti recipe is a simple variation on the standard ones for the lemon or almond biscottis available on the web. I love dark chocolate. I had walnuts handy, no almonds. And, this dark cocoa and walnut biscotti surprised me by turning out alright despite all the substitutions.

Ingredients
3 cups all-purpose flour
½ cup Hershey's Special Dark™ Cocoa (less, if preferred)
½ tsp salt
2 tsp baking powder
1 cup brown sugar or granulated sugar
2/3 cup Smart Balance™ Omega spreadable butter
¾ cup Egg Beaters
½ cup chopped walnuts
Optional:Powdered Sugar for glaze

Preparation
  1. Combine the dry ingredients - viz., flour, cocoa, baking powder, salt - and keep it handy (Sugar is considered a wet ingredient in most baking recipes)
  2. In a large bowl, combine the sugar and butter and beat with electric mixer in medium-speed for 2 minutes or till creamy; add egg beaters™ and beat well for another minute; then at low speed, add the dry ingredients a little at a time and continue mixing, beating till just blended; stir in walnuts, if using
  3. Spray a baking sheet with cooking oil spray, turn out the dough and shape into two long logs about 1½ to 2 inches thick
  4. Bake in a 350°F oven for about 25-30 minutes till a toothpick inserted in the center comes out clean
  5. Remove from oven and cool on wire rack for about 15 minutes
  6. Using serrated knife, cut the logs diagonally into the familiar biscotti slices
  7. In the same baking sheet, place the pieces cut-side up and bake in 350°F oven for about 12-15 minutes; flip so the other cut-side is up and bake another 12-15 minutes till crisp and edges are brown
  8. Remove from oven, allow to cool on wire rack
  9. Optional Glazing: Mix 1 cup powdered sugar with 5-6 teaspoon water to form a glaze and drizzle it over the cooled biscotti slices

easy recipe biscotti dark chocoa and walnut

Labels: , , ,

Thursday, December 03, 2009

Purple Cauliflower and Pear Salad with Raspberry Vinaigrette

quick and easy purple cauliflower salad

Purple cauliflowers are not just beautiful. They are also antioxidants-rich (anthocyanin) vegetables with chockfull of nutrients. I can't seem to pass them up at the farmer's market.

With white cauliflower, I like to roast them, make Gobi Manchurian, or Aloo Gobi, or throw them in soups and salads, even make a cheesy casserole.

With Purple cauliflower, it seems a shame to cook it down and lose some of its nutrients and color in the mix. So, salads seem like a wonderful way to present them. And, this time, rather than toss them in with the usual Romaine lettuce and other salad fixings, I wanted to let the purple cauliflower be the primary ingredient with just a simple balance of flavors and a simple vinaigrette to enjoy it fresh.

Plus, I had just enough pickled asparagus and pickled baby scallop squash waiting to be used up.

The sweet, crisp pear counters the vinegar-soaked asparagus and scallop squash, while the fresh mild purple cauliflower provides texture and balance, with a light vinaigrette of olive oil and lemon juice.

Ingredients
2-3 cups purple cauliflower florets
½ cup chopped pickled scallop squash
4-6 pickled asparagus spears, cut into bite-sized pieces
1 medium pear, sliced
optional: Spring onions, freshly grated Parmesan cheese, dried cranberries, walnuts

Vinaigrette:
4 Tbsp extra virgin olive oil
1 Tbsp fresh lemon juice
1 tsp freshly ground black pepper
1 clove of garlic, crushed finely
salt to taste

Preparation
Simply toss the salad ingredients together, drizzle as much vinaigrette as needed, top with cranberries and walnuts, serve fresh.

Labels: , , , ,

Tuesday, December 01, 2009

Butternut Squash Soup with Olive & Herb Dampers

easy recipe dampers for soups

Hot Butternut Squash soup with warm dampers fresh from the oven is a wonderful winter treat... at least for the adults. The kids don't seem to like it much. At least not so far... maybe a few years down the road they'll start loving it?

For the soup, I find it easiest to peel, core, cut into chunks and cook the squash in a pressure cooker, with some onions. Then, mash it well, simmer it in a broth with flavors, and finally, purée it before serving for a smooth texture.

The dampers are really simple and quick, done in about 20-25 minutes, about the time it takes to finish up the soup.

Ingredients
1 medium butternut squash, peeled, cored, chopped into chunks
1 medium onion, chopped
Herbs: Thyme, Sage, Rosemary, Basil, Marjoram
salt to taste
1-2 cups evaporated milk
water as needed


Dampers:
3 cups self-rising flour
1 tsp salt
¼ cup chopped pitted olives
½ cup herbs: parsley, chives, oregano
3¼ oz melted butter
½ cup water
½ cup milk

Preparation
  1. Butternut Squash Soup: pressure cook the squash chunks and onion; then, mash with a potato masher or purée if preferred; return to stove, simmer on low adding evaporated milk and herbs, adjust salt to taste; add water to adjust consistency of soup, if preferred
  2. Herb &a Olive Dampers:
    • Combine the dry ingredients in a bowl, make a well, add the wet ingredients, stir till incorporated, then turn it over onto a floured surface and knead till smooth
    • Shape into a ball, lay it on a greased cookie sheet and press down to make an 8-inch round
    • Score gently into 8 sections with a sharp knife taking care not to cut through
    • Bake in a 415°F oven for about 10 minutes, then reduce the heat to 350°F and bake for another 15 minutes or so till golden brown and done - i.e., sounds hollow when tapped on the surface
  3. Serve the warm fresh dampers with the hot soup


Labels: , , ,

Tuesday, November 24, 2009

Steamed Baby Artichoke with Balsamic Vinaigrette

steamed baby artichoke in balsamic vinaigrette recipe

I've been on the fence about artichokes.

I like canned artichoke hearts a lot - as toppings on homemade pizza, or in salads and paninis. As to fresh artichokes, it just seems like it is more work to eat it than to cook it... however, these purple baby artichokes at the Farmer's market were begging to be given another chance in my kitchen and the results were quite satisfactory :)

The few times I've had whole large green artichoke steamed and served with melted garlic butter, it seemed like I was discarding more than ingesting the leaves, at least the outer spiky fibrous leaves.

And it reminded me of eating murungakai (Moringa oleifera, aka drumstick) when I was little - a long spiky vegetable usually served in sambars in South India: murungakai has soft flesh with a thick ridged outer skin which, even after hours of cooking is never soft enough to swallow. So, one has to scrape the inner pulp with one's teeth and discard the skin.

steamed baby artichoke in balsamic vinaigrette recipeWhile this variety is a mature artichoke (nothing much baby about it except its size), it seemed to not have as many harsh and thorny outer leaves, and that was one primary reason I wanted to give it another try.

Boiling usually leeches out nutrients and color, so, I liked to steam it. I used the steamer that is part of my rice cooker, but, I am sure idli cooker or even microwave would be fine to steam these. And rather than melted butter sauce, I just drizzled some home-made balsamic vinaigrette.

Ingredients
whole baby artichokes

Balsamic Vinaigrette:
1 Tbsp balsamic vinegar
3-4 Tbsp extra virgin olive oil
pinch of salt
3 Tbsp finely chopped spring onions

Preparation
  1. Trim the stem and outer leaves, cut the tip off a bit and steam the artichokes till a toothpick inserted at the bottom goes through without resistance
  2. Prepare the vinaigrette, fan out the leaves a bit, drizzle over the steamed artichoke and serve fresh, or allow to marinate for about 15-20 minutes before serving


Labels: , , , ,

Friday, November 06, 2009

Buckwheat Bathura

buckwheat chaolay bathura fried indian bread quick and easy

I love buckwheat flour, am not sure why... I mean, I know its many virtues, and that could be the reason.

Bathura is a lightly fried Indian bread, usually made with whole wheat flour. This bathura recipe is not very different from my older one, except I used a combination of buckwheat flour and whole wheat flour instead of all purpose flour.

Ingredients
1 cup buckwheat flour
1 cup whole wheat flour
1 Tbsp canola oil
water or buttermilk as needed
salt to taste

Preparation
  1. Knead the ingredients into a smooth elastic dough, cover and allow to sit for about 15-20 minutes
  2. Meanwhile, heat some oil for frying the bathura
  3. When ready, divide the dough into roughly golf-ball-sized rounds, then flatten out with a rolling pin to about ¼ inch thick, dusting with flour as needed
  4. Fry one at a time till it puffs up and turns darker, flip or dunk the bathura in oil to make sure both sides are cooked, drain
  5. Serve warm with a few sides like Mutter-Tofu curry, Paneer Kofta Curry, Cholay, Dal, chutneys...


Labels: , , , ,

Tuesday, November 03, 2009

Mutter Tofu Curry

peas and tofu curry indian vegetarian matar paneer

This is an adaptation of my favorite North Indian style curry called Mutter-Paneer which is basically Peas (Mutter) and Fried Paneer in a delicious gravy.

About once a month or so, I get a large batch of extra firm tofu, marinate, bake or pan-fry, and store it in the fridge/freezer for use over the next few weeks.

For a quick curry, it is nice to use ready-made pastes: I like Patak's Tikka Masala paste, Vindaloo Curry paste, Biriyani paste, and Rogan Josh paste. But, it is just as easy to create my own paste with whatever is handy.

Ingredients
6 cups frozen peas
1 can diced tomatoes
1 medium onion chopped finely
cilantro, spring onions for garnish
salt to taste
1-2 tsp brown sugar, adjust to taste

For the sauce/gravy:
dry toasting:
1 Tbsp white poppy seeds
1 star anise
2 cardamom pods
2 cloves
2 Tbsp fennel seeds
1-2 indian bay leaves
2 2" piece of chinese/indian cinnamon bark
Plus:
1-2 jalapenos or serrano
1" piece ginger, chopped
4-5 garlic cloves, chopped
4 tomatoes, chopped
1 medium onion, chopped
1 Tbsp canola oil

Preparation
  1. For Curry/Sauce/Gravy:Dry toast the sauce/gravy spices, then grind them to fine powder, set aside
  2. Combine the rest of the sauce ingredients and grind to a fine paste
  3. Heat oil in a pan, sauté the ground paste till rawness subsides, then add the chopped onions, peas, tomatoes, some salt, water and the powdered spices, simmer over medium-low heat
  4. When peas are cooked through but not mushy, drop in the baked or pan-fried tofu and simmer to desired consistency, adjust flavors
  5. Garnish with cilantro, chopped spring onions and serve warm with naan, bathura or even plain basmati rice

Labels: , , , ,

Sunday, October 25, 2009

Tsukemono: Nasu Age-bitashi


Simply put, Tsukemono is Japanese Pickled Vegetables. When I got my very own copy of Quick & Easy Tsukemono as an early birthday present, I couldn't wait to try out a few right away.

Author's note in the Preface struck a chord with me, when he says, ...Japanese enjoy plain, hot rice with tsukemono. Coming from India, where pickles are of a different sort, yet enjoyed very much with plain rice and hot ghee, I could relate very well to the experience the author shared about the Japanese way of eating.

While Indian pickles typically involve using spices and oil, Japanese pickles are simple delicacies with mild rice vinegar, sake, miso, soy sauce and maybe some ginger root, karashi (hot mustard, japanese), Yuzu citron, ginger root and chilli peppers for extra flavoring.

Of the many recipes, I was attracted to this Nasu Age-bitashi (marinated eggplant) tsukemono as it was quick, (ready in 30 mins), delicate and light, and used one of my favorite vegetables - i.e., eggplant :)

Now, I have this chronic inability to follow recipe to the letter and like to substitute ingredients if I can't find the exotic ones listed. In that sense, this Nasu Age-bitashi is not exactly as given in the book... I tweaked it a bit as my recipes lean towards being fusion cuisine, not quite authentic, yet tailored to my tastes.

Also, many times, I wonder if authors would be charitable if their recipes are taken verbatim and pasted across the web for free - so, I refrain from posting them. I like to use recipes in books for ideas, for directions in which I can flex my culinary muscles, and try to take away the principles and methods and apply it for my tastes... in this case, I was glad to take away the fact that miso and rice vinegar make such an interesting clean-tasting pickle within a short time.

Ingredients
6 Japanese style eggplants
2 bell peppers -or- 3 jalapeños cored/seeded
1 medium tomato -or- 5 small grape or cherry tomatoes
1 small white onion
1 clove garlic
vegetable oil for frying
dressing/flavoring:
1 tsp red miso
2 Tbsp rice vinegar
4 Tbsp vegetable oil
1 tsp freshly cracked peppercorns

Preparation
  1. Get the dressing ingredients together, stir well and keep handy
  2. Cut the eggplant into wedges, bell peppers into rings, deep fry, drain and add to the marinade
  3. Slice onions and separate into rings, chop tomatoes and toss into the marinade with the eggplant and bell peppers
  4. Let it stand for 30 minutes and serve with hot plain rice

Labels: , , ,

Saturday, October 17, 2009

Zucchini and Eggplant in Spicy Sesame Sauce

Zucchini and Eggplant in Spicy Sesame Sauce
There's something about the combination of sesame seeds, coriander seeds, cumin seeds, whole black pepper and dry red chilies ground together with coconut that makes a wonderful base for curries.

This spicy sesame sauce with eggplant and zucchini is quite simple. Just make the spice paste, cook the veggies and stir the paste in and let them simmer together a bit longer and it's done.

Ingredients
a chunk of large zucchini, peeled, cored and cut into largish pieces
1 globe eggplant, cut into largish pieces, as much as needed
salt to taste
1 Tbsp brown sugar
4-6 cups of water
1 tsp tamarind paste (if not available, use 4 Tbsp lemon juice instead)

spice paste:
2 Tbsp black sesame seeds
4 Tbsp coriander seeds
1 Tbsp cumin seeds
2 Tbsp whole black pepper
4-5 dry red chilies
¼ cup dry grated coconut (unsweetened)

Preparation
  1. Dry toast the spice paste ingredients, all except coconut, allow to cool a bit, then grind to fine paste with the coconut, keep handy
  2. Cook the veggies with just enough water, some salt and tamarind paste till par cooked
  3. Add the spice paste and allow to simmer a little longer till flavors meld
  4. Serve wrm with basmati rice

Labels: , , , ,

Spicy Sautéed Brussel Sprouts


Among the few ways in which we like to have Brussel Sprouts, this spicy pan fried or sautéed is a simple favorite. Another being slit and stuffed like eggplant.

We had a big stalk/bunch of Brussel Sprouts from the farm, so this turned out a simple side for a weekend dinner, featuring plain Basmati rice and Keerai masiyal.

The spice powder varies depending on my mood. But, I had enough Ras Al Hanout from a batch I had made, and this seemed a perfect way to use it up.

Ingredients
4-5 cups fresh brussel sprouts halved or quartered into wedges, depending on size
2-3 Tablespoon Ras Al Hanout
1-2 teaspoon red pepper flakes
salt to taste
2 Tbsp canola oil
water as needed

Preparation
  1. Heat oil in a pan, add the brussel sprouts, salt, sauté till coated, add a little water, cover and allow to steam a bit if the brussel sprouts are large
  2. Add the Ras Al Hanout, turn up the heat a bit and pan fry for about 3-5 minutes to desired doneness

Labels: , ,

Tuesday, October 13, 2009

Kabocha Squash, Zucchini, Eggplant hash

kabocha squash zucchini eggplant hash with salsa fresca


I had just a small bit of Kabocha squash left over after the pan-roasted Kabocha and Orzo in Creamy Kabocha Squash Sauce. And, I had super large zucchini from the farm, plus some eggplant to use up.

The combination of the three seemed to suggest some sort of vegetable pot-pie, ratatouille, vegetable curry or vegetable hash. The latter sounded interesting so I decided to make it for a Sunday morning brunch.

The idea is much like the regular potato hash - simply grate the veggies, par-cook them, then make a mixture with some binding agents so that it can be shaped into patties and pan-fry. Serve warm with Salsa Fresca or Cuban Mojo or Hot Cilantro Mojo. I went with simple salsa fresca.

Ingredients
1 cup grated Kabocha Squash
2 cups grated Zucchini (skin peeled before grating)
1 cup grated Eggplant (skin peeled before grating)
1 medium leek, washed, cleaned of outer leaves and grit, chopped finely
¼ cup canned kidney beans, mashed
½ cup instant mashed potatoes powder (dry potato powder), more or less, as needed
½ cup grated cheddar cheese (optional)
1-2 Tbsp corn starch, more or less
1 tsp nutmeg powder(less, if nutmeg is not a favorite)
1 egg, beaten
salt to taste
4-6 Tbsp oil for browning the hash on the pan

Preparation
  1. Squeeze the grated zucchini to remove as much moisture as possible, same with eggplant
  2. Heat a tablespoon of oil in a pan, add the grated veggies, mashed kidney beans, leeks, salt and spices; sauté till veggies are cooked but not mushy and all the water is gone
  3. Allow the mixture to cool a bit; mix in the cheddar; then add dry potato powder a little at a time to form a sort of loose dough; add cornstarch and the beaten egg for binding; cover and chill in the fridge for about 30-40 minutes
  4. Heat a little oil at a time in the pan, form the dough into patties and pan fry the patties on both sides till desired done-ness
  5. Serve warm with Salsa Fresca - tomatoes, bell peppers, jalapeño, onion, cucumber, lime juice, cilantro, salt, a touch of olive oil

Labels: , , , , , , ,

Monday, October 05, 2009

Wild Rice Soup

easy recipe wild rice soup

Wild rice, which is not really a commercial rice variety, is a grain native to North America that grows wild and hence is harder to harvest. But, with the outer husk left on, it has such a rich nutty flavor and texture that I find it incredibly delicious - in stew, or pilaf, and sometimes in soup.

As a short-cut, I prefer to cook the wild rice in rice cooker before adding to the soup. Per measure of wild rice, I use 3 cups of stock or water. I like to start the rice cooker on my way out to work in the morning, so that, when I get back in the evening, I just have to chop up the veggies, get the soup base ready and throw them all together in a pot, allow to simmer till ready, and serve hot.

The soup base is almost like the vegetarian Tom Yum Goong I like to make. But, I add a bunch of seasonal vegetable to the wild rice soup to make it feel like a whole meal, especially for a cold weeknight.


Ingredients:
2 cups cooked wild rice
veggies used here: Brussel sprouts, zucchini, tomatoes, Kabocha squash, leeks, green beans, corn, bell peppers - these are the usual autumn harvest vegetables fresh from the farm.
3 cups stock or water (more or less)
½ can coconut milk - about 1 cup (more, if preferred)
salt to taste
1 Tbsp soybean oil or hazelnut oil or canola oil (Oregon is famous for its hazelnuts)

for the soup base:
1 Tbsp lemongrass powder OR 2 Tbsp finely chopped inner stalks of fresh lemon grass
2 Tbsp fresh grated ginger
¼ medium onion, diced (or equivalent shallots, if handy)
2-4 serrano chilies (or any kind whose heat you prefer and can enjoy)
2 Tbsp lemon juice
1 Tbsp brown sugar
1 Tbsp Nam Prik Pow paste or Sambal Oelek (optional)
1 Tbsp soybean oil or canola oil

Preparation
  1. Combine the soup base ingredients and grind to a fine paste
  2. Heat oil in a pan, add the soup base and sauté a bit till aromatic and rawness fades
  3. Add the vegetables, sauté a bit more; then add the wild rice, stock or water, cover and allow to simmer together till vegetables are cooked through but not mushy
  4. Stir in the coconut milk, turn down the heat, garnish with spring onions or cilantro if preferred, serve warm


Labels: , ,

Thursday, October 01, 2009

Pan-roasted Kabocha Squash

pan roasted kabocha squash

After the cow-train ride, and seeing Lucy llama, Victor goat and Lenny & Squiggy ducks, and climbing the hay pyramid, and checking out the pumpkins, the only thing left to do was get the farm fresh produce and head home.

And we did.

pan roasted kabocha squashThe Kabocha squash we got was a good size, and I couldn't use it all up for the Orzo in Creamy Kabocha Squash Sauce.

This Pan-roasted Kabocha Squash is very simple, really. But, just wanted to record the recipe anyway as it is quite tasty as a snack or appetizer, by itself.

Simply peel and cut into wedges, toss with oil and spices, and pan-roast (in a grill pan if available) over medium high heat till done. I left mine unattended for a bit as the wee one needed some TLC right away and so some of them got a bit more crispy-dark skin (read: charred) than I intended :)

Now, the spices listed here are usually handy in my spice rack, but, feel free to use whatever is handy - flavor is easily adjustable. Even though it seems like a long list of spices, with some of them having a tendency to overpower, the end result was quite interesting for me. (And yes, I didn't plan on adding all the spices, I just added a little of this and a little of that till it felt right).

If preferred, roast in a 400°F oven, in a single layer till desired doneness.

As a short-cut to cooking time, I microwaved the kabocha squash wedges till part-done and then pan-rosted.

Ingredients
20-24 wedges of peeled, cored Kabocha squash (more if preferred)
2-3 Tbsp olive oil
1 tsp cumin powder
1 tsp coriander powder
1 Tbsp smoked paprika powder
½ tsp cinnamon powder
¼ tsp nutmeg powder
1 tsp dry sage
1 tsp dry oregano
1 tsp thyme
1 Tbsp dry basil
1 Tbsp dry marjoram
salt to taste

Preparation
  1. Par-cook the kabocha squash wedges in microwave
  2. Drain and pat-dry and combine all the rest of the ingredients, toss well, arrange in single layer and roast in a grill pan, or just any pan; flip and roast both sides
  3. Alternately, roast in a 400°F oven till fully done
  4. Serve warm as a side, or even an appetizer. (I used the leftovers as a side for my favorite pepper rasam and rice meal for lunch the next day)

Labels: , , , ,

Tuesday, September 29, 2009

Orzo in Creamy Kabocha Squash Sauce


The fresh harvest, the nippy weather, the pageantry of trees... it must be Autumn!

This Orzo in Creamy Kabocha Squash Sauce captures the mood of Autumn for me, for Autumn is not Autumn unless I indulge in the gourds and squashes and pumpkins.

Orzo is pasta, shaped like rice, only slightly bigger. Kabocha squash soup is a favorite fall meal at home. I wanted to add some body, pump it up a bit for the kids. This almost feels like pumpkin risotto in texture, very creamy, thick and wholesome.

Cook orzo per package directions. I take the short cut - I usually start it in the rice cooker in the morning, before I leave for work. So, when I get home, I just need to make the sauce and finish the dish.

Now, after a bit of trial and error, I have managed to cook macaroni, rotini, penne even spaghetti in rice cooker, al dente, with proper amount of water. This way, I am not waiting for pasta to get cooked in the tight weeknights when all I have energy for is to throw together something simple yet sumptuous for the kids.

Kabocha, a Japanese winter squash is chockful of nutrients - beta carotene, with iron, vitamin C, potassium - rich in fiber, low in fat... all the good stuff.

Ingredients
3-4 cups of peeled, diced kabocha squash
1 small yellow onion, diced
4-6 garlic cloves, crushed
salt to taste
1-2 Tbsp olive oil
2-3 cups water or vegetable stock
1 cup evaporated milk or half-and-half

Spices for flavoring:
1 Tbsp dry basil
1 Tbsp dry marjoram
1 tsp dry oregano
1 tsp dry sage
1 tsp dry thyme
1 tsp turmeric powder

Preparation
  1. Heat oil in a pan, add the onions, garlic, spices and sauté a bit; then add the kabocha squash, water/stock, cover and allow to simmer
  2. When squash is cooked through, either mash with potato-masher or purée in a food processor, return to pan, add the cooked orzo and allow to simmer together
  3. Stir in the evaporated milk, heavy cream or half-and-half, off heat
  4. Garnish with chopped spring onions, fresh basil if handy and Serve warm


Labels: , , , , ,

Sunday, September 27, 2009

Tareko Alu

tareko alu potatoes nepalese way easy pan roasted lightly spiced

Alu, aka potatoes, have become such a universal and versatile vegetable that almost every cuisine features its own special styles of cooking them.

Tareko Alu, Delicately spiced fried potatoes is another simple recipe from Nepalese Kitchen by Loke Rajye Laxmi Devi. I cut down on the oil a bit as the recipe called for a cup of mustard oil and all I had was about 4 Tablespoons. It still turned out fine.

Stirring in the spice paste towards the end and cooking it just enough till rawness went away made this quite aromatic and delicious, almost like an appetizer or snack to be eaten as-is.

Ingredients
4-5 medium white wax potatoes, cut into wedges
1-2 chilies slit lengthwise (optional)
3-4 Tablespoon mustard oil
1 tsp fenugreek seeds
1 tsp turmeric powder
salt to taste

spices to grind:
4-6 cloves of garlic, crushed
1 tablespoon freshly grated ginger
3-4 green chilies
1 teaspoon black peppercorns

Preparation
  1. Soak the potatoes while getting the ground paste ready
  2. Combine the spice and grind to a fine paste, keep aside
  3. Par-cook the potatoes in the mcirowave, if preferred - I like it as it cuts down on cooking time and I don't have to deep fry
  4. Heat oil in a cast iron pan which can hold all the potatoes in a single layer; when smoking, add the fenugreek seeds
  5. Once the fenugreek crackles, add the potatoes, turmeric and salt and stir a bit to coat well and allow to sit over medium high heat to brown on one side
  6. Add the spice paste and stir to caot well, and flip the potato wedges to the other side without breaking up
  7. Allow to get lightly browned, off heat and serve hot with roti or rice


Labels: , , , ,

Friday, September 25, 2009

Palunga Ko Saag

vegan palunga ko saag spinach lightly spiced nepalese easy recipe

The recipes from Nepalese Kitchen by Loke Rajye Laxmi Devi, my newest addition thanks to D, has many simple recipes that are pretty close to Indian cooking. North Indian, I should specify. South Indian cooking is quite a different experience altogether.

This Palunga Ko Saag (Lightly spiced spinach) is one of the simplest recipes from the Nepalese Kitchen, which is quite close to a saag recipe I make pretty often. Primary difference being, the use of mustard oil and ajwain (caraway), whereas I use gingelly oil and jeera (cumin).

Ingredients
1 pkt frozen whole leaf spinach (fresh is good, adjust cooking time)
½ teaspoon caraway seeds
salt to taste
3-5 whole dry red chillies, slit and broken
2 Tablespoon mustard oil

Preparation
  1. Heat the oil in a cast iron pan
  2. When smoking, add the caraway seeds and chilies
  3. Add the frozen spinach, as-is, unthawed, some salt, toss well to coat the spinach with the oil
  4. Cover and cook till spinach is just done
  5. Serve with roti, or plain Jasmine or Basmati rice


Labels: , , ,

Sunday, September 20, 2009

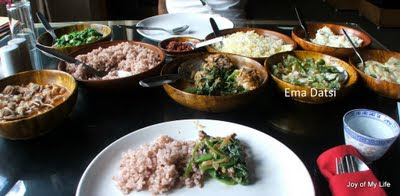
Ema Datsi from Druk Yul

Ema Datsi Bhutan national dish recipe

D managed to sneak in a short break from his work in India and take a cultural tour of Druk Yul: Land of the Thunder Dragon aka Bhutan.

While he has offered to do a guest post about his experiences there one of these days, I am not holding my breath, considering the 10,000 things he has lined up that are much higher priority for him, so I took the liberty of summarizing his trip just so I can experience everything as I narrate, albeit second-hand :)

Knowing my eagerness for experimenting and my unbridled passion for World Cuisine, he usually comes back from trips with cookbooks loaded with local flavors.

traditional bhutanese datshi  ema cooking nepalese recipes

The Bhutan trip was no exception: A Nepalese cookbook, plus a Traditional Bhutanese cookbook with samples from the various regions were the best souvenirs he could have brought back for me. I am excited to try out a few of the recipes, now that he has actually tasted them and can tell me if it gets close to what he had.

ema datsi bhutan recipe chillies n ceese sauce

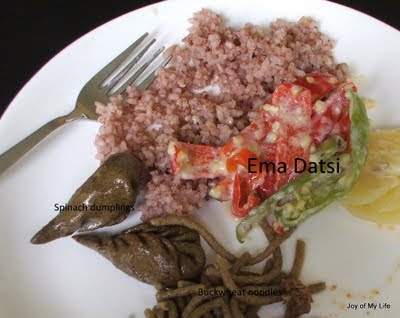
Ema Datsi was his first suggestion. Ema Datsi is a national dish in Bhutan usually served with red rice.

Simply put, Ema Datsi is boiled chilies in cheese sauce.

D can handle insanely hot foods so I could easily believe that he relished it. Since neither the Bhutanese home-style cottage cheese nor the the meaty hot chillies is easily available here, I approximated the taste drawing from suggestions found on the web.

D's resounding "Pretty darn close to what I had" between mouthfuls seemed like this is going on the Make-Often-for-D list, as it was too hot for me to handle :)

Ema Datsi Bhutan national dish chillies in cheese sauce recipe

Ingredients
Ema:
8-10 jalapeño peppers, red and green, sliced lengthwise
4-6 wax peppers sliced lengthwise (optional)
¼ medium yellow onion sliced thin
1 cup water

Cheese sauce:
Equal parts of the following to make 2 cups of grated cheese:
Queso Quesadilla Jalapeño
Colby Monterey Jack
Part-skim Mozzarella
Plus:
¼ cup crumbled feta
2-4 Tbsp grated Parmesan
4 Tbsp whole milk

Preparation
  1. Seed the chilies if preferred to cut back on the heat, or use Anaheim or other varieties that are large and meaty but not as hot
  2. Combine the cheeses and milk stir well and keep handy
  3. Combine the chillies, onion and water and bring to a boil till chillies are cooked, but not mushy, and the water is reduced to about a quarter cup
  4. Add the cheese mixture, stir well, reduce the heat and allow the cheese to melt in the heat and mingle well with the chillies, turn off heat
  5. Add salt to taste if preferred - the salt from the cheeses, especially feta was just perfect for us
  6. Add a bit more crumbled feta if preferred for texture/flavor
  7. Serve with jasmine rice, if red rice is not available

Labels: , , ,

Tuesday, September 15, 2009

Strawberry Pie glacé

strawberry-pie-glace-1


Just had to throw in the glacé as this turned out so smooth and shiny, thanks to the sugar.

This is a very rustic pie, nothing fancy about it. Single pie-crust, per usual recipe. Made a thickish sauce with some strawberries and sugar, and combined it with whole fresh strawberries we had picked. We had enough filling to make two pies out of this.

Ingredients
single-pie crust as in this recipe

for the glacé:
1 pint fresh whole strawberries, hulled, mashed
1½ cups sugar
2-3 Tablespoon cornstarch
½ - 2/3rd cup water

1 pint fresh whole strawberries
whipped cream (optional)
Preparation
  1. Combine the glacé ingredients and bring to a boil, allow to simmer for about 10 minutes, stirring constantly till well-combined and thick
  2. Allow to cool a bit, then pour some at the bottom of the pie crust, arrange some whole strawberries, and pour the rest of the glaze, chill in the fridge for about 4 hours
  3. Serve with some whipped cream on top


Labels: , ,

Saturday, September 12, 2009

Simple pan-fried gyoza packets

June-15-2010


I was sifting through my photos and remembered this crisp and hot snack we had a few months back, before my summer trip to India.

Nothing extraordinary about it except the memory associated with it - it was an overcast weekend and I wanted something quick and fried, but fairly "healthy", so this was just pan-fried, not deep-fried.

I wasn't in the mood for pot-stickers, although that was the intention when I bought these wrappers. Spring rolls or samosa was on my mind that day but spring roll wrappers weren't handy...

Anyway, at some point, I wanted to teach myself how to make gyoza wrappers at home, but, store-bought wrappers are what make this snack appealing to me - easy to make and they have a slightly different texture compared to deep-fried spring roll wrappers.

Ingredients
Gyoza wrappers
some veggies for filling
some oil for pan frying

Preparation
  1. Shred cabbage, carrots, onions; grate some ginger, crush some cloves of garlic
  2. Sauté them with a touch of salt, keep this filling handy
  3. Prepare the gyoza: add just enough filling to the wrappers (I tend to overfill and create a mess), fold as preferred - I just make a packet, nothing fancy, just like a gift-wrap, then, seal with some water
  4. Heat about 1 Tbsp of oil in a pan, place the packets carefully, allow to brown on both sides evenly
  5. Serve warm with dipping sauces, as appetizers or an afternoon snack


Labels: , , ,

Thursday, September 03, 2009

Plums, plums, plums


The art of Putting Food By has always been a secret indulgence of mine. Despite dirt-cheap jams and sauces flooding the supermarket, there is something extremely fulfilling about gathering the pesticide-free fresh produce from the backyard home-garden and putting it by for the colder months when the yield would be down to nil...

The only initial fear for me was inadvertent poisoning due to botulism if the canning is not done right. I stick to acidic foods which are hard to spoil and usually follow the directions and times for processing. There is nothing like hearing the "pop" as the jar cools after undergoing the boiling water bath canning, when the lid gets sucked in by the contracting air and the jar seals tight. All that's left is labeling with the date and storing it away in the pantry :)

We came back from a long and lovely vacation to find the little patch of Earth on our backyard yielding plentiful sustenance. The plum tree especially was overloaded with ripe purple prune plums. Sweet and juicy as-is, but, I was itching to make good plum jam and Chinese-style plum sauce and can them away...

Plum jam wasn't anything new - just followed the recipe that comes with the Fruit Pectin packet. Except I reduced the sugar, which is not a smart thing usually as the jam won't set well. But, I like the loose spreadable consistency anyway :)

Pit and coarsely chop the plums. Simmer in a little bit of water (about ¼ cup for 6 cups of chopped plums) for about 5 minutes. Crush it or process it in a blender, draining excess water. Return to pot, stir in a packet of fruit pectin allow to come to rolling boil. Skim foam if preferred. Stir in about 6-8 cups of sugar (makes it cloyingly sweet, but jam doesn't set well otherwise) and allow to come back to a boil. Stir well, and can in boiling water bath canner for 25-30 minutes.

plum-jam-09


I have always loved Chinese Plum Sauce mixed with Sambal Olelek - just the plum sauce by itself that I get at the stores is almost like honey, too sweet. So, I wanted to make some Plum Sauce that was close to my liking and ready to use on busy weekdays.

Ingredients
4 cups pitted chopped plums
½ medium onion, roughly chopped
2 Tbsp freshly grated ginger
4-6 cloves of garlic, maybe more
2 Tbsp Sambal Oelek
----
¼ cup cider vinegar
¼ cup rice wine vinegar
½ tsp Chinese Five Spice
¼ tsp cinnamon powder
1 tsp coriander powder (optional)
1 Tbsp Agave nectar or brown sugar

Combine the first five ingredients and allow to simmer for 10-15 minuted till onions and garlic are tender. Mash or process in a blender. Strain. Return to pot and add the rest of the ingredients to taste. Allow to simmer for another 20 minutes or so. Can in boiling water bath for about 30 minutes.

In addition to luscious sweet plum flavor, the sauce has all the spiciness I enjoy. This is almost like Hot-and-Sweet sauce and can be used as a dip for spring rolls and gyoza.

chinese-plum-sauce


Just for fun, to serve as simple winter dessert, I decided to can some plums whole. Rather than raw pack, I decided to process them hot in very light syrup (½ cup sugar for 8 cups of water). Despite pricking the skin with fork, some plums were too ripe and the skin split, but that's okay... I boiled them for about 35 minutes for canning.

canned-whole-plums


The plums are all put by for now. I am looking forward to dealing with all the pears this weekend... maybe make some pear sauce (like applesauce), maybe pack them in light syrup...

Labels: , , , , , , ,

Newer›  ‹Older