Related Posts Widget for Blogs by LinkWithin

Thursday, February 11, 2016

Steamed Lentil Balls with Parsnip, Rutabaga, Turnip

Steamed Lentil Balls with Parsnip, Rutabaga, Turnip


Served as snack or appetizer, these steamed lentil balls are packed with so much goodness that I can end up overindulging. And, when cooked in a curry sauce, it is the perfect side dish for naan or roti.


Steamed Lentil Balls with Parsnip, Rutabaga, Turnip


Petite French green lentils and split pigeon peas (tuvar dal), along with some bulgur (cracked wheat) is soaked in hot water till they soften a bit. Then ground up with some herbs and flavors.


Steamed Lentil Balls with Parsnip, Rutabaga, Turnip


Grated parsnip, rutabaga, turnip, and ginger bring in the earthy flavors.

Steamed Lentil Balls with Parsnip, Rutabaga, Turnip


Coconut flour, my latest obsession, is perfect to bring the dough together to shape into balls. High in fiber content, coconut flour helps bind the lentil paste and grated veggies. These balls can be steamed or deep fried or baked. I made a batch of steamed lentil balls and a batch of fried ones for kids's snack.


Steamed Lentil Balls with Parsnip, Rutabaga, Turnip


These steamed lentil balls are very much like the traditional South Indian Paruppu Urundai Kuzhambu recipe, but with a boost of flavor from winter root vegetables.

The steamed lentil balls can be cooled and frozen for later use. Just thaw overnight in the fridge before incorporating in curries or other recipes.

Ingredients
For the Lentil Balls:
1½ cups combined grated turnips, rutabaga, parsnip, ginger
⅓ cup coconut flour, more or less
to soak and grind to paste:
¼ cup split pigeon peas
¼ cup green lentils
¼ cup bulgur
3 or 4 dry red chilies (optional)
to flavor:
&frac14l teaspoon turmeric powder
&frac1 teaspoon chili powder
&frac1 teaspoon brown sugar
salt to taste

For the curry:
2 cups vegetable broth
1 Tbsp dark cocoa powder (optional)
2 Tablespoon tamarind concentrate (sold as Sour Soup Mix)
1 teaspoon minced garlic
¼ cup finely diced onions
¼ cup finely diced red, yellow bell peppers
1 cup tomato sauce
1 teaspoon vegetable oil
favorite spices - cumin powder, coriander powder, or ready-made taco seasoning, or even Ras al Hanout

Preparation:
  1. Soak the split pigeon peas, green lentils and bulgur with optional red chilies in boiling hot water for about half an hour or up to one hour
  2. Meanwhile, grate the parsnip, rutabaga, turnip and ginger and keep handy
  3. Grind the soaked split pigeon peas, green lentils, bulgur, chilies to a fine paste, adding no more than a few teaspoons of water if needed -- the lentil paste needs to be thick not runny
  4. Combine the ground lentils mixture, grated veggies, flavoring ingredients, add a little bit of coconut flour at a time and mix the dough to a stiffer consistency that will lend itself to shaping
  5. Shape the dough into balls and steam for about 10 minutes
  6. Meanwhile, start the curry simmering in the pot - simply combine all the curry ingredients and bring to a simmer, adjusting flavors
  7. Drop the steamed lentil balls into the gently simmering curry and allow to cook for about 8 to 10 minutes to absorb the flavors
  8. Serve warm with rice or roti or naan
Steamed Lentil Balls with Parsnip, Rutabaga, Turnip


Alternately, I saved a batch of lentil balls before steaming, and deep fried these for the kids. The steamed lentil balls can be deep fried as well, if preferred.

With some ketchup on the side, kids love eating up these fried balls not surprised at all by the fact that it has turnip, parsnip, and rutabaga which they typically avoid at all costs.


Labels: , , , , , , , , , ,

Wednesday, January 27, 2016

Bitter Gourd Bean Bites

Bitter Gourd Bean Bites


Sometimes  recipes come about because I am trying to use up bits and pieces, odds and ends, from the fridge before it is beyond salvaging.
Bitter Gourd Bean Bites


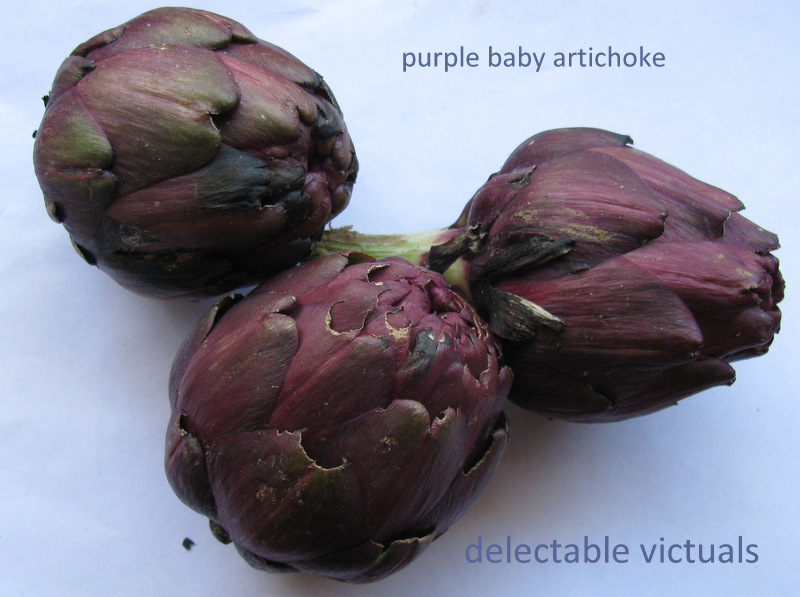
About half a cup of slow-cooked spicy beans and one large bitter melon were ignoring each other in the fridge. So, I decided to bring them together in this dish.

Instead of the beans, can use any leftovers like ground meat or mashed potatoes or even herbed goat cheese and feta.

Ingredients
½ cup slow-cooked flavorful black beans or pinto beans
1 large bitter melon
1 Tablespoon tamarind concentrate (sold as Sour Soup Mix in Asian stores)
1 Tablespoon chopped chipotle in adobo sauce
1 Tablespoon brown sugar
salt to taste
2 Tablespoons vegetable oil or olive oil

Cilantro and toasted sesame seeds for garnish

Preparation:
  1. Cut the bitter melon lengthwise in half, scoop out the pulpy innards with seeds, chop into bite-sized pieces, sprinkle some salt and allow to sit on a towel to drain for about 10 minutes
  2. Pre-heat the oven to 425°F
  3. Arrange the bitter melon pieces on a greased roasting pan; add a drop each of tamarind concentrate and adobo sauce chipotle; sprinkle some brown sugar and salt
  4. Bake in the 425°F oven for about 12 minutes
  5. Remove from heat, add a dollop of the bean-filling on each piece and cook for about another 4 to 5 minutes, turn off the oven
  6. Top with cheese if preferred and return it to the oven for the cheese to melt (with the oven off, the residual heat is enough to melt the cheese)
  7. Garnish and serve warm


Labels: , , , , , , ,

Friday, January 22, 2016

Japanese Yam, Green Papaya, Cauliflower Spicy Coconut Flour Kofta Balls

Japanese Yam coconut flour kofta chipotle


Unlike the supersweet sweet potatoes with orangish insides sold as "yams" in some grocery stores, the Japanese yam is mildly sweet with whitish insides, and has a flaky texture that somehow embodies both delicate and wholesome.


Japanese Yam coconut flour kofta chipotle


Kofta balls floating in spicy korma curries are quite a treat, especially with rice or naan. But, this time, I served these balls as an appetizer/snack with tomato chutney and cilantro-mint chutney.

Also, typically koftas are fried, but, these delicious goodies are baked.


Japanese Yam coconut flour kofta chipotle


One of my favorites to incorporate these days is the coconut flour, so, sure enough these kofta balls have coconut flour as well.

Ingredients
1½ cups combined, of grated Japanese yam, green papaya, cauliflower
2 chipote in adobo sauce chopped finely
¼ cup coconut flour
¼ cup chickpea flour
salt to taste
1 tablespoon sesame oil
vegetable oil for spraying

Preparation
  1. Pre-heat the oven to 430 ° F
  2. Combine the grated Japanese yams, green papaya, and cauliflower, and all the other ingredients and knead to a moist dough that can be shaped into balls. (Since grated veggies have enough water, I don't usually add water unless the dough gets too stiff)
  3. Spray a roasting pan with oil, arrange the balls, spray oil on top as well and bake for about 20 to 25 minutes till outsides are crispy and insides are moist and well done, not too raw and doughy
  4. Serve with dips and chutneys. Or, throw it in simmering pot of curry and serve immediately.

Labels: , , , , , , , , , , , ,

Thursday, September 24, 2015

Purple Yam Ube Oven-Roasted Fries

Purple Yam Ube Oven-Roasted Fries


Filipino Purple Yams, Ube, promptly show up at the local Asian market during season every year. They have a gorgeous purple flesh and a delicately sweet taste, primarily used in desserts.

Purple Yam Ube Oven-Roasted Fries


Since I am not fond of desserts much, I went with a simple oven-roasted purple yam fries. Tossed in coconut oil with a dash of salt, single layer in a roasting pan, in a 425°F oven for about 15 to 20 minutes. That's it. A perfect Autumn snack ready in no time.


Labels: , , , , ,

Tuesday, September 01, 2015

Beets and Purple Carrot with Brown Rice, Barley, Mung Bean Cutlets

Beets Carrot Brown Rice, Barley, Mung Bean Cutlets


What to do with leftovers might be a troublesome prospect for some. It happens to be quite an exciting enterprise for me.

About 1½ cups of stuffing for the Stuffed Kohlrabi in Coconut Sauce was leftover (on purpose). Also, some purple carrots and beets and red cabbage were handy. That's how these loaded Beets and Purple Carrot with Brown Rice, Barley, Mung Bean Cutlets came about.


Ingredients
1½ cups Barley, Brown Rice, Mung Bean prepared as shared in Stuffed Kohlrabi recipe
1½ cups combined grated purple carrots, beets, red cabbage, lightly sauteed with salt
¼ cup coconut flour
¼ cup fine corn meal
Up to 1 cup all purpose flour (a little at a time, as needed)
salt to taste
oil as needed

2 to 3 cups of Panko seasoned bread crumbs

Preparation

  1. Combine the sauteed purple carrots, red cabbage and beets with the brown rice+barley+mung-bean filling
  2. Add the corn meal and coconut flour and stir till incorporated
  3. Add some all purpose flour, a little at a time, to make a thick dough-like batter that can be shaped into golf ball sized spheres
  4. Have the Panko breadcrumbs hand on a plate
  5. Heat a pan to medium high
  6. Press each dough ball into the breadcrumbs and flatten a little; also, press in breadcrumbs to the topside so that both surfaces are coated
  7. Place gently on the hot pan and cook; flip and cook both sides till breadcrumbs get crisp and golden and the cutlets hold together
  8. Serve warm with favorite chutneys, including Green Papaya, Green Mango, Kohlrabi Chutney

Labels: , , , , , , , , , , ,

Friday, July 24, 2015

Roast Tomatoes Flavored with Home Garden Fennel and Basil


Roast Tomatoes Flavored with Home Garden Fennel and Basil

Sometimes, the simplicity and the earthiness is what makes a recipe special to me, not the long list of ingredients and complex steps to achieve the results. No doubt, traditional multi-tiered recipes have their merits, especially around holiday traditions and wintertime, but summers are for wholesome simplicity.

No one else in the household likes or appreciates tomatoes like I do. The youngest will quaff ketchup if I let him, the older child will turn up her dainty nose on all things tomato, and the other adult will accept adequate amounts of tomato sauce on pizza or pasta. Which leaves me as the sole consumer of copious amounts of  all varieties of fresh tomatoes in season in the family.


Although this summer's heat wave didn't excite me to turn on the oven, the lure of roast tomatoes overpowered my disinclination. 

Caramelized deeply thanks to balsamic vinegar and a sprinkling of brown sugar plus olive oil, this plate of roast tomatoes with fresh mozzarella pearls and home garden fennel and basil was my special treat, for no reason except to celebrate the start of the tomato season, in my mind.

Roast Tomatoes Flavored with Home Garden Fennel and Basil

And, since no one else cares for fresh tomatoes from the home garden, I decided to grow my snack tomatoes in the Upside Down Hanging Contraption that was popular a few years ago. I have some Yellow Pear, Sweet Cherry, and Grape tomatoes in there, plus some tomatillos just for the fun of it. They are barely surviving, but, am hoping they'll give me plenty to munch on over the next few weeks.

Roast Tomatoes Flavored with Home Garden Fennel and Basil


Any old recipe would do for roasting tomatoes, the thickness of slices might affect the results. My preferred method for this batch was to cut the vine tomatoes into quarter-inch thick slices, drizzle with balsamic vinegar, sprinkle some minced garlic, salt and brown sugar, spray some olive oil and roast in a 460 ° F oven.


Italian basil is flowering and going to seed already in my garden. Between fresh homemade pesto and adding it to tomato sauce and other recipes, it has been a sweet companion throughout. Basil, Fennel, Oregano, Mint, Rosemary and Lemongrass are the only herbs I use frequently as they are readily available in my backyard. The one plant I've always wanted but haven't had success so far is Curry Leaves (Murraya Keonigii). Maybe someday...

Labels: , , , , , , ,

Tuesday, July 01, 2014

Stuffed Cucumber Hors d'oeuvres

no-cook Stuffed Cucumber Hors d'oeuvres summer appetizer


Perfect for summer, and hard to stop eating, these stuffed cucumber rings didn't start out to be stuffed cucumber rings. They were supposed to be cucumber sushi rolls. But, after sacrificing a cucumber or two, I decided to blame the knife for not doing its job and decided to enlist the trusty old spoon instead.


Inserted the back of a long spoon and scooped out the innards of the cucumber, leaving a fairly thick fleshy part to make up the hollow cylinder for stuffing.

no-cook Stuffed Cucumber Hors d'oeuvres summer appetizer


Filling ingredients: Cream cheese, feta, grated carrots, shallots, and sambal oelek came together for a thick and creamy stuffing.

Stuffing/Filling can be prepared ahead and refrigerated till ready to serve. And, keep the stuffed cucumber refrigerated until ready to serve. Also, preferably, place the serving tray over ice, or, as I found out on a hot day, the filling likes to melt and ooze out before we were ready to eat.


Labels: , , ,

Tuesday, June 17, 2014

Eggplant Roll Ups

eggplant roll ups vegetarian tahini dressing


So many ways to enjoy the incomparable eggplant, each with its own special merits.

These eggplant roll ups are easy to make. They work best with large globe eggplant, but I like making it with the long neon or japanese and chinese eggplant as well.

Eggplant Slices:
Slice the eggplant uniformly thin, brush with oil, sprinkle some salt and arrange in a roasting pan.
Bake for about 12 to 15 minutes in a 425 °F oven till soft and cooked but not falling apart.

Filling:
Anything goes. But here, I went with a mix of feta, cream cheese, chopped onions, chopped bell pepper, grated carrots, chopped olives, plus some red leaf lettuce for layering. Combine all but the lettuce and stir well to spreadable consistency.

Assembly:
Lay a slice of baked eggplant on a plate. Place a layer of lettuce leaves. Spread some of the filling mixture. And roll up the eggplant slice. Seal the end with some of the cream cheese filling.

Serve with tahini yogurt dressing.

Labels: , , , , ,

Friday, June 14, 2013

Chard Eggplant Baked Croquettes


Jokes about its color and shape notwithstanding, these croquettes were consumed hot off the oven without much coaxing by the other adult in the family. Kids could take it or leave it. Rather than deep frying, these are baked and can get dry if left in the oven for too long.

Ingredients
1½ cups finely diced eggplant
2 cups chiffonade chard
1 small onion, finely diced
1 Serrano chili, finely chopped
1 Tbsp finely grated ginger
¼ cup chopped mint and fennel leaves
1 Tbsp sun-dried tomatoes
2 dried ancho pasilla chilies, reconstituted in water
1 cup cooked chick peas
½ tsp salt
1 Tbsp oil

For coating:
2 Tbsp chickpea flour
4-6 Tbsp breadcrumbs

Preparation

  1. Pre-heat the oven to 400°F
  2. Heat the oil in a pan and sauté all the ingredients, except chickpea, chickpea flour and breadcrumbs
  3. Combine the sautéed ingredients with cooked chickpeas to make a thick dough to shape into croquettes
  4. Add a bit of chickpea flour as needed if the dough is too sticky or loose
  5. Coat with breadcrumbs and bake in a 400°F oven for about 20 mninutes, checking half way
  6. If the inside is not fully cooked leave on for another 5 minutes or until done
  7. Remove from oven and serve with favorite dipping sauces


Labels: , , , , ,

Monday, May 06, 2013

Jackfruit Seed Hummus


Recently, and rather unexpectedly, I found a huge 10+ pound Jackfruit on my kitchen counter.

Rather than speculate on whether it is still raw and green, in which case I can savor the green jackfruit delicacies, or ripe and ready, in which case I can relish the sweet flesh and make jam, I decided to cut it open. More precisely, have it cut open by the handy sous-chef, the other adult in the household.

The jackfruit we were beholding seemed a giant next to a large avocado. Amid discussions of how many avocados will it take to make a jackfruit that size vs. how many avocados will it take to weigh the same as that jackfruit, I thought a picture of their relative sizes was in order.


Right from the first bit of it I had probably when I was 5-ish, I've loved jackfruit - everything about it: the heady aroma, the way it hangs in the tree, the size it can get up to, the hard thorny-looking exterior, the precious yellow flesh covering the seed, and not the least of all, the meaty chestnut-like seeds! Yes, the jackfruit seeds are amazingly tasty when cooked especially in savory dishes, like my mom's specialty Chakka Kottai Molagoottal.

Having sung the virtues of Jackfruit a few years ago, I'll try to refrain from waxing eloquent on it again.

Ignoring the pleas of Please don't hurt the porcupine egg from the youngest, the jackfruit was cut into chunks. The earnest task of extracting the best edible parts had just begun.


With meticulous work, the juicy ripe yellow fruit sections/bulbs/pods were cut out discarding the fibrous innards. And then, the jackfruit seeds inside this flesh was pried out, again with practised ease (on my part) and much joy.

I remember spreading newspapers on the floor and, as a family, doing the exact same extraction procedure when I was young. Each jackfruit season. When, of course, there were fruit vendors who had already done the hard work and were lined up at the market to sell just the clean yellow flesh for a nominal price. I think my mom relished in making us work for it. And I thank her for it - now.


After making a small batch of Chakka Varatti, and some Elai Adai, it was time to focus on the seeds.

The seeds were pressure cooked till they were just done, not mushy. The harder greyish outer skin were  removed from the seeds as needed. One batch got dutifully frozen. Another batch created a new combination for Koottu that sort of came together that day as I was gathering a few things from the garden.

The last batch got made into hummus. Well, chutney/dip, if hummus purists feel strongly about it. But, hummus it shall remain for me. One of the best hummus born in my kitchen.

Jackfruit Seed Hummus

1 Tbsp Tahini
12 cooked jackfruit seeds
½ Tbsp sambal oelek
1 tsp red wine vinegar
 2 Tbsp olive oil
2 to 3 Tbsp water
1 small garlic clove, squeezed through a garlic press

Combine all the ingredients in  a food processor and blend to a paste.


Labels: , , ,

Thursday, March 14, 2013

Stuffed Mini Pepper Bites

goat cheese stuffed peppers

I seem unable to resist picking up a bag of colorful mini peppers whenever I see it at the store- especially when it is on sale. There are recipe ideas on the bag, which I adapt to suit my tastes. This recipe here was inspired by a recipe on the bag of mini peppers I bought a while back.

The filling can be anything from a combination of cheeses to Indian style tamarind-and-mint or even potatoes-and-peas.

I went with a combination of goat cheese and feta this time: 3 parts goat cheese to 1 part feta. I made 3 kinds of fillings based on what I added to the goat cheese + feta mixture:
1. Habanero salsa (drain out the liquid) or any favorite salsa
2. Cilantro pesto (make it fairly thick)
3. German-style mustard with home-made sauerkraut (drained)


  1. Pre-heat oven to 350°F
  2. Cut the peppers in half with the stem on, and seed them if preferred
  3.  Spoon some filling, place them in a single layer in a roasting pan, drizzle some olive oil
  4. Bake in 350°F oven for about 10 minutes
Fresh from the oven, warm and flavorful, a plateful of these stuffed peppers are hard to refuse.


Labels: , , , , ,

Sunday, March 03, 2013

Spargel with Cheese Sauce

spargel white asparagus cheese sauce

I had these dreamy white spears for the first time about 6 years ago during a visit to Germany where they enjoy an exalted status. It was boiled in water and served with a simple cheese sauce. It was best when eaten steaming warm and fresh off the stove, tender enough to cut with a fork, and not at all chewy and woody.

Asparagus, a favorite, often just roasted and eaten right away, is usually green when grown above ground thanks to photosynthesis. White asparagus (Spargel) is cultivated underground/covered to prevent the green coloration. They tend to be less woody when mature than their green cousins.

spargel white asparagus

Every once in a while we come across white asparagus here in the local markets and can't resist buying them. This time, I boiled it for a good 20-25 minutes in salted water to get it fork tender. (Gently peel the skin before boiling.) And served it with a quick cheese sauce, sprinkled with parsley and ground black pepper.

For the cheese sauce:  (recipe from BBC)
flour
butter
milk
cheese

I usually don't measure precisely for this type of sauce. Sometimes, I make a roux of sorts by heating butter in the pan and adding the flour and cooking to make a paste; then, slowly add in some milk while stirring constantly. Then, add in grated cheese - like Colby Jack, Cheddar, even a bit of Parmesan mixed in...

Labels: , , , , , ,

Tuesday, February 12, 2013

Turkey-Stuffed Red Pepper

turkey-stuffed red pepper baked


Stuffed peppers are easy and sumptuous. I prefer the red or the orange peppers for their mild sweetness, rather than the green peppers. And the stuffing depends on the mood and what's available.

Purple peppers were the rage for a while if I could find it at the farmer's market. (Incidentally, Lesson Learnt: not wise to rely on free sites to host my pictures. Most of my food photos from the infancy of this blog are lost; and, I don't have a copy as I never did regular back-ups back then and my old laptop died... well, a series of unfortunate events, as they say, but quite propitious as I get to take fresh pictures when I make them again these days!)

The usual cranberry-pine-nut-rice stuffing like for dolma would be good for the peppers as well. But, to satisfy the protein cravings of the nicer half, these red peppers are stuffed with ground turkey.

Ground Turkey Stuffing:
  1. Finely chop some red onions, red cabbage, carrots, celery, flat-leaf parsley, garlic 
  2. Heat a tablespoon of oil in a pan, add the ground turkey, a sprinkling of salt, taco seasoning, and paprika and cook till done
  3. Stir in the finely chopped veggies, cover and cook a few more minutes till veggies are tender yet crisp

Stuffed Peppers:

  1. Pre-heat the oven to 425°F
  2. Cut the bell peppers in half, brush with olive oil, sprinkle some salt and bake in the 425°F oven for about 5 minutes; turn down the oven to 375°F
  3. Remove pepper halves from the oven, stuff with the prepared stuffing, cover the stuffing portion of the peppers with a small piece of aluminum foil
  4. Return the stuffed peppers to the 375°F oven and bake for another 8 to 10 minutes till peppers are tender

Top with toasted pine nuts, chopped scallions and parsley or cilantro, and serve warm.

Labels: , , , , ,

Sunday, December 23, 2012

Mini Pepper Poppers


Bajji, Pakoda, Ulunthu (Urad dal) Vadai, Masaal Vadai, Samosa... deep fried snacks were quite an indulgence around monsoon season when I was young. Of course, they were made for festivals and guests, and just because as well. Bajjis were my favorites - batter-dipped and fried eggplant, large green chilies, carrots, onions.

The weather being cold and soggy, and it being winter break for the kids, we felt like having some home-made deep-friend snacks.

Mini Peppers are so cute and colorful and have become my favorite indulgence of late, along with Baby Bella aka Cremini mushrooms.


Rather than the usual Baajjis, we had some Jalapeño and Mini Pepper Poppers, with some Habañero (seeded) thrown in the filling for the adults. Not an unusual recipe, but, quite satisfying nonetheless... Save any leftover filling in the fridge and use as sandwich spread

Ingredients
12 Jalapeño, Mini Colorful Peppers,
½  Habañero pepper, seeded and finely minced (optional)
8 oz Cream cheese or Neufchâtel cheese
grated cheddar and mozarella as much as needed for the filling
garlic, herbs, finely minced
1 Tbsp finely minced drained, squeezed pineapple bits (optional)

some milk, flour for coating
about 20 oz. breadcrumbs or as much as needed for coating

oil for deep frying

Preparation
  1. Filling: Mix the Neufchatel cheese, freshly grated cheddar and mozarella, some minced seeded habañero, finely chopped pineapple, minced garlic and set aside
  2. Cut the peppers in half lengthwise, seed them, and scoop some filling in and keep handy
  3. Have a bowl of milk, a plate of flour, a dish of breadcrumbs ready
  4. Heat the oil to about 375°F
  5. Dip the filled half peppers in milk, then in flour, allow to dry; then dip in milk and then in breadcrumbs and allow to dry; then once more in milk then in breadcrumbs and deep fry
  6. Drain in a paper towel and serve with favorite dipping sauce

Labels: , , , , ,

Thursday, June 07, 2012

Swiss Chard Dolma

swiss chard dolma


Dolmas: Something Stuffed.

Flavorful stuffing wrapped in favorite leaves and steamed. Be it East Asian style lettuce leaves or Mediterranean style grape leaves or Swiss chard.

Blanch the Swiss chard leaves after cutting away the white thick stems carefully. I have a tendency to over-stuff, but, this time I managed to use just enough and wrap it into tight little packages for steaming.

Brown rice with toasted pine nuts, feta, and dried cranberries, flavored with cinnamon, nutmeg, salt and a hint of cayenne pepper makes up the stuffing for these Swiss Chard Dolmas.

I served it with a Balsamic Vinaigrette dip and Sweet Chili Sauce. But a delicious rich tomato sauce or a light and delicate Mint-Yogurt sauce or Tahini-Sumac-Yogurt Dressing would be wonderful as well.


Labels: , , , , , , ,

Monday, April 23, 2012

Easy Home-made Garlic Herb Breadsticks

easy recipe home-made garlic herb breadsticks

Wet Wintry Weekends strongly urge me to bake something if only to keep the oven on so the kitchen area where I hang out is warm, not to mention the hearty aroma that draws the kids to the dining area even if they are engaged in their own activities.

I had visions of clicking these shiny brown and dapper breadsticks, twirling and beckoning from a lean tall basket set among an earthen bowl of steaming Tomato Florentine soup and a rustic plate of crispy Romaine leaves, with some lush tomatoes and herbs strewn about an aged wooden cutting board, along with my unbleached muslin napkin...

Of course, in the rush to serve the kids, I usually end up using the same old blasé white dish that I always use for clicking my food pictures... No matter. Food Styling & Photography can wait, but eager little tummies don't have to.

It has become such a cliché at home about me photographing everything I cook that it didn't surprise me when the seven year old patiently explained to the 4 year old on her own birthday, "Not yet, Oggie, my cake is not ready yet. Mama has not taken a picture, see? It is in the nook, on her photo table. That means we have to wait till she has taken the pictures before we get to eat it."

Not that Guilt is in short-supply for my mind, but, this sort of sends me into self-chastising mode. And then I remind myself that someday when my little girl asks me how to make those amazing breadsticks I seem to whip up, I can send her right here to Delectable Victuals.

Top the breadsticks with favorite herbs/spices, or with cinnamon sugar for that breakfast/dessert dish, twist it as I did or roll it into the traditional cigar shape, braid it or lay it out in a spiral like cinnamon rolls... these breadsticks are a lot of fun to make.

Allow for plenty of time to rise in a warm place. I typically start breads and such right after breakfast on weekend mornings to have it ready for dinner. Some recipes, I let it rise overnight to bake it fresh on a  Sunday morning.

I typically add flaxmeal and nutritional yeast to my recipes, but can be omitted. Substitute these with flour as the recipe calls. And, although baking is an art and a science, requiring care and precision on the measurements, I tend to be a bit lax about it and be satisfied with what turns out.

Ingredients
¾ cup milk
1 Tblsp sugar
2 tsp salt
1 Tblsp butter or shortening, softened

¼ cup warm water (about 110° F)
2¼ tsp active dry yeast

¼ cup whole wheat flour
¼ cup flaxmeal
2 Tblsp Nutritional yeast
2½ cups sifted unbleached flour (more or less)

Oil for greasing

Topping: 1 egg white, coarse salt, minced garlic, dried parsley, sesame seeds

Preparation

Scald milk in a pan, off heat stir in sugar, salt and butter and cool to lukewarm.

In a large mixing bowl, add the warm water and sprinkle yeast, stir; allow to sit till bubbly.

Add the milk mixture and the flaxmeal, whole wheat flour and about 1 cup flour to the yeast mixture and beat at medium speed till smooth.

Add more flour, a little at a time, and knead till a smooth elastic dough forms.

Grease the large bowl, shape the dough into a ball, coat it with the oil and allow to rise in the greased bowl till doubled in volume.

Roll the risen dough into about ¾ inch thick rectangle; cut 1" strips about 6" or 8" long.

Twist or roll the strips and place them in a greased baking sheet and allow to rise again for about 20-25 minutes.

Top with the garlic herb egg wash for that shiny golden top.

Bake in a 400°F oven for about 8-10 minutes till done.


Labels: , , , ,

Sunday, June 20, 2010

Spinach & Napa Cabbage Eggless Croquettes

Spinach Napa Cabbage vegetable no-egg Croquettes

Vegetable croquettes with dipping sauce or chutney can be a wonderful appetizer or snack. Typically, potatoes and carrots are mashed with some spices and binding agent (usually eggs), possibly breadcrumbs for crisp crunchy skin, and deep fried.

This recipe uses home-garden veggies: spinach, spring onions, and radish; plus some Napa cabbage and carrots; no eggs, just heels of bread loaves, rice flour, and water for binding.

home garden vegetables radish spinach onions vegetable croqueetes

As I often mention, à la Owl in Tearwater Tea, the heels - the end-slices of sliced bread loaves - loathed and discarded cruelly by one and all, have a sad fate indeed. Which is precisely why I like to use them for binding, even for making breadcrumbs and croutons.

For a quick Father's Day snack, I served these vegetable croquettes with fresh home-garden mint chutney.

Ingredients
1 cup finely chopped Napa cabbage
½ cup finely grated carrots
1 cup chopped fresh spinach leaves
optional: finely grated radish and chopped radish greens
2 or 3 end slices of bread loaf
¼ cup rice flour (more or less)
1 Tbsp smoked ground paprika
1 Tbsp ground black pepper
1 Tbsp coriander powder (optional)
salt to taste
water as needed (a Tbsp at a time)

Canola oil for deep frying

Preparation
  1. Combine the ingredients and knead to a soft dough that can be shaped into small logs
  2. Deep fry in oil till golden brown and cooked through on the inside


Mint Chutney

2 cups fresh mint leaves
¼ cup pickled jalapeno rings (less if preferred), with a bit of the vinegar it is pickled in

Combine the ingredients and blend till smooth, adding a little water if needed. Serve fresh.

Labels: , , , , , , ,

Monday, March 08, 2010

Roasted Fingerling Potatoes

roasted fingerling potatoes ruby crescent

Fingerling potatoes are a heritage variety of potatoes that are usually small, oblong, about the size of a largish finger. And, when in season, they are aplenty and fairly inexpensive. Well, not inexpensive compared to sturdy old Idahos, but, reasonable enough , let's say :)

Fingerlings are not new potatoes which are just baby potatoes (like we dig up from our garden early winter), and are usually roundish. There are quite a few varieties of fingerling potatoes in the market and so far the ones I've tried have all been good - Ruby Crescent, French Fingerling, Russian Banana.

Some are best steamed, some are best roasted, usually cooked with the skin on. This is a simple recipe for roasted Ruby Crescent Fingerling potatoes (400°F oven, about 20 minutes), with herbs and light seasoning. Somehow, it seems like rosemary and potatoes are made for each other :)

Fresh rosemary from the garden, with a touch of olive oil and some salt makes this one of our favorite sides, and was especially good with Blood Orange, Beets and Black Plum salad.

Labels: , , , , ,

Wednesday, March 03, 2010

Fresh Spring Rolls with Rutabaga, Turnip, Zucchini filling

easy recipe Fresh Spring Rolls with Rutabaga, Turnip, Zucchini filling

Thanks to a wide array of ready-made wrappers, making spring rolls seems like something my 4 year-old sous chef can handle easily these days. Wonderful as an afternoon snack washed down with green tea, or as an appetizer, spring rolls have become a staple at home, nothing to be excited about.

Some weekends, I just make a big batch in the morning, along with dipping sauces, and arrange it on the table like hors d'oeuvres to be munched on and off as we go about our business. On such days, typically, we end up not having any major meals as the spring rolls turn out very satisfying.

As I was sorting through my posts, I realized I haven't shared a recipe for fresh spring rolls, just a version of deep fried and pan-fried spring rolls.

As always, the filling changes each time depending on vegetables of the season, my mood, availability etc. This particular version is D's favorite, thanks to the rather unconventional filling.

Ingredients
For the filling:
1 rutabaga, grated
1 turnip, grated
2 medium carrots, grated
1 zucchini, grated
2 cups finely chopped cabbage
½ medium onion, sliced thin
3-4 cloves of garlic sliced thin
2 Tbsp grated ginger
2 Tbsp kecap manis
1 Tbsp sambal oelek
1 Tbsp coconut vinegar (or seasoned rice vinegar)
1 Tbsp sesame oil or canola oil
2 Tbsp toasted sesame seeds

Dry rice paper (Vietnamese), reconstituted/moistened with damp cloth, for wrappers

Preparation
  1. Filling: heat the oil in a pan, add the grated ginger and sliced garlic, sauté a bit and then add the onion, sauté some more; then add the rest of the veggies, seasonings, cover and cook till slightly soft but not mushy; finish off cooking without the lid; allow to cool
  2. Add the filling into each soft fresh spring roll wrapper, roll per package directions or like a burrito
  3. Serve with home-made peanut sauce and (canned) plum sauce


Labels: , , , , , , , ,

Tuesday, November 24, 2009

Steamed Baby Artichoke with Balsamic Vinaigrette

steamed baby artichoke in balsamic vinaigrette recipe

I've been on the fence about artichokes.

I like canned artichoke hearts a lot - as toppings on homemade pizza, or in salads and paninis. As to fresh artichokes, it just seems like it is more work to eat it than to cook it... however, these purple baby artichokes at the Farmer's market were begging to be given another chance in my kitchen and the results were quite satisfactory :)

The few times I've had whole large green artichoke steamed and served with melted garlic butter, it seemed like I was discarding more than ingesting the leaves, at least the outer spiky fibrous leaves.

And it reminded me of eating murungakai (Moringa oleifera, aka drumstick) when I was little - a long spiky vegetable usually served in sambars in South India: murungakai has soft flesh with a thick ridged outer skin which, even after hours of cooking is never soft enough to swallow. So, one has to scrape the inner pulp with one's teeth and discard the skin.

steamed baby artichoke in balsamic vinaigrette recipeWhile this variety is a mature artichoke (nothing much baby about it except its size), it seemed to not have as many harsh and thorny outer leaves, and that was one primary reason I wanted to give it another try.

Boiling usually leeches out nutrients and color, so, I liked to steam it. I used the steamer that is part of my rice cooker, but, I am sure idli cooker or even microwave would be fine to steam these. And rather than melted butter sauce, I just drizzled some home-made balsamic vinaigrette.

Ingredients
whole baby artichokes

Balsamic Vinaigrette:
1 Tbsp balsamic vinegar
3-4 Tbsp extra virgin olive oil
pinch of salt
3 Tbsp finely chopped spring onions

Preparation
  1. Trim the stem and outer leaves, cut the tip off a bit and steam the artichokes till a toothpick inserted at the bottom goes through without resistance
  2. Prepare the vinaigrette, fan out the leaves a bit, drizzle over the steamed artichoke and serve fresh, or allow to marinate for about 15-20 minutes before serving


Labels: , , , ,

‹Older