Related Posts Widget for Blogs by LinkWithin

Tuesday, November 27, 2007

Rye Spelt Injera

rye-spelt-injera-1


Over the last few years, I have started incorporating more of buckwheat, rye and spelt flours in my recipes.

Pizza, injera, and even some earthy breads seemed to turn out fine. The trick was to experiment and find the right balance with all purpose flour and gluten when using spelt or rye or buckwheat flours. Many of my breads and naans with spelt and rye flours turned out a disaster - dense and stiff like cardboard.

Spelt especially can be difficult to work with as it doesn't have as much gluten as whole wheat, so, it won't rise as much and tends to stay dense, but tastes pretty good. And precisely for this reason of low gluten it is preferred by many who have gluten-intolerance.

Even now, I can't say I have any sure-fire way of success... am still experimenting and documenting all the successful ones here :)

A while back, Sig sent me some starter which I have been feeding and using in a few other recipes. This injera recipe is one of them. I started the fermentation on a Sunday night and the batter was ready for dinner following Wednesday.

If starter is not handy, I am sure my usual recipe with rapid rise yeast would work just fine.

The only main difference I found between rye-spelt injera and all-purpose flour injera is that I had to make these a little thicker than normal else they fell apart easily. Plus they had a more wholesome earthy flavor than the all-purpose injeras.

This time, I served the injera with some steamed spinach (with spices similar to y'abesah gomen), a mushroom and bell pepper curry, and some kohlrabi dal ... not quite the traditional Ethiopian sides, but, I had them handy and it made a sumptuous weeknight meal.

Ingredients
1 cup yeast starter
1 cup rye flour
1 cup all purpose flour
2 cups water (plus more as needed)
½ cup spelt flour
1 Tbsp baking powder
salt to taste

Preparation
  1. Mix the starter, rye, spelt, all purpose flour with the water, stir well, cover and allow to rise in a warm place for about 2-3 days, stirring once each day
  2. I usually mix them in a ceramic bowl, heat the oven to about 175°F, turn it off and leave the bowl in there to start the fermenting process
  3. When batter is well fermented, it will acquire a pleasant sour odor and be a little gooey with sort of latex paint consistency, and when stirred, gets quite bubbly
  4. When ready to make the injeras, add the baking powder, salt, stir well, add water as needed to make a thin crepe-like batter
  5. Heat a pan, brush or spray with oil as needed, ladle some batter and swirl it around to form a thin layer; bubbles/holes will form at the top surface and as it gets cooked the batter will set and no longer look wet; can remove from pan at this time - no need to flip and cook the second side

rye-spelt-injera-2

Labels: , , , ,

Monday, November 26, 2007

Kohlrabi dal

kohlrabi-dal-1


Kohlrabi gets used about 6-8 times a year in my kitchen, when I feel the urge to have some, which is rare... My mom used to make sambar, koottu, even a dry poduthuval with it when I was little.

The name comes from the German Kohl ("cabbage") plus Rabi ("turnip"), because the swollen stem resembles the latter. Kohlrabi has been created by artificial selection for lateral meristem growth; its origin in nature is the same as that of cabbage, broccoli, cauliflower, and brussels sprouts: They are all bred from, and are the same species as, the wild cabbage plant (Brassica oleracea).
-- Wikipedia (http://en.wikipedia.org/wiki/Kohlrabi)

There are quite a few ways to cook it - I've tried them in soups with turnips and parsnips and other winter vegetables, grated and added to parathas (just like stuffed mooli paratha), steamed, sautéed and so on. I happen to like them best in sambar and dal.

kohlrabi-1


They don't have a strong flavor of their own, but, just like cabbage or broccoli, they do have a subtle smell and taste that takes well to other spices and flavorings.

Dal ('dhaal') is a staple Indian dish made with lentils or grams. It is usually mild, served as a side with rice or Indian flatbreads like roti/naan/paratha. My preferred gram for making dal dishes is yellow skinned and split moong beans. They cook up fast and have a full-bodied flavor, plus are quite nutritious.

This kohlrabi dal can be served as a soup - simply adjust water to get desired soup consistency. Also, any other herbs handy can be added - like fresh fennel leaves, or even mint.

This Kohlrabi Dal recipe goes out to Kalyn's Weekend Herb Blogging, hosted this week by the gracious and resourceful Kalyn herself.

Ingredients
1-2 medium kohlrabi
1½ cups yellow split moong dal
1 medium onion, diced
2-3 Serrano chilies, chopped finely
4-5 cloves of garlic, crushed
1 Tbsp fresh grated ginger
water as needed
salt to taste
1 tsp canola oil
some cilantro for garnish (optional)

Tempering: 1 tsp canola oil, 4-5 curry leaves (optional), 1 tsp urad dal, 1 tsp mustard seeds

Preparation
  1. skin and chop the kohlrabi to bite-size chunks
  2. heat 1 tsp canola oil in a pan, add the onions, ginger and garlic and sauté a bit till onion turns translucent
  3. add the chilies, kohlrabi and dry moong dal, about 3 cups of water, some salt, cover and simmer on medium low heat till kohrabi and moong dal are cooked through
  4. Tempering: heat oil in a pan, when it shimmers, add the urad dal, when it turns golden brown, add the mustard seeds, and when thye pop, add the curry leaves and remove from heat
  5. Garnish the dal with the tempering; stir well before serving

Labels: , , , , ,

Saturday, November 24, 2007

Thanksgiving 2007

thanksgiving-2007-1


Until a few years ago, I never cooked a Thanksgiving meal at home. We usually try to drop off packaged foods at Oregon Food Bank collection centers and just enjoy the 4 day break from work routine.

I am not fond of turkey. But, to me, Thanksgiving meal is all about the sides. Usually, we visit D's family on Thanksgiving Day and have quite a good meal that I never felt the need to cook at home.

But, a year or so before our wee one arrived, D wanted to start making a simple meal for Thanksgiving at home. My favorites are cranberry sauce (made from whole fresh cranberries, when possible), green bean casserole, candied yams, stuffing and steamed corn.

thanksgiving-2007-3


D likes to cook turkey, but, a whole bird is a lot of effort and since I don't like it, we just resort to cooking a fairly medium-sized turkey breast. Turkey breast is brined overnight, then marinated for about 24-36 hours before cooking.

The marinade this time was: soy sauce, hot sauce, red wine vinegar, kecap manis and some herbs. Just before cooking, it is rubbed with a spice rub that D just makes up each year, and it is baked in a 345°F oven (with a foil tent) for about an hour, turning midway, till it is done. It was as moist as turkey can get, and had enough infused flavor to make it interesting - at least the piece D gave me to try :)

Now, stuffing is done separately, I am not fond of stuffing that has been inside the bird. And since we don't cook a whole bird, D put the turkey breast on the top rack of the broiling pan, and at the bottom the stuffing items are thrown together and baked in the oven while the turkey breast is getting done.

Stuffing: 2 cup cubed boxed stuffing mix, carrots, celery, potatoes, onions all chopped, 2 Tbsp butter, 1 cup stock and any favorite seasonings. Toss these together and spread it on the bottom of the broiling pan (top rack holds the turkey breast) and bake it along with turkey breast.

thanksgiving-2007-2


Green bean casserole is one of my favorites. I only make it around Thanksgiving and Christmas for some reason. While I prefer fresh tender green beans, blanched to crisp-tender, I used french-cut frozen green beans this time and they turned out just fine. Mixed with home-made sauce and baked, topped with french-fried onions, green bean casserole is a wonderful meal by itself.

Greenbean casserole sauce: 3 Tbsp flour, 1 Tbsp butter, 1 cup warm milk, 1 cup freshly grated colby jack or any other cheese that melts well, some water as needed, ¼ cup jalapeño tomato sauce (optional), ½ cup finely diced celery, french-fried onions, green beans

Toast the flour, add the butter, sauté (no lumps), add milk slowly and stir constantly, add the celery and jalapeño-tomato sauce and any seasoning/flavor let it thicken a bit, stir in the cheese, allow it to melt; add the thawed frozen french-cut green beans; stir to coat; transfer to a greased casserole dish; bake in a 350°F oven for about 15-20 minutes, top with french-fried onions and bake about 5 minutes more; serve warm.

Cranberry sauce: 1 cup fresh whole cranberries, 1 cup unsweetened tart applesauce, 4 Tbsp brown sugar, water as needed

Combine the cranberry sauce ingredients and cook over medium low till cranberries are soft but still discernible, not too mushy.

Labels:

Monday, November 19, 2007

Poached Pears

poached-garden-pears-1


Over late Summer we had a ton of pears in our backyard. We have an Asian pear tree which looks sort of like Shinseiki and a Northwest variety that looks a bit like Seckel. We inherited the trees when we bought the house some years ago when the pear trees were just little babies and weren't bearing much fruit... so, am not sure what the varieties are exactly.

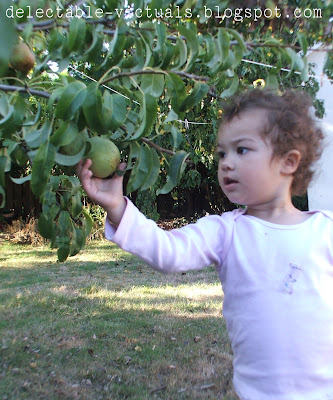
Both the pear trees are short and skinny and bear a ton of fruit within a short span of 6-8 weeks, every other year. Many of the fruits are usually low-hanging that my toddler could reach and pick and enjoy fresh from the tree.

I made a few batches of pear sauce out of the juicy Asian pears and canned them. Pear sauce recipe I used is very much the generic Applesauce recipe, nothing special. About a couple of dozen pears were just sliced and canned in a light syrup. Many were enjoyed as-is, whole, fresh off the tree. Quite a few of them became an integral part of our summer salads.

poached pearspoached pears

However, some of the Seckel-style pears were destined to be served poached in a delicious sauce, in a bed of summer berry confetti :)

The rosy green skin was quite a hit with my toddler. They were mildly sweet, not cloying. And when picked just right, they had the crisp crunch that I love. I am not fond of ripe, soft and mushy pears.

garden-pears-1


Ingredients
for the sauce:
1 can (11½ fl oz) Kern's Papaya nectar
2/3 cup sugar
¼ cup sweet red wine
1 cup apple juice
a 2" piece of cinnamon bark whole (or 1 tsp cinnamon powder)
6-8 allspice berries
2 tsp cornstarch (as needed)
½ cup water

3-4 small to medium, firm pears, peeled.
fruit cofetti:
blue berries, raspberries or any of your favorite summer berries, maybe some diced apple all tossed together with about a tablespoon of sugar if preferred

or any other Kern's nectar that you like - I just had papaya nectar handy; or even any other preferred 100% fruit juice
I had some Syrah and Tawny Port handy, but any table wine with medium-to-heavy body and on the sweet side can be used

Preparation
  1. Bring a pot of water to a boil and allow the pears to cook in it till a fork pierces the flesh with some gentle pressure - don't cook till mushy unless you like it that way :)
  2. Sauce: combine all the sauce ingredients except the red wine and cornstarch, bring to a boil, then lower the heat, add the par-cooked pears so they are at least 2/3rds immersed in the syrup, add the red wine and simmer on low till thick and syrupy and the pears are fork-tender; dissolve cornstarch in a bit of water and stir it in gently to thicken the sauce to desired consistency as needed
  3. Serve warm or cold: place the fruit confetti in the bowl, place the poached pears and drizzle some extra sauce, or serve extra sauce on the side


poached-garden-pears-2

Labels: , , , ,

Wednesday, November 14, 2007

Curry Chicken Wrap

curry-chicken-wrap-2


Wraps are wraps, nothing spectacular, easy to make with favorite choice ingredients... can be just a quick snack, or a filling meal.

This curried chicken wrap is for my mum-in-law. Mom, if you are reading this, let me know your version of it and how you'd like to serve it.

For this curry chicken wrap version, I had Ana in mind, so I threw in some green beans and peas along with the curried chicken. Adults may not fancy green beans and peas the way my toddler does :) Curried chicken can be prepared ahead of time and warmed up before wrapping and serving. Any other favorite vegetables can be added.

The sauce is pretty mild as well, nothing too spicy or overwhelming. It is basically my sun-dried tomato thokku mixed with some nonfat yogurt to desired consistency and mildness. Sun-dried tomato thokku can be prepared ahead of time and refrigerated as well.

Alternately, if sun-dried tomato thokku is not handy, mix some canned chipotle in adobo sauce with yogurt to desired spiciness.

Ingredients
Curried Chicken:
1 boneless skinless chicken breast
1 cup frozen peas
handful frozen petit green beans
1 medium onion sliced thin
1 tomato chopped
1-2 garlic cloves minced
2 Tbsp Madras curry powder (or Balti curry powder)*
salt to taste
1-2 Tbsp canola oil
4 Tbsp coconut milk (optional)
other:
mixed salad greens
chopped walnuts
dried cranberries and cherries
whole wheat or spinach or sun-dried tomato tortillas
(or rotis or any favorite wraps)
2-3 Tbsp sun-dried tomato thokku
¼ cup nonfat yogurt

*Available ready-made at Indian stores; sometimes Indian stores I shop at don't have Balti curry but I've always found that Penzey's Spices is well-stocked.

Preparation

Curried Chicken: chop the thawed chicken breast to bite size pieces; heat oil in a pan, add the onions, chicken, garlic and tomatoes, a pinch of salt, and sauté a bit; add the spices and coconut milk, a few Tbsp of water as needed, cover and cook on medium till chicken is cooked through, keeping the curry fairly dry, but taking care not to char or burn.

Allow the curried chicken to cool a bit before stuffing. This wrap is good served at room temperature. Warm up the tortilla a bit to make it soft and pliable.

I like to make a cone out of the tortilla and stick a toothpick through the bottom to make a sort of conical container and then stuff it. Spread some sauce on the tortilla before making the cone. Toss in some greens, curried chicken, walnuts and cranberries, drizzle more sauce if preferred.

Serve with a simple side salad - I just threw in some mixed greens, kiwi and home-made raspberry vinaigrette. Can use avocados instead of kiwi if in season...

curry-chicken-wrap-1

Labels: , ,

Tuesday, November 13, 2007

Spaghetti & Sauce

wholewheat-pasta-1


Whole Wheat Spaghetti with Tomato and Roasted Red Bell Pepper Sauce seemed too long and descriptive a title, so I settled for the blasé Spaghetti & Sauce

Not all meals need to be exotic and exciting, right? Take the good old spaghetti and sauce, or mac-and-cheese, or even just rice-and-sambar, they can be jazzed up no doubt with our creativity as the limit... or they can be presented without much ado, as-is, hearty and rustic. Ah, yes, "rustic", a term guaranteed to perk up D's interest. (not!)

Anyway, the other day, we had this whole-wheat spaghetti with some peas and green beans, some herbs, tossed with a tomato-roasted-bell-pepper sauce - just the regular array of ingredients handy in my kitchen on an average day. It was tasty and hearty is all I can say.

And since I managed to make it on a weekend daytime rather than a weeknight meal, the picture seems to have turned out half-way decent considering it was a gloomy day and I don't have any special props/lighting for my photos than the good old Ball of Fire in the sky... so, mustering up the courage, this goes out to CLICK: Noodles November 2007 event created by Jai and Bee of Jugalbandhi

Ingredients
Sauce:
1 small jar roasted red bell peppers packed in water
(or roast the peppers over open flame or under the broiler)
1 can diced tomatoes
4-6 cloves of garlic, minced
1 medium onion, diced finely (optional)
1 Tbsp chopped fresh (or dried) rosemary
1 Tbsp dried marjoram
1 Tbsp dried oregano leaves
¼ cup chopped fresh basil
2 Tbsp cayenne pepper powder
1 Tbsp paprika
salt to taste
(or any of your favorite herbs and seasoning)
Noodles:
Whole wheat spaghetti, or fettucini or penne or any favorite pasta
1 cup frozen peas
1 cup chopped green beans
(any other vegetables handy)
salt to taste
water as needed
1 tbsp olive oil


Preparation
  1. Sauce: Blend the roasted peppers and tomatoes, bring to boil in a pan, toss in the other sauce ingredients including the herbs and seasonings to taste; optionally, I like to set aside a little of the diced canned tomatoes as I like the chunky texture it adds to the sauce
  2. Noodles: boil the noodles in plenty of salted boiling water till al dente, throwing in the veggies if using
  3. toss the noodles with sauce to desired sogginess, serve warm with favorite bread


Labels: , , , ,

Monday, November 12, 2007

Semiya (Vermicelli) Payasam

semiya-payasam-2


Payasams are desserts/sweets usually made for special occasions like birthdays, anniversaries and festivals. They can be made with milk, sugar, rice, vermicelli, or, with dals and brown sugar and coconut... there are many varieties and I would like to collect them all here someday...

Anyway, I am not particularly fond of payasam, so, I only make it for festivals, to keep up the tradition, and, since D and Ana like it a lot, it is incentive enough to make a small batch...

For this semiya payasam, I like to use packaged extra-fine roasted vermicelli. This is thinner than the regular vermicelli, and usually comes packaged as golden brown extra fine, extra long strands that crumble to the touch. In contrast, "regular" packaged vermicelli I use for Upma is usually broken into 1-cm bits, and is antique-white in color like angel hair pasta...

This vermicelli payasam recipe is very simple. Just combine the ingredients and boil on medium-low till vermicelli is cooked through. Garnish with roasted cashews and raisins. Saffron is optional. Also, I prefer the body and flavor of evaporated milk for this dish and it cooks up faster, but, if preferred, can use regular whole milk and cook for longer till thickened.

Ingredients
1 cup loosely packed, lightly crumbled roasted extra-fine vermicelli
1 12-oz can evaporated milk
¼ cup sugar
3-4 small strands of Kashmiri saffron (optional)

garnish: raisins, unsalted broken cashew nuts, 1 Tbsp ghee

semiya-payasam-1


Preparation
  1. Combine the roasted vermicelli, evaporated milk and sugar and cook over medium low heat till vermicelli is cooked, stirring occasionally
  2. heat ghee in a pan, add the cashews, toast till golden brown, then add the raisins till they plump up, off heat
  3. garnish the payasam with the cashews and raisins, and saffron if using
  4. Stir well before serving
  5. serve warm or cold
\

Labels: , ,

Sunday, November 11, 2007

Gulab Jamun

gulab-jamun-1


Wheat Halwa, Savory Mixture, Balushai, Gulab Jamun, Theratti Paal, Maida Savory Biscuits, Thattai... these were just some of the items my mom made in huge quantities especially for Deepavali. She made it all with such enthusiasm and care that I look back in awe... mainly to share it all with friends, family and staff. We'd have tins and tins of leftovers after generous distribution, and snack on these goodies till pretty much New Year's every year!

I am not as adept or patient as my mom, however. So, we celebrated Deepavali: Festival of Lights in a simple way at home just a few days ago. I made the traditional family meal for Deepavali: pearl onion arachu vitta sambar, simple potato curry, thayir pachadi* and semiya payasam†

*thayir pachadi - raita like yogurt-based side-dish which has many interesting variations in south Indian cuisine that I'd like to dedicate a separate post to it someday.
semiya payasam - a sweet dish made with roasted vermicelli, milk and sugar, recipe to come

But, just to stretch myself one little baby step at a time, I threw in Gulab Jamun to the festivities this year.

A few years ago, D gifted me this wonderful cookbook Lord Krishna's Cuisine: The Art of Indian Vegetarian Cooking by Yamuna Devi.

I treasure this book and refer to it for some authentic recipes that can be made from scratch easily with readily-available ingredients.

I love the little anecdotes and reminiscences the author scatters throughout the book while discovering and learning the recipes from royal families and temple cooks in India, some of which apparently were guarded for centuries. Makes me wonder how she got them to part with the recipes to share with the whole world...

Anyway, I usually follow the Gulab Jamun recipe given in this book rather than buying a boxed mix from Indian stores. I have nothing against the boxed mixes - I personally have tried Gits™ Gulab Jamun mix a few times and it turned out quite well. But, Yamuna Devi's recipe seems more satisfying to make... as always, I made one or two minor variations to the given recipe without significant change in taste :)

Ingredients
Syrup:
2½ cups water
2 cups sugar
1 Tbsp Rose water
1 or 2 pods of cardamom
Jamun:
2 cups instant nonfat dried milk powder
1½ Tbsp self-rising flour
½ cup warm milk, as needed
1 tsp ghee or unsalted butter

Ghee or Oil for deep frying (I simply used canola oil)


Preparation
  1. Syrup:Bring the sugar and water to a boil over moderate heat, stir well till sugar dissolves, raise the heat to high and boil for about 4-5 minutes; off heat stir in rose water and crushed cardamom pod, set aside
  2. Jamun:
    • heat sufficient oil for deep frying to a moderate 225°F - if oil is too hot, the outside will char and darken before the inside is cooked
    • combine the jamun ingredients, adding a little of the milk at a time till the dough comes together soft and pliable
    • grease your palms and pinch off small portions of the dough and roll into about 24 balls
    • deep fry in batches till golden brown on the outside and cooked through on the inside, controlling the oil temperature appropriately as needed
  3. gently drop the fried balls into the syrup and allow them to sit for at least 2 hours before serving; refrigerate if serving cold


Labels: , ,

Friday, November 09, 2007

U.N. World Food Program

Ordinarily, I reserve this blog exclusively for recipes and collect my thoughts on mommyhood and life in general elsewhere... but, this cause seemed worth promoting so I decided to dedicate a tiny post to spread the word.

arbalest, baobab, caries, copacetic, coriaceous, lapidary, sinistral, taboret...

What do these words have in common?

Find out here!


Labels: ,

Wednesday, November 07, 2007

cornmeal rava idlee

rava-idlee-1


I've been making minor variations of my regular recipes, nothing spectacular to post, but, I was quite surprised by this batch of experimental idlee batter that I decided to note it down here.

It is a variation of the rava idlee, with cornmeal and rice idlee rava, plus some starter for fermenting the batter. The starter is optional. I had it handy from the Lemon Fruit Cake recipe and wanted to see if it would stay active and ferment this batch of batter. And it did! In about 24 hours.

The idlees came out quite fluffy and mildly sour, just the way I like it:)

Serve warm with chutneys of your choice, or even sambar.

Ingredients
1 cup bread starter* (optional)
1 cup rosated coarse sooji rava
1 cup rice idlee rava
1 cup coarse cornmeal or cornbread mix
1 cup buttermilk
½ tsp sugar (only if using the starter)
1 tablespoon salt
1 teaspoon baking soda
plus water as needed to make a fairly thick batter

tempering: 1 tsp oil, 1 tsp urad dal, 1 tsp chana dal, 1 tsp mustard seeds

*if not using the starter, can use 1 Tbsp rapid rise yeast instead; or, simply leave out the yeast and allow for natural fermentation, which might take longer than 24 hours depending on where you live.

Preparation
  1. combine the batter ingredients, (all except baking soda and salt) in a ceramic or plastic bowl, the batter can be thick at this point, stay conservative with the water till ready to cook; cover and set aside in a warm place to ferment overnight or for 24 hours
  2. when ready to make the idlees, get the tempering ready: heat the oil in a pan, add the chana dal, when it turns golden brown add the urad dal and when it turns golden brown add the mustard seeds, when mustard seeds pop turn off the heat and add it to the batter, stir well
  3. taste the batter and add salt as needed; stir in the baking soda and add water to desired idlee consistency
  4. grease the idlee moulds, pour the batter and steam till done

Labels: , , , ,

Thursday, November 01, 2007

Simple Manicotti

manicotti-1


For the last decade or so since I read it, Manicotti has always reminded me of this little strip of Calvin & Hobbes

easy recipe simple manicotti italian vegetarian
Picture Courtesy: http://www.s-anand.net/calvinandhobbes.html#19951116
S Anand has a very interesting collection, and no, I don't know him from Adam and he is not paying me to plug it :0


Anyway, since Ana is not quite the Calvin, and since D was in the mood for it, I made a small batch for dinner some time back.

The recipe is really simple, just like for any pasta recipe I try to do on a weeknight: simply cook the manicotti pasta per package directions, stuff the manicotti tubes with your favorite stuffing (usually ricotta+herbs), top with sauce, bake for about 25 minutes.

Ingredients

6-8 tubes manicotti, dry
favorite tomato/pasta sauce

stuffing:
part-skim ricotta cheese
fresh grated part-skim mozzarella
fresh grated parmesan
dried herbs - basil, rosemary, marjoram, oregano leaves
salt to taste

Preparation

  1. Pasta: cook the pasta per package directions, drain, keep handy
  2. heat the oven to 350°F, keep a baking dish handy
  3. Stuffing: combine required amounts of the cheeses and herbs, with a pinch of salt - I prefer more ricotta and parmesan, a little less of mozzarella, but, the proportions can be varied to your taste; can even add cooked spinach, keeping it as dry as possible
  4. Sauce: can use store-bought sauce or make your own
  5. Assembly: stuff the manicotti tubes with the cheese mixture; layer some sauce in the baking dish, arrange the manicotti over the sauce in a single layer, top with more sauce
  6. Bake: in 350°F oven for about 25-30 minutes till cheese and sauce are bubbly

manicotti-2

Labels: , ,

Newer›  ‹Older