Related Posts Widget for Blogs by LinkWithin

Saturday, December 30, 2006

spring roll with two dipping sauces

easy recipe sping roll dipping sauces
Spring rolls are sort of easy to make and are a favorite appetizer in our family. I just don't make it often as it involves frying, so, every time I make it I try to come up with some nice dipping sauce that makes it interesting :-)

As the dipping sauces kind of take center-stage, I leave the spring rolls plain and simple.

Ginger Garlic Chili Soy Sesame sauce
2 Tbsp low sodium soy sauce
1 Tbsp mirin
1 Tbsp rice wine vinegar
1 tsp kecap manis
1 Tbsp fresh grated ginger
1 Tbsp minced garlic
1/2 tsp cayenne pepper
1 tsp red pepper flakes
1 tsp toasted sesame seeds

Preparation: just combine all the above ingredients and stir well. Adjust to taste, if necessary.

Tangy Lemongrass Peanut sauce
1 Tbsp finely minced lemon grass
1 Tbsp finely grated ginger
1 Tbsp minced garlic
1 Tbsp peanut butter (I prefer chunky)
1 tsp brown sugar
4 Tbsp lemon juice
1 Tbsp rice wine vinegar
1 tsp soy sauce

Preparation:
  1. heat lemon juice, ginger, garlic, brown sugar and lemongrass in a pan till it reduces a bit; off heat, combine the rest of the ingredients, stir well and serve
Spring rolls
Ingredients:
easy recipe sping roll dipping sauces
Spring Roll wrappers (I prefer the frozen kind)
Filling - veggies of your choice - julienned or sliced fine - onions, carrots, spring onions, cabbage; pickled ginger, bean sprouts
salt and cayenne pepper to taste
oil for frying
easy recipe sping roll dipping sauces
Preparation:
  1. combine the veggies, season with salt and pepper, set aside
  2. keep a small bowl of water handy for wetting the wrappers
  3. the package usually comes with instructions - just spoon some filling, roll up, wet with water to seal
  4. deep fry in oil, serve warm with the dipping sauces

Labels: , , ,

Friday, December 29, 2006

Paruppu Urundai Kozhambu

quick and easy recipe lentil ball stew paruppu urundai kozhambu

This is a kozhambu (kuzhambu) aka stew my mom makes when she runs out of fresh seasonal veggies to make sambar with and needs to make something healthy.

Paruppu=Lentils; Urundai = round/ball.

Kuzhambu is a spicy sauce-dish from South India which can be made with practically any of the lentils, grams and vegetables common to the region, and is typically served with plain hot rice.

So, instead of veggies, this kuzhambu has lentil balls. Toor dal is soaked and ground to a fine paste, shaped into balls, steamed and boiled in kozhambu spices to make this delicious dish, usually had with plain rice.

I reserve some of the steamed lentil balls for another dish called 'paruppusili' which can be made with veggies like snake beans, bunch beans, capsicum etc.

quick and easy recipe lentil ball stew paruppu urundai kozhambu

Ingredients


for lentil balls:
1 cup toor dal
3 dry red chilies
3 cups water

tempering:
1 tsp mustard seeds
1 tsp cumin seeds
1 tsp urad dal
2-3 curry leaves chopped
1 Tbsp canola oil

for kozhambu:
4 Tbsp tamarind concentrate
4 cups water
1/2 tsp asafoetida (optional)
1 Tbsp oil
1 medium onion, diced
1 Tbsp brown sugar
2 Tbsp coriander powder
1 Tbsp cumin powder
1 tsp cornstarch (for thickening)
salt to taste

Preparation:
  1. Lentil balls: soak the toor dal and dry red chilies in water for 30 mins; drain well; grind to a thick fine paste so as to be able to shape them into balls; add some salt to taste; shape them into balls about 2 inches in diameter; steam them till they are firm and cooked; set aside
  2. heat oil in a pot, add the onions, asafoetida, pinch of salt and coriander+cumin powders; sauté well
  3. add water, tamarind paste and brown sugar and let it come to a boil; lower the heat, add the steamed lentil balls one by one - as many as you'd like in the stew - gently into the pot and let them simmer on low heat for about 10 minutes or so
  4. if it seems too watery, thicken with cornstarch: dissolve the cornstarch in a few Tbsp of water and slowly add it to the simmering pot and stir well till thickened; adjust salt to taste
  5. in a small ladle or pan, get the tempering ready: heat oil in a pan, when the oils shimmers, add the urad dal, when they turn golden brown, add the mustard seeds, and when they pop and die down add the cumin seeds and curry leaves, off heat, set aside
  6. when lentil balls seem to have absorbed the flavorful spices and feel like a loaded sponge, off heat, garnish with tempering, serve warm with basmati rice

Labels: , , , ,

Monday, December 25, 2006

Ridge Gourd Peel Chutney


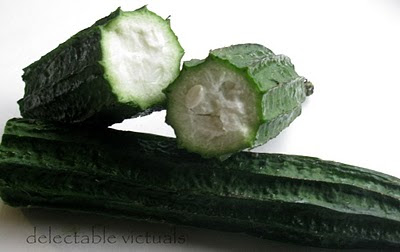
Ridge gourd is one of those vegetables that reminds me of cactus: if nothing else seems like vegetation and this seems to be the only juicy thing around to cook and eat, of course, I'd relish it. But, fortunately for the ridge gourd, I love its peel as it makes a fantastic thohayal or chutney.

ridge gourd peerkanga beerakkai peerakaya

Ingredients:
1 Tbsp urad dal
3 Tbsp dry grated coconut
1/2 cup diced onions
6-8 curry leaves (optional)
2-3 cups ridge gourd peel, chopped
4-6 dry red chilies
¼ tsp tamarind paste -or- 1 Tbsp lemon juice
1 Tbsp Apple cider vinegar
1 tsp brown sugar (optional)
salt to taste
1 Tbsp Olive oil
water as needed
tempering: (optional)
1 tsp mustard seeds
1 tsp cumin seeds
1 tsp urad dal
2-3 curry leaves chopped
1 Tbsp canola oil

Preparation:
  1. heat 1 Tbsp canola oil in a pan, sauté the ingredients for the chutney
  2. when cool enough to handle, blend in a blender or food processor into a fine paste, adding a little water at a time as needed; adjust salt to taste
  3. tempering: heat oil in a small pan or ladle, when it is shimmering, add the urad dal; when it turns golden brown, add the mustard seeds; when mustard seeds pop and die down add the cumin seeds and curry leaves, off heat
  4. garnish the chutney with the tempering; stir the tempering in before serving

Labels: , , ,

Wednesday, December 20, 2006

Mango Rice

Mango Rice south Indian vegetarian

I remember roughly about a dozen or so varieties of mangoes that I relished in my childhood: some best eaten raw, some best when ripe and golden, each with quite a distinct flavor and texture. Some were stringy, some were soft and fleshy; some were way too juicy that i just had to poke a hole, stick a straw and enjoy the juice and discard the mango.

Summer was the mango season where I grew up. My mom used to make so many different dishes with mangoes - the raw green ones as well as ripe fruits.

Tiny raw baby mango pickle is still one of my favorites: my mom used to just brine a batch and have it handy for snacking on; and then a larger batch was brined and soaked in a blend of spices including extra hot chili powder and mustard - we either called it "maa vadu" or "kadugu manga" - a wonderfully addictive pickle/achar/side that I loved eating with yougurt or buttermilk rice. My mom had special porcelain/earthenware jars/crock to store these in and they last for over a year, if we don't eat it all up first, that is.

Plus, of course various mango chutneys, salads and pachadis. By the end of each mango season we kids would have gorged so much that we couldn't handle the sight of another mango! Those were the days!

Many south Indian dishes seem elaborate as they involve some form of spice paste, plus some form of spice powder, but, I have found that making extra and saving it for future use makes it seem effortless the next time :)

Mango Rice south Indian vegetarian

Ingredients
2 medium raw green mangoes - one diced, one grated finely
4 cups cooked basmati rice
1 tsp turmeric powder
1 Tbsp canola oil
salt to taste

spice paste*:
4-6 cloves of garlic
1" piece of ginger
4-5 green chilies

Spice powder:
1 Tbsp urad dal
1 Tbsp chana dal
1 Tbsp mustard seeds
1 star anise
1-2 bay leaves
1-2 2-inch pieces of Indian/Ceylon cinnamon bark (optional)

tempering:
1 tsp mustard seeds
1 Tbsp chana dal (optional)
4-5 fresh curry leaves (optional)
1 Tbsp oil for tempering

Preparation
  1. Dice one mango (get as close to the pit as you can; and discard the pit) - i like to leave the skin on as it gives a certain texture and bite to the dish; alternately, skin and grate the mango, if preferred, instead of dicing; set aside
  2. Roughly chop the other mango; again, remove the skin if preferred
  3. Combine the chopped mango from step 2 and the spice paste ingredients in a blender or food processor and grind into a fine paste; set aside
  4. Dry roast the spice powder ingredients, and when cool enough to handle, grind them to a fine powder; set aside
  5. Heat the oil in a pan, add the spice paste and sauté till the raw flavor of garlic is gone and the spices release their aroma
  6. Add the diced mango, turmeric powder, spice powder from step 4, some salt and sauté till the diced mango softens a little and is not too raw
  7. Add the cooked rice, adjust salt to taste, stir till well incorporated
  8. Tempering: heat oil in a small pan/ladle, when oil shimmers add the mustard seeds; when mustard seeds splutter and die down, add the curry leaves and turn off heat
  9. Garnish with the tempering, serve warm with pappadam or vadaam.

I usually double or triple the quantities for the spice powders and spice paste and save a portion of them for later use. Spice pastes can be refrigerated for up to a month usually, and spice powders last even up to six months if stored in an air tight container.

While I prefer to make my own spice pastes and powders, I also try to have some store-bought ones to fall back on.

The quick and easy mango rice recipe here is adapted from Dakshin by Chandra Padmanabhan, with variations, as I cannot follow a recipe without personalizing/customizing it somehow.

Labels: , , ,

Sunday, December 17, 2006

Sprouted Moong Bean Salad


I like sprouting beans and seeds - something magical about the way the shoots emerge, reaffirming the beauty of life.

Last week I sprouted some moong beans (aka green gram). Very simple method, nothing fancy - it has worked for me so far, so, I stick to it:
--Soak the whole green moong beans for an hour or so in lukewarm water.
--Drain.
--Place in a canning jar
--Cover the jar with a piece of cheesecloth (or any thin porous cotton fabric, or netting fabric) to allow breathing, and screw the ring on the jar
--Rinse once a day and leave it in a cool dark place for a few days
--Voila!


Sprouted moong beans can be refrigerated and used for about 5-7 days. I like to add a handful to salads and vegetable dishes for the crunch and nutrition.


Ingredients:
1 cup sprouted moong beans
2 cups grated carrot
1-2 green chilies chopped fine
3-4 Tbsp lemon juice
1 cup diced raw green mango (optional)
salt to taste

tempering:
1 Tbsp chana dal
1 Tbsp urad dal
1 tsp mustard seeds
4-5 fresh curry leaves (optional)
1 Tbsp oil for tempering

Preparation:
  1. heat oil in a smallish pan/ladle till the oil starts to shimmer; add the tempering: chana dal first, when it turns golden brown, add urad dal and when it is golden brown, add mustard seeds; keep a screen lid handy as mustard seeds will try to jump out of the pan; when mustard seeds splutter and die down, off heat add the curry leaves and set aside
  2. combine all the salad ingredients; raw green mango adds a certain zing to this salad, so, if i have it handy, i just throw some in
  3. adjust salt and lemon juice to taste; garnish with the tempering from step 1
  4. serve cold or at room temperature, with roti or rice; or, simply enjoy it as a starter salad :-)
Alternately, just omit the carrots, sauté the sprouted moong beans and add lemon juice and salt to taste; garnish with the tempering and Ta-Da! Another healthy salad/side ready:


Sometime I just throw a handful in any of my curries or even in sambar to up the nutritional value.

Labels: , , , ,

Thursday, December 14, 2006

chayote squash koottu

Chayote squash is generally bland and watery and doesn't seem to have much of a strong flavor of its own. So, to me, it is ideal for using in several different dishes combined with different spices. I like its texture when cooked.

I grew up calling it chou-chou and loved the various dishes my mom made with it - like chou-chou more-kozhambu(aka more-kali), more-koottaan, chou-chou koottu, even chou-chou sambar.

The koottu recipe here is adapted from one of my favorite cook books for south indian foods: Dakshin by Chandra Padmanaban. This book is a gift from my husband and I treasure it because when the recipes are followed closely, they come out pretty tasty - sort of like how my mom makes them.

easy recipe chayote squash koottu

Koottu, to me, sort of refers to the gravy in the dish which is made with specific ingredients: if it has lentils and certain ingredients which i list below, then it is a Koottu :-) The vegetable in the koottu can be substituted for other seasonal vegetables - for instance, chayote squash in this recipe can be substituted with say, ridge gourd or ash gourd or yam or snake gourd and still have a delicious koottu.

Ingredients
easy recipe chayote squash koottufor the spice paste:
2/3 cup dry(or fresh) grated coconut
7-8 dry red chilies (less, if you prefer)
1 Tbsp urad dal
1 Tbsp cumin seeds
2 Tbsp par-boiled rice (puzhungal arisi)

2 cups cooked toor dal
3-4 cups diced chayote squash (or any other vegetable in season)
1 tsp turmeric powder
1 tsp brown sugar (optional)
salt to taste
2 Tbsp canola oil
some water
6-8 curry leaves*

tempering:
1 tsp urad dal
1 tsp chana dal
1 tsp mustard seeds

Preparation
  1. dry roast the spice paste ingredients and when cool enough to handle grind them to a fine paste with just a tad bit of water to get them all together; set aside
  2. heat oil in a pan, add the tempering: chana dal first, when it turns golden brown, urad dal and when it is golden brown, add mustard seeds; keep a screen lid handy as mustard seeds will try to jump out of the pan
  3. when mustard seeds splutter and die down, add the diced chayote squash, turmeric powder, curry leaves, some salt and some water; cover and let the chayote squash cook till soft
  4. add the spice paste from step 1, and the cooked toor dal, brown sugar; stir well and let it simmer for about 5-8 mins till the flavors meld; add a little water if the gravy seems too thick; adjust salt to taste
  5. off heat garnish with curry leaves; serve warm with rice or roti or naan.
* Curry Leaves are sort of special and I love to incorporate them into my cooking. When I was growing up in India, I noticed many of my friends and family sort of pick it out of their food and throw it away. What a waste. I have not found any substitute for the wonderful flavor they impart, and they are certainly not equivalent to bay leaves. Curry leaf chutney or thohayal is one of my favorite ways of getting all its goodness.

Labels: , , , , , ,

Tuesday, December 12, 2006

Colocasia (Chaembu)

Colocasia  (Chaembu) taro root indian vegetarian cheppan kezhangu pan fried

Taro (chaembu, as we called it,or chaembu kezhangu -' ch' as in 'chair', not 'choir', ) was almost as ubiquitous as potatoes when I was growing up. My mom tried to use it in a few different dishes, including making taro chips, but, our collective favorite at home was this simple, quick and easy recipe here.

It cooks up like potatoes, but, is pretty starchy and slimy when wet, sort of like how okra gets when wet. So, to get it pan-roasted, try to steam it covered, with not much extra water, and then pan-roast it till it gets crisp on the outside.

quick and easy recipe taro root


Ingredients
8-10 medium taro
2 Tbsp canola oil
salt to taste
spice powders (adjust to taste):
1 Tbsp curry powder
1 tsp garam masala
1 tsp cayenne pepper
tempering:
1 tsp urad dal
1 tsp chana dal
1 tsp mustard seeds

Preparation:

  1. peel the taro just like potatoes, wash and pat it dry so it is not too slimy; dice them to fairly uniform size
  2. heat oil in a non-stick pan, add the tempering: chana dal first, when it turns golden brown, urad dal and then mustard seeds
  3. when mustard seeds splutter and die down, add the chopped taro, 1 Tbsp of water, the spice powders, some salt, stir well; cover and cook on medium-low heat till it is cooked through but not mushy
  4. remove the lid, start pan roasting it on medium-high to high heat till they are fairly crisp on the outside
  5. serve warm with rice and rasam or sambar, or even with roti.
Alternately, taro can be roasted in the oven just like potatoes. In a plastic bag, add some oil and spices, and some salt, throw in the chopped taro, shake well, dump them onto a roasting pan, single-layer, and roast them just like potatoes - maybe 350 F to 400F oven for about 35-45 mins or so, keeping an eye on it so it doesn't char.

Labels: , , , , , ,

Sunday, December 10, 2006

Green Tomato Rice


We harvested the last of the green tomatoes which may not get a chance to ripen as we had to say good-bye to our vegetable garden for this year.

Much like green tomato dal/koottu, this dish came about as I was looking for a good way to use up the tomatoes.


Ingredients
quick and easy recipe green grape tomato rice
For spice powder:
1 Tbsp mustard seeds
1 Tbsp urad dal
2 Tbsp chana dal
3 Tbsp coriander seeds
6-8 dry red chilies
1/2 cup dry grated coconut

3 or 4 large green tomatoes, chopped
4 cups cooked basmati rice
2-3 fresh green chilies, slit in half
OR - 2 Anaheim peppers
green beans (optional)
1 medium onion sliced thin
2 Tbsp golden raisins (optional)
2 Tbsp canola oil
1 tsp turmeric powder
salt to taste

for garnish(optional):
2 Tbsp cashew nuts
2 Tbsp chopped cilantro

Preparation:
  1. dry roast the ingredients for the spice powder, when cool enough to handle, grind them to a fine powder
  2. heat oil in a pan, add the onions, green chilies, turmeric powder and green tomatoes; sautee till onions turn translucent and green tomatoes are softened a bit
  3. add the rice, raisins, the spice powder from step 1, and some salt, stir till well incorporated, and sautee on low heat for a few mins
  4. off heat, garnish with cashew nuts and cilantro, serve warm with raita or thayir pachadi, and, pappad or vadam

Labels: , , ,

Thursday, December 07, 2006

Butternut squash poduthuval


Butternut squash is a favorite winter squash - its texture and mild sweetness makes it quite versatile. It takes well to spices, but is also wonderful with a mild flavoring of coconut+green cilies, which is what I do here.

This is a simple side which can be served with rotis or rice and rasam or sambar.

This is a quick and easy recipe that is pretty much the same as my young green jackfruit recipe. Can substitute Pumpkins for Butternut Squash.

Ingredients
4-5 cups peeled diced butternut squash
1/2 cup dry grated coconut
3-4 green chilies (adjust depending on variety of chili)
salt to taste
1 Tbsp coconut oil (or canola oil)
water as needed

tempering:
1 tsp urad dal
1 tsp chana dal
1 tsp mustard seeds
1/2 tsp cumin seeds

Preparation
  1. grind the grated coconut and green chilies into a fine powdery paste and set aside
  2. heat oil in a pan, add the tempering: chana dal first, when it starts to turn golden add the urad dal and when they turn brown add the mustard seeds and then the cumin seeds
  3. when mustard seeds splutter and die down, add the diced butternut squash, some salt, the coconut-chili paste and stir well till it is coated with oil and tempering
  4. add a few tablespoons of water, cover and let the squash cook a bit till it is soft but not mushy; stir once in a while
  5. off heat garnish with cilantro or curry leaves, if available
  6. serve warm with roti or steamed basmati rice

Labels: , , , , ,

Wednesday, December 06, 2006

Young Green Jackfruit


This is another favorite dish from my childhood days in India and I like it best when made as in this quick and easy recipe here.

I remember back in the days, jackfruit ("chakkai", as we called it at home) was available in loads during the season. Many prefer the ripe jackfruit. But, my mom used to incorporate young green jackfruit, as well as the large pit inside the jackfruit, into many different dishes. Also, she used to make a sort of jam with ripe jackfruit and jaggery which to this day makes my mouth water.

Young green jackfruit is available canned or sometimes fresh in season here at asian markets. I prefer the canned version as it saves a lot of cleaning and preparation time. I haven't found jackfruit pits in my local stores here in Portland so far.


Ingredients
quick and easy recipe young green jackfruit
2 cans young green jackfruit,usually packed in water and some salt and preservatives
1/2 cup dry grated coconut
3-4 green chilies (adjust depending on variety of chili)
salt to taste
1 Tbsp coconut oil (or canola oil)

tempering:
1 tsp urad dal
1 tsp chana dal
1 tsp mustard seeds
1/2 tsp cumin seeds


Preparation
  1. grind the grated coconut and green chilies into a fine powdery paste and set aside
  2. drain the water from the canned green jackfruit, chop or crush the chunks coarsely to the texture you prefer - i like it sort of as in the picture above :-)
  3. heat oil in a pan, add the tempering: chana dal first, when it starts to turn golden add the urad dal and when they turn brown add the mustard seeds and then the cumin seeds
  4. when mustard seeds splutter and die down, add the coarsely chopped/crushed green jackfruit, some salt and stir well till it is coated with oil and tempering
  5. add the coconut-chili paste from step 1 and stir till well incorporated; serve warm as a side with rasam or sambar and rice.

Labels: , , , ,

Monday, December 04, 2006

buckwheat injera

buckwheat-injera-1


Injera is one of the favorites in my family, almost right up there with Dosai, as my wee one likes it too. I've wanted to incorporate more buckwheat in our diet and this seemed like a good recipe for that.

This is very much like the other all-purpose flour injera recipe I have, with slight difference.

Ingredients
2 cups buckwheat flour
2 tsp rapid rise yeast
4 cups lukewarm water
salt to taste
a pinch baking powder
some oil

Preparation
  1. combine buckwheat flour, yeast and water and stir well till no lumps exist, cover and let it ferment in a warm place for 2 days; stir once a day
  2. when ready to make, add salt to taste and a pinch of baking powder
  3. the batter sort of has the texture of latex paint - it is a bit sticky/gooey, so, adjust water as needed
  4. heat a non-stick pan, brush some oil as needed, pour a small amount of the batter and swirl it around till it is in a thin layer
  5. remove when holes form on the top surface and injera looks cooked; can also flip and cook the other side if preferred
  6. serve warm with mint chutney, or mesir wat, or gomen

Labels: , ,

Friday, December 01, 2006

Quick and Simple Yakisoba

kid friendly Quick and Simple Yakisoba noodles


Jokes about the name notwithstanding ("Is it Yucky-Soba today, Mama?"), kids do manage to eat the yakisoba noodles no matter what combination of flavors I end up using (as long as I don't go overboard with the chilies).

Stir-fried noodles is usually a quick-to-cook dinner but can get boring over time. One way to change it up a bit is the combination of flavors, and the type of noodles. Buckwheat soba is a staple since all of us at home like it.

Yakisoba sauce here, while not quite earth-shattering, came about as an unusual combination of flavoring ingredients. Sometimes, add in some ketchup, sambal, even habañero mustard for a bit of a bite.


Ingredients
1 pkt buckwheat soba noodles
1 medium onion, sliced thin
plus any other veggies of your choice - cauliflower, carrots, green beans, broccoli, sugar snap peas
1 Tbsp hazelnut oil (or sesame oil, or mustard oil)

for the sauce:3 Tbsp light or citrus soy sauce or Bragg's Liquid Aminos
1 Tbsp Worcestershire sauce
1 Tbsp Japanese rice vinegar
1 Tbsp ketchup
1 teaspoon cane sugar
1 teaspoon sambal oelek
1 teaspoon habañero mustard (optional)

Preparation
  1. cook the noodles per package directions, drain, set aside
  2. combine the sauce ingredients; adjust the quantities to suit your taste; set aside
  3. heat the oil in a pan, sautée the onions and other veggies
  4. add the noodles and the sauce, stir gently till well coated; serve warm

Labels: , ,

Tuesday, November 28, 2006

pasta shells with broccoli

Pasta is one of the simplest, easiest and heartiest at my table. Unfortunately, my tummy can't handle a lot of it, so, I make it sparingly.

Usually, I just throw some veggies and flavoring; sometimes it is tomato or marinara sauce, sometimes white sauce with spices like rosemary, oregano and such.

This recipe has pasta shells, garlic, broccoli, sun-dried tomatoes, pepperoncini, pine nuts and some mushrooms. The sauce is like a white sauce, starting with a roux of sorts, and has mustard for flavoring.

pasta shells broccoli pine nuts pepperoncini sun dried tomatoes

Ingredients
3 cups cooked pasta shells(or farfalle, or penne), al-dente*
1 cup broccoli florets, blanched
1 cup sliced button mushroom, sauteed
1 cup chopped pepperoncini
1/2 cup sun dried tomatoes
4 Tbsp pine nuts, toasted
4 garlic cloves, sliced thin
salt to taste
olive oil as needed
* 1-2 cups cooked pasta should be plenty depending on the variety of pasta used;
for the sauce:
2 Tbsp all-purpose flour
1 cup whole milk, preferably warm or at room temperature
3 Tbsp dijon mustard
1 Tbsp Jack Daniels Horse-radish mustard (optional)
1/2 cup of pasta water reserved, or just warm water
a few sprigs of parsley

Preparation
  1. heat a large shallow pan gradually, add the flour and dry toast till it turns pale brown, lower the heat a little if needed so as not to burn the flour; then add the garlic, mustard and the warm whole milk a little at a time, stirring constantly; allow to simmer and reduce a bit; add a little water, as needed, if the sauce gets too thick
  2. add the broccoli, 'shrooms, sun dried tomatoes and pepperoncini to the pan with the sauce and toss gently; adjust salt to taste; add the pasta a little at a time so there is enough sauce to coat it all; stir in parsley and some olive oil to give it some clean flavor, wetness and shine
  3. garnish with toasted pine nuts;serve warm with garlic bread or other starters

Labels: , , ,

Monday, November 27, 2006

Cranberry Pearl Onion Sambar

Cranberry Pearl Onion Sambar south indian vegetarian

Sambar, along with rice, is a dish I grew up eating pretty much at every meal about 90% of the time. I like the variety involved: add veggies in season, vary the spices a bit, omit the toor dal to make 'vatral kuzhambu' (aka vetha kozhambu), add coconut-coriander-seeds-dry-red-chilies paste to make 'araichu vitta sambar' and so on.

Sambar, in general, uses cooked toor dal, sambar powder and tamarind. As I ran out of toor dal at home, I used brown lentils and was quite happy with the results: it had the body and flavor of sambar, the heartiness of dal, tartness from the cranberries and a nice rich brown color from the brown lentils.

This recipe here is quite unconventional, so, probably my mom would not appreciate it as much :-)


Ingredients
1 cup fresh cranberries
6-8 pearl onions, peeled whole
1 cup chopped carrots (optional)
2 cups cooked brown lentils, coarsely mashed
2 Tbsp tamarind concentrate*
1/2 tsp asafoetida powder (optional)
1 Tbsp brown sugar
3-4 Tbsp sambar powder** (either make at home, or use store-bought)
salt to taste
5 cups of water
coriander and curry leaves for garnish
2 Tbsp canola oil (or any oil)
tempering: 1 tsp each urad dal and mustard seeds
---------------
* tamarind concentrate that i use in my recipes is found in asian stores - sometimes sold as sour soup mix - here is a picture of what i use
-----------------------
** sambar powder spices (this is a slightly non-traditional mix)
1 cup coriander seeds
1 cup dry red chilies
1/2 cup chana dal
1/2 cup toor dal
1/8 cup fenugreek seeds
2 Tbsp whole black pepper
2 2" piece of chinese/indian cinnamon bark
1 tsp poppy seeds
1 cup curry leaves (optional)

Preparation
  1. if making sambar powder at home, dry roast all the sambar powder ingredients, one at a time;combine them and grind them to a fine powder and set aside; can double the quantities and store the sambar powder in airtight containers, or even vary the proportion a bit to get a slightly different flavor - primary ingredients are coriander seeds and dry red chilies and the two dals, the rest is more to suit individual tastes; and from what my mom taught me: try to use (a) equal quantities of coriander seeds and dry red chilies; (b) equal quantities of the dals; BUT, ratio of (a):(b) is 2:1
  2. heat the oil in a cooking pot, add the tempering: urad dal first and when it starts turning light brown add the mustard; when mustard seeds splutter and die down add the pearl onions, carrots and asafoetida powder and sautee for a bit
  3. add the tamarind concentrate and water, a little salt, sambar powder, cover and let it cook over medium-low till onions are cooked, and it reduces a bit; sambar can be thick or thin - i prefer it thick and hearty; if making it thin, add more water and adjust spices so it doesn't feel dilute and bland
  4. add brown sugar, cranberries and cooked lentils; simmer on medium-low heat till flavors meld and cranberries are cooked but not mushy; adjust salt to taste
  5. off heat, garnish with coriander and curry leaves; alternately, the curry leaves can be added at the tempering stage itself to render it slightly crispy, and infused with sambar flavors
  6. serve warm with rice and sides such as snake gourd, snake beans and zuccini or even a simple potato dish.

Labels: , , , , ,

Thursday, November 23, 2006

Vangi Baath: Eggplant Rice

vangi baath eggplant rice


Eggplant happens to be a favorite of mine and I try to cook it in a few different ways to keep it interesting.

This eggplant rice (vangi baath) recipe uses a blend of spices that can be made in larger quantity and stored for later use.

Ingredients

spices
1 black cardomom
easy recipe vangi baath eggplant rice1 star anise
3-4 cloves
1 tsp whole black pepper
1-2 tsp cumin seeds
4-5 Tbsp coriander seeds
6-8 dry red chilies
2 2" piece of Chinese/Indian cinnamon bark
1 Tbsp sesame seeds (optional)
4-6 Tbsp dry powdered coconut (unsweetened)


1/2 large globe eggplant, sliced thin
1/2 medium onion, sliced thin
2 cups cooked basmati rice
a few cilantro and curry leaves for garnish
salt to taste
2 Tbsp oil

tempering: 1 tsp each urad dal, mustard seeds


Preparation

  1. Dry toast the spices, let them cool a bit, and grind them to a fairly fine powder; set aside
  2. heat oil in a pan, add the tempering; when mustard seeds sputter and die down, add the eggplant, onions and some salt and sauté till eggplant seems cooked through but not mushy
  3. add the cooked rice and stir a bit, then add the spice powder from step 1 a little at a time till the rice is as spicy as you'd like, adjust salt to taste
  4. stir well till spices and rice seem well incorporated into the eggplant-onion mixture
  5. off heat garnish with cilantro (or curry leaves, if available), serve warm

Labels: , , ,

Monday, November 20, 2006

mysore bonda

'Bonda' and 'Vadai' are fried indian snacks, usually served with a few chutneys, like coconut chutney or mint chutney, or even with sambar.

There are quite a few versions of vadai* - masala vadai, keerai vadai, ulundhu vadai and so on.
* Not to be confused with 'vadaam' - vadaam is a different class of food, falls closer to the pappadam, appalam category.

There are quite a few versions of Bonda: some use chickpea flour batter to coat the mashed vegetable filling (like potato bonda), some just use urad dal or rice flour.

The bonda in this recipe is sometimes referred to as Mysore Bonda, uses just urad dal and no filling. The batter used for this bonda recipe can also be used for vadai, with slightly different add-ons.
easy recipe bonda
Ingredients
1 cups urad dal, soaked for about 1 hour
3 Tbsp cup finely diced fresh coconut
1 Tbsp whole black pepper
1/2 tsp asafoetida powder
4-5 curry leaves, finely chopped
salt to taste
oil for frying

Preparation
  1. drain the soaked urad dal as best as possible, grind it into a fluffy paste, no lumps - usually, I let it run in the wet grinder for about 30-40 mins; there is no need to add water as the soaking absorbs enough water, and any excess water sort of ruins the batter; the consistency is sort of like a fairly thick pancake batter but fluffier and held together better
  2. add the coconut pieces, black pepper, asafoetida, salt and curry leaves, stir the batter well; set aside
  3. heat oil for frying (about 370-375 F) seems to work; in general, when the oil starts to shimmer and wisps of smoke appear, I just try to drop a tiny piece (a 1/2 cm diameter ball) of the batter - if it rises up to the surface within 2-3 seconds and then browns in about 6-8 secs, i believe the oil is hot enough for frying the first batch
  4. drop roughly shaped balls of the batter, a few at a time without crowding the pan; the outside should gradually get crisp and brown while the inside cooks well; if the oil is too hot, outside crisps up fast and the inside stays raw; if the oil is not hot enough, the result is usually a greasy and unsavory bonda
  5. after each batch, it is a good idea to test the oil for its hotness before throwing in the next batch; usually, a perfect mysore bonda has crispy crunch on the outside and a spongy, soft inside that is completely cooked
  6. serve warm with chutney, along with hot tea or coffee; this is one of my favorite tea time snacks :-)

Labels: , , , ,

Sunday, November 19, 2006

pepper rasam

Rasam is one of my favorite comfort foods. There are several different rasam recipes like lemon-lime rasam, paruppu rasam, pepper rasam, thippili rasam and so on. Some use toor dal, some don't. Some use tomatoes, some don't. Some are pretty watery like a thin soup, some are hearty and thick. The spices used make one rasam different from the other, but, in general many families in south india have their own special rasam recipe, and have their own secret "rasam powder" formula:-)

easy recipe pepper rasam

This pepper rasam recipe is quick and easy to make and is one of my favorites. I like to just drink it sometimes, especially when I have a stuffy nose and head, but, it makes a nice simple meal with rice and sides like simple potato side or snakegourd side or snake beans and zuccini side.

Ingredients easy recipe rasam
4 Tbsp tamarind concentrate
1 medium tomato, diced
2 Tbsp canola oil (or ghee, i find ghee tastes better)
2 Tbsp chopped cilantro for garnish
4-5 curry leaves, chopped, chiffonade (optional)
1 Tbsp whole black pepper
4-5 dry red chilies
4-5 garlic cloves
2 tsp cumin seeds
2 tsp brown sugar
salt to taste
water as needed
tempering:
1 tsp mustard seeds
1 tsp cumin seeds

Preparation
  1. in a mortar and pestle, pound the cumin, black pepper, dry red chilies and garlic into a fairly smooth powdery paste
  2. if using fresh tamarind, shell it, soak it in hot water and extract pulp, discard seeds strings and skin, if any
  3. in a cooking pot, heat the oil/ghee and add the tempering*, when mustard seeds stop spluttering, add the pepper paste from step 1 and the tomatoes and sautee for a minute or so till the spices bloom
  4. add about 4-6 cups of water, tamarind pulp/concentrate, brown sugar, salt to taste; let it simmer till tomatoes are cooked well and the rawness of the tamarind is gone; amount of water determines how thin or thick the rasam turns out
  5. off heat, garnish with cilantro/curry leaves; serve warm with basmati rice, or as an appetizing soup
    * traditionally, tempering is done last, in a separate tempering "ladle" of sorts and poured over the hot dish and allowed to sizzle; this works best, even tastes a little better; but, doing the tempering first has become a short-hand procedure for some of my cooking as I find it more convenient

Labels: , , ,

Thursday, November 16, 2006

simple potato side

This is another one of my favorite sides to have with rasam and rice whenever I feel like eating some hearty comfort food.

Ever since I read that potatoes are close to perfect food, with potential health benefits, I try to make it at least once a week. A lot of times, I use potatoes as thickener in some of my curries - pressure cook them, mash them to a smooth paste and add them to the curry that needs thickening.

easy recipe simple potatoes

Ingredients
4 medium Russet Burbank ('Idaho') potatoes *
few cilantro leaves for garnish
2-3 tsp cayenne pepper
1-2 tsp paprika powder
1 tsp turmeric powder
1/2 tsp asafoetida powder (optional)
salt to taste
tempering:
1 tsp mustard seeds
1 tsp cumin seeds
1 tsp split dehusked urad dal
2 Tbsp canola oil
---
* usually, i pressure cook a bunch of potatoes and crumble them to largish chunks and freeze them for later use; it saves time to just thaw them in the microwave and use as a thickener, or for making this dish

Preparation
  1. pressure cook the potatoes, or cook them on stovetop till they are cooked through but not too soft; peel skin; roughly crumble them to fairly largish chunks;set aside
  2. heat oil in a pan, when oil shimmers, add the tempering ingredients - urad dal first, and when it turns brown add the mustard seeds and when it starts to spatter, add the cumin seeds; keep a screen lid handy to prevent a mess from mustard seeds jumping everywhere
  3. add the crumbled potato chunks, turmeric, asafoetida, paprika, cayenne, salt; stir well to coat the potatoes; leave heat on medium-low and let the potatoes develop a sort of crust from the oil and the spice coating; stir occasionally to brown evenly
  4. off heat, garnish with cilantro, serve warm with roti or rice

Labels: , , ,

Wednesday, November 15, 2006

rava onion dosai


Traditional dosai batter requires soaking, grinding, fermenting; but, this rava onion dosai batter is sort of quick to make and keeps for a day or two in the fridge.

Ingredients
2 cups sooji rava, dry roasted to a light brown color
1 cup rice flour
1 cup all purpose flour (or, maida)
1 cup finely minced onions
4 Tbsp chopped curry leaves and cilantro (optional)
3 green chilies finely chopped (optional)
salt to taste (say about 1 Tbsp, more or less)
3 cups water (more or less)
oil as needed

tempering (optional) :
heat 1 Tbsp oil in a pan, add 1 tsp mustard seeds and 1/2 tsp cumin seeds; when mustard seeds spatter, remove from heat and add it to the rava onion dosai batter, stir well.

Preparation
  1. combine all the ingredients, except water, in a bowl
  2. add a little water at a time and start kneading into a dough; gradually add more water and stir or knead well till there are no lumps and a fairly thin batter is formed
  3. heat a non-stick pan on medium, pour about 1/2 cup of batter and swirl it around till it forms a thin layer
  4. when bottom side is cooked, flip and cook the other side of the dosai
  5. brush the pan with oil as needed to ensure dosai lifts off the pan without struggle
  6. rava onion dosai is a soft crepe type dish, it usually does not get very crisp and is best eaten hot
  7. serve warm with mint chutney, or coconut chutney, or even 'dosai milagai podi' (a versatile lentil+spices powder)


easy recipe dosai

Labels: , , ,

Monday, November 13, 2006

Thai-inspired Yam Curry

thai-yam-curry
I think Yam is sometimes confused with Sweet Potato here - at least at the grocery store, the yam they sell tastes just like sweet potato.

The yam I remember from my younger days in India was a lot different - more roundish (not elongated), yellowish inside (not orange), neutral flavored (not sweet), with tough brown skin (not thin pinkish skin).

In any case, this yam recipe is inspired by thai flavors.

Ingredients
1 yam, cut into chunks
1 bunch spring onions, cut into 4" long pieces
1 bunch baby bok choy, cleaned, roughly chopped
2 tbsp oil
salt to taste
easy recipe thai yam curryfor sauce:
2-3 Tbsp tamarind concentrate or, fresh tamarind
1 medium shallot
1/2 stalk lemon grass
4-6 fresh chilies (i used red balloon chilies from my garden)
2" piece of ginger
1 Tbsp brown sugar (optional if yam is sweet)

Preparation:
  1. if using fresh tamarind, shell it, soak it in hot water and extract pulp (remove the seeds) to get approximately 8 Tbsp; combine the sauce ingredients and blend it to a smooth paste
  2. heat oil in a pan, add the yam chunks, some salt, some water and cook till half-done
  3. then add the sauce, bok choy and some more water, cover and cook till yam is cooked through but not mushy
  4. add the spring onions, stir well, adjust salt to taste and cook for a few minutes till spring onions soften
  5. serve warm with steamed rice

easy recipe thai yam curry

Labels: , , , ,

Friday, November 10, 2006

Indian Baby Eggplant Curry


baby eggplant curry indian


We harvested the last of the calliopes and Ichiban (my two favorite eggplant varieties) from our garden a few weeks ago even though they were just baby-sized. We didn't think the plants would last long enough to ripen to full size with this cold wet weather.

The small Indian Eggplant would be perfect for this dish. Slit and stuff with the spice-paste/masala and cook in tomato-based sauce.

ndian baby eggplant


Ingredients
6 baby or indian eggplant, each about the size of a grade A large egg
1 can of diced tomatoes
1 medium yellow onion, diced
chopped cilantro leaves for garnish
3 Tbsp canola oil
salt to taste
water as needed
spices for cooking:
1 Tbsp coriander powder
1 tsp paprika powder
1 tsp cayenne pepper powder
1 Tbsp brown sugar
for masala paste:
1/2 medium yellow onion coarsely chopped
2" piece of fresh ginger, coarsely chopped
6 cloves of garlic, peeled and chopped
1 Tbsp garam masala
1 Tbsp brown sugar

Preparation
  1. in a blender, combine the ingredients for the masala paste, with 1 Tbsp of oil and blend it to a smooth paste; set this masala paste aside
  2. slit the baby eggplants up to about 1/2 cm from the stem, without breaking up the stem, into roughly lengthwise quarters
  3. gently separate at the slits, while holding the stem tight, and slather on the masala paste into the slits of the eggplant, in a thin layer, taking care not to break apart the eggplant; set aside
  4. heat 2 Tbsp of oil in a pan, add the diced onions and a pinch of salt and any remaining masala paste left over after slatherting/stuffing the eggplants; sautee till onion turns translucent
  5. add the can of diced tomatoes and the rest of the spices, stir till well-incorporated to form a gravy of sorts, adjust salt to taste
  6. gently place the 'stuffed' eggplants into the gravy so they are mostly submerged in the gravy, cover and let it simmer over medium low heat till eggplant changes color and looks done - cooked through but not mushy, adding water as needed
  7. when eggplant looks done, off heat, stir gently, garnish with cilantro and serve warm with rotis or naan or basmati rice


Labels: , , ,

Wednesday, November 08, 2006

Green Tomato Dal (Koottu)


With the cold setting in, our vegetable garden is withering, so, we had to harvest all the green tomatoes. I have not found green tomatoes sold in stores (tomatillos aplenty, of course), but, maybe I haven't been looking in the right stores...

"Dal" (dhaal) in general is a wonderful side or main dish, served with rotis or rice, or eaten as a soup by itself. Dal dishes can be made with either moong dal or toor dal, although moong is my favorite. I love the versatility and heartiness of moong dal.

"Koottu" is a south indian term referring to a certain style of making sides - while this recipe is strictly not a traditional koottu, I use the terms dal and koottu interchangeably as my method of preparation of each sort of overlap.

Instead of green tomato, any suitable vegetable can be used to make this koottu/dal: i like opo squash, chayote squash, red ripe tomatoes, ash gourd, bottle gourd, ridge gourd, or even tomatillos as alternatives.


Ingredients
2 cups dry split yellow moong dal (not the whole green moong)
2-3 medium green tomatoes,cut into chunks
1 medium yellow onion,diced
3-4 green chilies, finely chopped
2 Tbsp fresh grated ginger
1 Tbsp chopped fresh mint leaves

2 Tbsp cilantro/coriander leaves for garnish
2 Tbsp fresh or bottled lemon juice
3 Tbsp grated coconut (dry or fresh)*

1 tsp turmeric powder
1/4 tsp asafoetida powder (optional)
2 Tbsp oil
salt to taste
water as needed

for tempering
1 tsp mustard seeds
1 tsp cumin seeds
1 tsp split (dehusked) urad dal - optional
*can be omitted without seriously compromising the outcome

Preparation
  1. pressure cook the moong dal, or just boil 6 cups of water and add the moong dal and let it cook till it gets mushy; set aside
  2. heat oil in cooking pot, when oil starts shimmering, add the tempering - urad dal first, and when it starts turning light brown, add the mustard seeds, then cumin seeds; mustard seeds will spatter, keep a screen lid handy and cover the pot, turn the heat down if needed so as not to burn the tempering
  3. when spattering dies down, add the chilies, ginger and onions, a little salt, turmeric, asafoetida and sautee; the smell of ginger and onion sauteeing after the tempering is very appetizing
  4. then add the green tomato chunks, a little water, cover and let it cook till green tomatoes are a little soft
  5. add the cooked moong dal, coconut, more water if it is too thick or dry, adjust salt to taste and cover and simmer till green tomatoes are well done, but not mushy, and the dal has the consistency of a thick soup
  6. off heat stir in lemon juice and garnish with cilantro leaves
  7. serve warm with basmati rice, or roti, assorted indian achar (pickle) or pappadam
  8. alternately, cook the dal with more water so it has a hearty soup consistency and just have it as a soup - makes a great filling, healthy dinner on cold winter nights

Labels: , , , , ,

Monday, November 06, 2006

Ginger Tofu Eggplant

eggplant ginger tofu soy sauce


Combination of eggplant and tofu, with ginger and garlic is quite heavenly.

Pan-fried or baked tofu, infused with flavors from marinating overnight, makes a great addition to simple vegetable dishes. It can be made ahead of time and refrigerated for up to a week, or frozen for a little longer.  I like the Extra Firm tofu and bake it so the texture gets chewy and firm.

Marinate the tofu cubes in a simple ginger-soy sauce-chili marinade and leave it in the fridge overnight. Bake in a 375°F oven for about 10-12 minutes.

Ingredients:
1/2 large globe eggplant, cut into fairly big cubes
8 to 10 cubes of pan-fried marinated tofu
1 cup coarsely chopped spring onions
1 Tbsp fresh grated (or julienned) ginger
2 to 4 cloves garlic, sliced
1 Tbsp crushed red pepper
2 Tbsp oil

1 tsp cornstarch + water as needed for thickening the sauce

garnish:
3 Tbsp chopped cilantro for garnish
3 Tbsp finely chopped spring onions for garnish
2 tsp sesame seeds (toasted, if preferred)

ginger-soy-sesame sauce:
2 Tbsp fresh grated ginger
4 Tbsp light soy sauce
2 Tbsp red wine vinegar
2 Tbsp tamarind concentrate
2 tsp cayenne pepper (less if you prefer)
1 Tbsp brown sugar
1 tsp sesame seeds (toasted, if preferred)
1 finely chopped green chili (optional)
1 Tbsp black bean paste (optional)

Preparation:
  1. Mix the sauce ingredients and set aside
  2. Heat oil in a wok or pan, add the garlic, ginger, saute briefly, then add the eggplant chunks and crushed red pepper
  3. Add the sauce and stir well to coat and cook till eggplant is almost done - cooked through but not mushy; add the pan fried tofu chunks and toss it around a bit till sauce is well incorporated and eggplant is done; thicken with corn starch if the sauce is too runny
  4. Garnish with chopped sesame seeds, spring onions and cilantro; serve warm with steamed rice

Labels: , , , ,

Marinated Pan-fried Tofu


This is a versatile ingredient in many of my favorite dishes that I decided to dedicate one post to it entirely.

I like Extra Firm tofu for this; the size of the chunks and the marinade depends on my mood and the dish I want to use them in; I usually make a few batches of marinade and reserve some for later use or to be used as sauce as in ginger-soy-eggplant-tofu dish

Here are a couple of options:

ginger-soy-sesame marinade:
2 Tbsp fresh grated ginger
4 Tbsp light soy sauce
2 Tbsp red wine vinegar
2 Tbsp tamarind concentrate
2 tsp cayenne pepper (less if you prefer)
1 Tbsp brown sugar
1 tsp sesame seeds (toasted, if preferred)
1 finely chopped green chili
1 Tbsp black bean paste (optional)


red-chili-soy-sesame-oil:
3 Tbsp red chili paste (or sambal oelek)
1 Tbsp sesame oil
2 Tbsp soy sauce
1 Tbsp mirin

Preparation
  1. cut the tofu into chunks and marinate for 10-15 minutes, if desired
  2. alternately, add the marinade and refrigerate it overnight or for about 8 hrs - shake it once or twice to spread the marinade around
  3. heat about 2 Tbsp oil in a pan, place the tofu cubes without crowding the pan too much, leave heat in medium and pan fry till sides turn brown - turning the tofu chunks as needed so they are evenly fried on all sides
  4. pan-fried tofu refrigerates well - lasts about 4-5 days, but freezes fine too - lasts about a month or so (i've not stored it longer than that, so am not sure if it will last longer...)
  5. toss it with noodles or in ginger-soy-eggplant-tofu dish

Labels: , , ,

Thursday, November 02, 2006

dosai : rice crepes


There are quite a few variations of dosai and i hope to be posting a few of them over the next few weeks... this is one of my favorite 'tiffin'/snack items.

This recipe here involves soaking, grinding and fermenting rice and urad dal - which is the traditional recipe i learnt from my mom. Some other recipes using other methods and ingredients like semolina are quicker - like rava dosai, maida dosai etc. and i hope to be sharing them here soon.
easy recipe dosai easy recipe dosai
Ingredients
for dosai:
1 cup urad dal (de-husked, i.e., black skin removed)
4 cups parboiled rice (sometimes sold as 'puzhungal arisi' in indian stores)*
water as needed
salt to taste
oil for greasing the pan

*i've tried basmati rice, and jasmine rice instead and they do turn out alright for home-made dosai, but, i prefer puzhungal arisi whenever it is available

Preparation
  1. soak urad dal and rice separately for about 4 hours; i've tried soaking for 6-8 hrs or even overnight, and didn't find a significant difference in how the dosai turned out eventually; however it might make a difference in helping the grinding process - when soaked longer, many standard blenders handle grinding better than otherwise
  2. drain the water, grind urad dal in wet grinder (or heavy-duty blender) and let it get soft and fluffy (usually i let it run for about 30-35 mins in the wet grinder); set aside in a large-ish bowl
  3. then drain and grind the rice as well, and add it to the bowl with the ground urad dal; use very little water for grinding, preferably leave the batter thick and sort of sticky
  4. cover the bowl and leave it in a warm place for several hours or overnight till it ferments well - you can smell the sourness (sort of like sourdough smell) and notice the rise in the dough/batter; i've found that fermentation makes a difference in taste and texture of dosai
  5. when ready to make the dosai, stir the batter thoroughly, scoop a few ladles out onto a separate bowl, add a little water at a time to get to a pouring consistency, add some salt to taste - experiment with this 'diluted' batter's consistency till you find the best one that helps spread the batter evenly and without struggle;
  6. heat a non-stick pan or griddle, pour about half a cup of dosai batter and spread it around to form a nice round shape; when underside seems done (the sides usually start lifting from the pan), flip the dosai and cook the other side
  7. i've found the need to grease the non-stick pan between dosais to help them come off the pan without much struggle; also, i save the thick fermented dough/batter as-is in the fridge for later use; i find this more convenient than diluting the whole batch of fermented dough/batter and saving it for later
  8. serve warm dosai with mint chutney, or coconut thogayal and sambar

Labels: , , ,

Newer›  ‹Older