Related Posts Widget for Blogs by LinkWithin

Thursday, August 31, 2006

Chutta Kathrikkai pachadi - smoked aubergine relish


This is a little tedious to prepare, but, I find it well worth the effort. It is a South Indian dish usually served on the side with rice and Molagoottal (milagoottal, milagu kootal). But, I just enjoy it as the main dish accompanied by chapathi/roti or rice.

Ingredients
4-6 Tbsp tamarind concentrate
1-2 Tbsp brown sugar
1-2 dry red chilies crushed
salt to taste
2 Tbsp oil for tempering
1/2 cup water (more if you want the dish a bit runny)
5-6 curry leaves (murraya koeniigi) for garnish
2 Tbsp chopped cilantro for garnish
a pinch each of of mustard seeds, urad dal and cumin seeds for tempering
a pinch of asafoetida
1/2 medium yellow onion, sliced
about 3 medium calliopes (or any favorite eggplant variety), charred, as in picture below


Smoking or charring the eggplant is the best part of this recipe, the flavor is unmistakable. It is so much easier with a gas stove, now that I have it, and a steel wire roaster.

Slice the eggplant and make some slits on the cut side with a knife; brush the eggplant with some oil; hold it over the open flame and turn them around as needed so they get evenly charred and cooked inside.

Preparation
  1. smoke or char the eggplants either over open fire or on a grill or in the broiler; set aside to cool a little
  2. when cool enough to handle, roughly chop the charred eggplant; i like it chunky; but, you can also run it in the blender for a smoother texture
  3. heat the oil in a pot, add the tempering; when mustard seeds splutter and die down, add the dry red chilies, asafoetida, and the chopped onions and sautee till onions turn translucent
  4. then add eggplant, water, tamarind, brown sugar and salt to taste; stir well.
  5. cover the pot and let it simmer on medium heat for about 8-10 minutes; stir as needed.
  6. adjust the taste to your liking: i prefer it sour-and-sweet so i sort of adjust the tamarind and brown sugar till they seem balanced and to my liking :-)
  7. garnish with curry leaves and cilantro; serve warm or cool, with chapathi, naan or rice.

Labels: , , , , ,

Wednesday, August 30, 2006

Snake Beans and Zucchini

easy recipe poduthuval indian cuisine snake beans zucchini vegetarian
I like long chinese green beans also referred to as snake beans sometimes. They have a slightly different flavor than the regular green beans and are usually about a foot long.

This poduthuval is a South Indian side dish, usually served with (rice and sambar) or (rice and rasam).

easy recipe poduthuval indian cuisine snake beans zucchini vegetarian
We had a huge zucchini growing in our garden (photo) and this recipe was a good way to use that zucchini. It is quick to cook, but takes a bit of an effort to chop the veggies.

Also, Chana Dal(Cicer arietinum) is pretty healthy, and is often confused with yellow split peas, but is supposed to be a relative of chickpeas; it doesn't cook up to a mush like other dals or lentils, and holds it shape firm and cooks up pretty quickly.


Ingredients
1-2 standard zucchini (or half a large zucchini as in picture above)
15-18 snake beans (long green beans)
7-8 tablespoon chana dal (can use up to 1 cup, if you like this dal)
4-5 Tbsp grated coconut (dry works fine, or can use fresh)
1-2 green chilies
5-6 curry leaves (murraya koenigii) for garnish
1 tsp mustard seeds, a pinch of cumin seeds for tempering
1 Tbsp oil for tempering
water, as needed for steaming
salt to taste

Preparation
  1. Soak the chana dal in water for 5-10 mins
  2. While chana dal is soaking, peel, remove inner pulp and seeds, and dice the zuccini
  3. Cut the long green beans into 1" pieces
  4. blend the green chilies and coconut into a coarse dry powdery paste and set aside
  5. heat oil in a pan, add the mustard and cumin seeds for tempering; mustard seeds will spatter - use a screen lid for the pan to prevent a mess
  6. when the spluttering dies down, add the chana dal and some water, cover the pan and let the chana dal cook till it gets a little soft; use approximately about 1 cup water for 1 cup chana dal
  7. add the chopped green beans; cover the pan and let the green beans cook in medium-low heat till they are almost done
  8. then add the zuccini, salt, a tablespoon or so of water if needed - look for a nice steamed texture where veggies retain their shape but are still cooked enough but not mushy
  9. if water turns out to be too much, just drain it out with a spoon as needed
  10. when veggies look about done, add the coconut+green chilies blend, stir it in, turn off heat and garnish with curry leaves
  11. serve warm with rice and sambar or rasam

Labels: , ,

Monday, August 28, 2006

Sambal Terong - Spicy Eggplant delicacy

sambal terong


Although I like to call it sambal terong, this is not a traditional recipe. I varied the ingredients for the sauce a bit as I don't like shrimp paste or fish paste.

I love eggplant and we have a ton of yield from our garden this year - 4 varieties - calliopes, ichiban, black beauty and kamo. I used 2 ichiban, 1 kamo and 1 calliope but, i think sticking to just one variety, say, ichiban would be good too.

I prefer to bake the eggplant, rather than frying. Brush with oil and bake in a 425°F oven for about 8 minutes, then top with sauce and finish baking for another 2 or 3 minutes.

This dish is wonderful served at rom temperature as well.

Ingredients
2-3 ichiban eggplant, about 7"-8" long
oil for frying (optional)

for the sauce
1 medium tomato, seeded, diced
4 Tbsp sambal oelek (or any chili paste)*
2 Tbsp kecap manis
1Tbsp sushi vinegar
1 Tbsp tamarind pulp
1 Tbsp plain white vinegar
4-5 cloves of garlic
salt to taste (optional if using sambal oelek)

*basic chili paste can be made as follows:
soak about 10-12 dry red chilies in hot water for about 10 mins, then drain and pound it in a mortar and pestle or blend it in a blender, adding oil if needed.

Preparation
  1. slit the ichiban in half lengthwise, and then half cross-wise again to make 4" slices and set aside; you may salt it and drain it if you want to remove the bitterness. I find the ichiban pretty tasty even if i omit this step.
  2. blend all the sauce ingredients in a blender and bring it to a simmer in a sauce pan, turn off heat,adjust taste as desired, and set aside
  3. heat oil for frying, and fry the eggplant slices in batches till they are golden brown and cooked through; alternately, bake in 425°F oven for about 8 minutes
  4. drain the eggplant slices, and set aside till all the slices are fried
  5. arrange the fried eggplant slices in a serving dish and spoon the sauce over it as desired
  6. serve warm or cold, with jasmine rice or sweet rice; sauce can be served on the side if desired.

Labels: , , ,

Wednesday, August 23, 2006

Red Beans & Rice

red beans and rice easy recipe creole seasoning

I love rice; and I love kidney beans; and this dish sort of has become one of my favorite "one-pot dish" because it is quick and easy, and just one pot to clean up after cooking.

My favorite way of making this involves sautéeing celery, onions, garlic and tomatoes till aromatic and then throwing in the red beans and rice and cooking them together in water or stock till done, adjusting seasoning per availability and mood.


Ingredients
1-2 standard celery stalk, diced finely
1 medium yellow onion, diced finely
3 medium tomatoes, diced finely
2-3 cloves of garlic (optional)
2 cups cooked red kidney beans
cilantro for garnish
2 cups jasmine rice (or any long grain rice)
1Tbsp canola oil
4.5 cups water


easy recipe red beans and rice
spices: adjust to taste
1 tsp paprika

1 Tbsp creole or cajun seasoning mix (includes salt)

1 small can jalapeno-tomato sauce (El Pato brand is what i like - small green can)
1/2 Tbsp chili powder
1 Tbsp Taco seasoning
1 Tbsp brown sugar

Preparation
  1. Heat oil in a large enough pot, add the trinity-viz., celery,onions, tomatoes - and sautee
  2. add the raw rice and sautee a bit more
  3. wash the can of kidney beans and add it to the pot
  4. add the spices and water to the pot
  5. when water starts to boil, lower heat and let it simmer till rice is done and all the water is absorbed; adjust the spices and salt to taste
  6. garnish with chopped cilantro; serve warm

Labels: , , ,

Tuesday, August 22, 2006

Fried Cauliflower (Gobi) in Manchurian-Orange sauce


This is just my version of manchurian sauce as the original manchurian sauce is supposed to be a secret recipe and I didn't try to find it. I've tried to get the flavors from staples I have in my kitchen. This recipe is open for a lot of variation and experimentation with the sauce flavors.


Ingredients
For the sauce
4-5 Tbsp tamarind concentrate
1/2 cup soy sauce
2 Tbsp worcestershire sauce
4 Tbsp no-HFCS tomato ketchup
1 tsp white pepper powder (less if you like, adjust to taste; can substitute black pepper powder)
3-4 Tbsp plain white vinegar
5-6 Tbsp of pounded ginger-garlic-dry-red-chilies mixture (dry red chilies here are optional)
2-4 tsp orange zest (more if you like the orange flavor)
1 Tbsp corn starch
1 tsp brown sugar (optional)
2 cups (about 12-16 oz) water

For the batter
either use packaged tempura mix
or make a thin batter of your choice
or combine
1/2 cup chickpea flour (besan)
1/2 cup rice flour
2 Tbsp corn starch
salt to taste
water as needed to make a thin batter


1 medium head of cauliflower, cut into florets- yields about 4 cups of florets
3-5 fresh mild green chilies, cut into 1 inch pieces (optional)
1 green or yellow bell pepper, chopped (optional)
3-4 cups canola oil for frying (depends on the pot used for frying)
3-4 Tbsp canola oil for sauteeting
chopped cilantro and sliced green chilies for garnish

Preparation
  1. add enough oil in a pot for frying, and let it heat up to 350°F
  2. meanwhile, make the batter in a good sized bowl
  3. add the cauliflower florets and green chilies to the batter in the bowl and coat all the florets uniformly and set aside
  4. set aside a plate/dish with a few paper towels for draining the fried cauliflower
  5. Sauce: in a separate saucepan, mix all the ingredients except corn starch for the sauce and bring it to a boil, turn down the heat and let it simmer on low till flavors meld
  6. By now oil should be ready for frying; without crowding the pot, fry in batches the florets coated with batter (and chilies, if using them) till they are crisp and golden brown; drain and collect on the paper towel lined dish in step 4
  7. taste the simmering sauce and adjust the flavors - add more pepper powder or soy sauce as needed; if too salty, balance with more sour or sweet flavors using tamarind pulp or vinegar or brown sugar
  8. add the chopped pepper to the sauce, if using, and simmer till peppers are softened
  9. in a small bowl, dissolve the corn starch in enough water to form a thin paste, no lumps; add the corn starch paste to the simmering sauce and stir to thicken the sauce; (add a little at a time and stir constantly to make sure sauce consistency is not too thick)
  10. add the fried cauliflower (and fried chilies, if using them) to the simmering sauce and stir gently till well incorporated
  11. Off heat, garnish with chopped cilantro and sliced green chilies; serve warm with cooked jasmine rice

Labels: , , , ,

Monday, August 21, 2006

Pad Thai

easy vegetarian pad thai

This is a dish I love, but, since i don't eat shrimp or oyster sauce or fish sauce or any of the 'traditional' ingredients, I had to sort of make up my own version of this dish, which turns out much to my liking usually:-)

I like the tanginess from the tamarind, but, experiment with this - start with a little of each ingredient - and blend the flavors till you find that the sauce is to your liking.


Ingredients
For Sauce
3-4 Tbsp tamarind concentrate (sold in most asian stores: plastic can with blue lid)
2 Tbsp sushi vinegar
1 tsp mirin (optional)
1-2 tsp brown sugar
2-3 Tbsp vegetarian soy sauce (adjust to taste)
1 Tbsp peanut butter
1 Tbsp red chili paste (add more or less, to taste)

For the noodles
1 pkg rice noodles (pad-thai-style noodles sold in asian grocery stores)
4-5 sliced green chilies
2 medium carrots julienned
2 cups shredded napa cabbage
1 cup bean sprouts
1/2 medium onion sliced thin
2 inch piece of ginger, julienned
1/2 pkg extra firm tofu, cut to desired size cubes
10-12 petit green beans - optional (sold in frozen foods section, thaw before using)
1 egg (optional)
1/2 cup peanuts, coarsely chopped, or pounded in mortar and pestle
2-3 Tbsp canola oil (or sesame oil)

Preparation
  1. Mix all the ingredients for sauce, taste it and adjust as you like and set aside (i like it to have pronounced and identifiable tanginess, mild sweetness and adequate saltiness - adjust tamarind concentrate, brown sugar and soy sauce accordingly)
  2. cook the pad thai noodles per package instructions; drain and set aside
  3. heat oil in a pan or wok; add the tofu and sautee till browned
  4. remove tofu from pan; then, add the ginger, green chilies and sautee for about 30-40 seconds, then add the onions and sautee till translucent
  5. add the carrots and green beans to the pan and stir fry till slightly softened
  6. add the napa cabbage and stir fry some more
  7. if using the egg, push the veggies to the side in the pan, add the egg and scramble it in the pan
  8. now add the drained noodles, bean sprouts, tofu, and the sauce a little at a time to avoid ending up with a soggy dish; stir till well incorporated
  9. garnish with chopped peanuts, cilantro and sliced green chilies; serve warm with sambal oelek on the side (optional)
this usually makes enough for 2 people for dinner, plus leftovers for next day's breakfast :-)

Labels: , , ,

Friday, August 18, 2006

Soya Chunks (Nutrela) Curry

easy recipe vegetarian curry indian soya chunks soy


I like incorporating soya chunks, seitan, and other forms of packaged soya products in my cooking, for the protein they provide.

Nutrela is sold in most Indian stores in a pre-packaged box as dry round nuggets. Just need to soak them in really hot water for about 10-15 minutes till they soften and the soya chunks are ready to be added to any food.

Ingredients
4 medium tomatoes or 1 can of diced tomatoes
1 medium onion thinly sliced
1 yellow (or red) bell pepper
2 medium potatoes cooked and mashed
8 leaves of mint (optional)
2" piece of fresh ginger
6 cloves of garlic (more or less to your taste)
3-4 dry red chilies
1/2 package of Nutrela soya chunks
2-3 Tbsp Maggi Tikka paste (to suit your taste)
3 Tbsp canola oil
sliced green chilies and coriander for garnish
salt to taste

easy recipe vegetarian curry indian soya chunks soy nutrela

Preparation
  1. Soak the Nutrela soya chunks in a bowl of very hot (almost boiling) water and set aside for 10-15 mins till it softens (leaving it soaking longer won't hurt the soya chunks)
  2. Pound the ginger, garlic, dry red chilies and mint in a mortar and pestle; or just blend it coarsely in a blender or food processor
  3. Heat the oil in a pan and add the sliced onion and sautee till translucent
  4. Add the ginger,garlic,dry red chilies, mint mixture to the pan and sautee till fragrance is released
  5. add the tomatoes and the tikka paste to the pan and sautee till the oil releases
  6. squeeze out the water from the Nutrela soya chunks and add them to the pan
  7. add about 1.5 cups of water (or more if you want a thinner curry), salt to taste, and the mashed potatoes and let it simmer for about 10 minutes
  8. garnish with sliced green chilies and chopped fresh cilantro/coriander leaves
  9. serve it warm with Naan or Green rice or just plain cooked basmati rice

Labels: , ,

Tuesday, August 15, 2006

Kadhi (Karhi) with Naan


This is a Gujarathi dish that I have sort of adapted to my taste. I added pakoras to the kadhi, but, any other vegetable like bell peppers or even chick peas would be good, or just leave it plain and unadorned.

The pakoras can be made ahead and then simmered with the karhi, with a few crunchy ones added as garnish right before serving.

Kadhi/Karhi is a versatile dish: it can be served as a side with any of the Indian flat breads, especially good with home-made naan; or even with rice; or even used as a dipping sauce for chips and fresh veggies.


Ingredients
3/4 cup chick pea flour (besan)
1 cup yogurt
3 cups water (more if you want the kadhi thinner,less if you want it thicker)
2 Tbsp lemon juice
10-12 pieces of pakoras
1/2 cup finely chopped medium yellow onion
1 Tbsp finely chopped green chilies (optional)
2 tsp turmeric powder
1 Tbsp canola oil (or ghee)
salt to taste
5 curry leaves (murraya koenigii) for garnish

Preparation
  1. In a large enough bowl, mix the chick pea flour, yogurt, water, turmeric without any lumps and set aside
  2. heat oil in a pan, sautée the (chilies and) onions till onions turn translucent
  3. add the mixture from step 1 to the pan, and some salt to taste
  4. boil the mixture on medium heat for about 15 minutes, stirring constantly, till it thickens and the raw flavor of the chick pea flour is gone
  5. the consistency is sort of close to a white sauce, but, you can have it thicker or thinner as you like
  6. now add the pakoras (or steamed veggies or cooked chick peas) and cook till pakoras/veggies soften a little
  7. add the curry leaves and cook for a minute or so
  8. remove from heat, add lemon juice and stir
  9. serve hot with home-made naan

Labels: , , , , ,

Monday, August 14, 2006

Mint and Spinach "Green" Rice

I love mint. I try to find ways to incorporate it in my cooking, especially since my garden is yielding a ton of mint this summer...

This is a simple, recipe, nothing fancy, nothing too spicy...


easy recipe vegetarian rice mint spinach


Ingredients
2 cups loosely packed mint leaves
2 cups loosely packed fresh clean spinach leaves
1" piece of ginger
5 cloves of garlic
2 Tbsp ghee (or butter, or, any oil of your choice)
2 cups finely chopped celery
2 cups cooked basmati rice
1 cup Nutrela soya chunks (optional)
salt to taste

Preparation
  1. If using Nutrela Soya chunks, dunk the chunks in very hot water and set aside for 10 minutes
  2. Pound the ginger and garlic in a mortar and pestle
  3. heat the ghee in a pan, add the ginger garlic and saute for about 30 seconds till it is fragrant
  4. add the mint to the pan and sautee till it wilts and releases its oils and aroma
  5. then add the spinach and toss it around till it wilts a bit
  6. if using Nutrela soya chunks, squeeze the water out of the soaked chunks and add it to the pan
  7. finally add the cooked rice and adjust salt to taste; serve warm
  8. to make it slightly more sumptuous and fancy, this can also be served with egg curry or kadhi or any other curry of your choice

Labels:

Saturday, August 12, 2006

Fried Aubergine in Miso sauce

easy japanese recipe vegetarian eggplant fried in miso sauce
This dish is best served hot. Eggplant is a favorite at home and this recipe is pretty easy to make.

Castor sugar is optional. I omitted it as i don't like it too sweet.

This recipe is adapted from a Japanese cookbook by Emi Kazuko

Ingredients
2 japanese eggplant - (i used 7" long ichiban from my garden)
3 Tbsp sake
1-2 Tbsp mirin
3 Tbsp soy sauce (or shoyu, if you have it)
3-4 dry red chilies, coarsely broken (remove the seeds or use less if you don't like the heat)
2 Tbsp red miso
5-6 Tbsp sesame/canola oil (or any other oil of your choice)

Preparation
  1. Cut the eggplant into 1" cubes
  2. sauce: mix the sake, mirin, soy sauce and red miso; set aside
  3. heat the oil in a pan
  4. add the dry red chiles and sautee for about 10 seconds or so (don't let it burn)
  5. add the aubergine/eggplant and toss it around to coat it with oil in the pan and let it get fried a little
  6. when eggplant looks partially cooked (firm, but not raw), add the sauce from step 2
  7. stir gently over medium-high heat until sauce coats the eggplant and cook till eggplant looks well done
  8. serve on the side with sushi tower or nigiri-zushi

Labels: , , ,

Friday, August 11, 2006

Kamo Aubergine and Tofu


I love aubergine (aka brinjal, eggplant). As I only had tofu and half a can of coconut milk at home, I decided to make this dish a few days ago: our garden is yielding at least 3 varieties of aubergines this year, and lots of super chilies and some not-too-bad cilantro, so I try to come up with recipes to use the fresh veggies from the garden...

This is sort of inspired by Malaysian cuisine...

Ingredients

1 aubergine - about 4" in diameter and about 3-4" tall (i used kamo variety from my garden)
1/2 package of extra firm tofu
3 green chilies
1/2 medium yellow onion
2 Tbsp of chopped cilantro for garnish
soy sauce
worcestershire sauce
black bean paste (optional)
5-6 garlic cloves
2 inch piece of giner
3-4 dry red chilies
sambal oelek (if have it handy)
5 Tbsp coconut milk (optional)
4 Tbsp oil

Preparation
  1. if you have a mortar and pestle, pound the garlic, ginger, dry red chilies to a paste and set aside; else, just blend it coarsely
  2. dice the tofu and aubergine; slice the onions finely
  3. heat oil in a pan, add the tofu cubes and 1Tbsp black bean paste and 1 tsp soy sauce and 1 tsp worcestershire sauce and sautee the tofu cubes till brown, turning the cubes over as needed; take the tofu out of the pan and set aside
  4. in the same pan, add the onions and ginger-garlic-dry red chili paste and sautee till it turns translucent; add a little more oil if needed for sauteeing
  5. add aubergine cubes and sautee them in the same pan
  6. when aubergines look paritally cooked, add the coconut milk, if using it
  7. add 2 tsp soy sauce, 1 tsp worcestershire sauce and some water so the dish is not too dry
  8. add sambal oelek, if using it
  9. let it cook till aubergine is not raw anymore and still firm, not mushy
  10. stir in the sauteed tofu and let it simmer together for a minute or so
  11. garnish with fresh green chilies (slit open or chopped fine) and some cilantro
  12. serve with nasi lemak (cooked rice in coconut milk) and sambal oelek on the side as in photo below; or just have it with plain steamed rice, or even roti or naan.

Labels: , , , ,

Sushi Tower

easy recipe sushi tower japanese cuisine
I love America's Test Kitchen and saw a recipe for Crab Tower. Since I don't eat crab, I decided to substitute it with sushi rice instead. It is simple but surprisingly very filling...

We had it for dinner a few days ago with some Fried Aubergine-Miso and some home-made dipping sauces on the side.

Assembly takes patience and some creativity :-) I didn't have a fancy ring mold, so, I cut out a 4" tubular piece from plastic soda bottle and used it for assembling the tower.

Ingredients

2 avocados
1/2 yellow bell pepper
1/2 red onion
1/2 cucumber
2-3 small red radish
1 cup sushi rice
1 tsp sesame oil
2 Tbsp sushi vinegar
1 tsp lemon juice
salt to taste

either a chef's ring mold
or a 4" plastic pvc mold

Preparation

  1. Start cooking the sushi rice per directions
  2. Meanwhile, mix together the sushi vinegar and sesame oil to form a sort of vinaigrette and set aside
  3. Chop the veggies - slice or dice
  4. Add 1 Tbsp of the sushi vinegar+lemon juice+sesame oil 'vinaigrette' to the veggies and set aside
  5. Slice the avocados, add lemon juice and salt to taste, mix gently and set aside
  6. When rice looks done, stir in the rest of the sushi vinegar-sesame oil vinaigrette
  7. Transfer rice to a cookie sheet to cool in front of a fan to make it shiny
  8. Assembly: Place the ring mold on the serving dish, spoon some avocado mixture at the bottom, then the sushi rice, then arrange the veggies on top. Try not to squish down the too much. Then, carefully remove the mold, to leave the assembled items standing in a "tower".
  9. Serve with Fried Japanese eggplant in Miso sauce

Thursday, August 10, 2006

Spicy Egg Curry

egg curry indian spicy boiled eggs


I like eggs. But, not when i can sort of taste and smell the raw eggs - like in cakes, mayonnaise, aioli etc. So, i usually end up making omelettes, fried eggs, pickled eggs and egg curry with eggs.

This is a simple recipe, but, to get some depth, i wanted the eggs to absorb all the rich flavors from the gravy, so i let it sit in the slow cooker overnight and woke up to the wonderful aroma.

Ingredients
for the gravy/sauce:
¼ cup chopped fresh ginger
10-12 cloves of medium sized garlic
1 medium size yellow onion
4 medium size tomatoes
5-6 dried red chilies (less if you don't like it hot)
1 star anise
2 inch piece of indian cinnamon bark
2 bay leaves (dried)
one can of diced tomatoes
6-8 hard-boiled eggs, shelled
4 tbsp canola oil (or any oil of your choice)
salt to taste
¼ cup chopped cilantro for garnish
2 tsp brown sugar
1 Tbsp curry powder (more if you like the spicy flavor)


Preparation
  1. blend all the ingredients for the gravy until smooth
  2. heat oil in a pan and all the blended items from 1.
  3. sautée until the oil releases, stirring occassionally
  4. add salt to taste, curry powder and brown sugar and stir well
  5. transfer the gravy from the pan to a slow cooker, and add the shelled hard-boiled eggs, making a few slits on the surface of the eggs
  6. leave the slow cooker on overnight making sure there is enough liquid so it doesn't burn and char
  7. if you don't have a slow cooker, just add the eggs to the pan in step 4., cover it and simmer it on low heat for about an hour, making sure there is enough liquid in the pan
  8. the gravy/sauce can be as thick or as thin as you want, so, add water accordingly
  9. garnish with chopped cilantro and serve warm with roti, naan, paratha, roti jala,Green Rice or plain cooked rice.

Labels: , , ,

Tuesday, August 08, 2006

About Delectable Victuals


What is Delectable Victuals about?

Food, health, fun, life.


What drives you to cook?

It's a Zen thing.

Cooking is more than just following a recipe and setting food on the table. It is a meditative practice and a creative outlet.

It is about exploring, experimenting with, and appreciating not just different ingredients and cuisines from around the world, but also the whole range of cooking methods, kitchen tools/apparatus, and scientific reasoning behind some of these.

It is the challenge of opening a cupboard and finding only a few things handy, and still managing to present a wholesome meal for the family!

It also gives some semblance of control over what we put in our bodies, gives the power to eat healthy.


What sort of recipes do you post?

Ummm... many kinds.
Mostly Vegetarian.
Mostly Healthy.
Mostly Indian, Asian, Ethiopian Central & South American, Italian, Mediterranean, African... still exploring.
Fusion Cuisine - my personal strength and preference.
Usually Quick & Easy to make.
The ones my family seems to relish...

Having grown up on Palakkad Cuisine, thanks to a very talented mom, my personal favorites still remain the mouth-watering wholesome south Indian traditionals.

However, Fusion Cuisine is my passion that drives me to try new things and enjoy the whole experience.

I believe healthy, wholesome foods need not be boring and bland.


Many of your recipes talk about "home garden vegetables". Are you an avid gardener?

Oh, by no means am I a savvy or expert gardener, but every year I get to dabble in home gardening as a learning endeavor. It is a rewarding yet humbling experience.

Over the past 15 years, from Spring until Fall every year, I try to putter around the small patch of backyard tending to whatever I managed to plant that year.

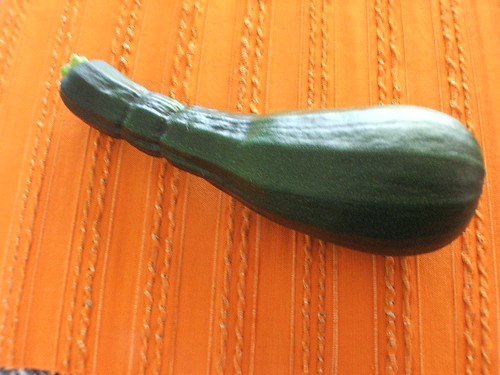
Besides the handful of fruit trees and flowering shrubs, there is a modest patch of shade-free garden where I grow the "home garden vegetables": a random selection that I get from a local nursery, mixing up the varieties each year.

It is extremely satisfying to harvest the handy vegetables and try to come up with interesting ways to make a delectable meal out of them. And, post those "home garden vegetables" recipes here.


Do you cook all the meals for your family?

Yes. Cooking is my own version of mindful meditation.

Sure there are days when I am too sapped to make a gourmet meal, when I just serve a bowl of quick and simple oatmeal porridge. What and how much I cook may vary from day to day, but, pretty much 99% of the time I prefer to cook with what's handy at home and what the mood calls for.


Do you always present food in a fancy way at your table?

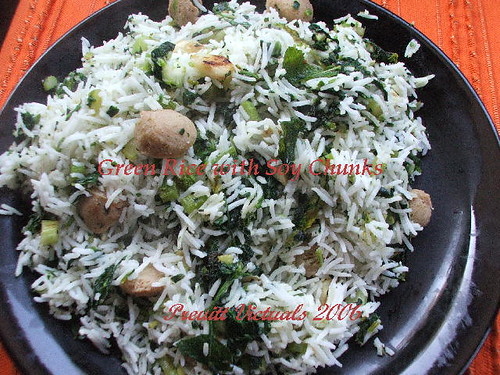
Food presentation in my mind is not just for fancy.  I believe we eat as much with our eyes and nose as with our mouths.

While nourishment is the primary focus of food intake - to keep the body and soul together - the sight and smell of food adds to our feeling of fullness and satisfaction.

Of course, I don't always indulge in presentation details with every meal, but, I like to try... The Art of Food Styling and Presentation is fascinating and I am always learning.

Kids keep me busy enough which possibly explains why I haven't spent enough energy and time on taking beautiful step-by-step styled food photos that I so admire in other blogs...


How do I find recipes I might be interested in?

There is a dedicated "Recipe Index" tab which is not comprehensive...

There is a dropdown recipe index on the sidebar, which is a work in progress...

Customized Google Search on the sidebar...

Hope this is a helpful start.


How can I use your recipes?

I am more of an intuitive cook than a by-the-book cook. So, feel free to adjust the ingredients and quantities to your taste. Most of the recipes where I post the ingredients list and quantities are tailored to my tastes, and can be used as-is. Sometimes, I just outline the general method and leave out the ingredients/proportions... sorry about that.

As I experiment a lot, and have this chronic inability to follow a recipe to the letter and do precisely as instructed, my recipes might have a non-traditional edge to it.

If I did follow a recipe closely from another source, I usually attribute it. Or, if another recipe was my inspiration, I allude to it. I'd appreciate the same, if any of my recipes inspired you at all.

If you like my recipes, and you tried them, I'd love to hear from you. Leave a comment that I can share with other visitors, or email me directly for a more personal note.

This goes without saying, but, apparently it is a different universe and honor system fails in the anonymous blogdom: Please do not use my photos and my recipes without permission. Drop me a note and I'd be glad to help, if reasonable. Thanks!


More Later...
Ciao for now!

Labels: , ,

Newer›