Related Posts Widget for Blogs by LinkWithin

Monday, April 30, 2007

molten chocolate cupcake


easy recipe molten chocolate cupcake

I am not really a cupcake fan, but, this one was asking to be made...

I found a used copy of Cupcakes by Susanna Tee - just exclusively cupcakes - at my local bookstore pleading, "Take me home, please", and I had to :)

Of course, as with music CDs, I rarely find one book with only the recipes I like and want. Same with this cupcake book. But, there were enough good recipes in there (plus it was under $5) that I decided to get it a week before my baby's birthday: I was planning to make mini cupcakes of various sorts for her birthday, but, decided to make teddy bear cakes instead.

Anyway, the molten center of the cupcake made this appealing. Simply place a little bit of your favorite chocolate into the center of the cupcake batter before baking; bake as usual; and serve warm. The chocolate inside is perfectly melted and just oozes out. I was a bit conservative as seen in picture above, but next time I think I will add more chocolate to the center ;)

And what was more appealing to me was that this was one of the recipes in the book that made up a small batch - just 6 regular cupcakes. Usually, if I try to halve the proportions of the ingredients of a standard baking recipe they don't turn out right.

Of course, as always, I could not help meddling - the recipe here is slightly different from the one in the book :) But it turned out alright...

Ingredients

4 Tbsp butter
½ cup baker's sugar
1 large egg
2/3 cup flour
1 tsp baking powder**
1 Tbsp Hersheys Special Dark™ cocoa powder*
2 oz dark or semi-sweet chocolate
powdered sugar for dusting (optional)

*or any other cocoa powder you like
**my baking powder is old, so, if using fresh baking powder, reduce the amount a little

Preparation

Heat the oven to 375°F; place 6 paper baking cases in a muffin pan, or double layered paper cases on a baking sheet

combine all ingredients, (except the chocolate and sugar for dusting), and beat with electric whisk till just smooth, no need to over beat

spoon some batter into the paper case, just half way, add the chocolate, spoon more batter to fill the paper case

bake for about 20 minutes or until risen and springy to the touch

Remove from oven and let it rest for a few minutes before serving. Dust with powdered sugar, if desired.
Labels: , ,

Sunday, April 29, 2007

teddy bear cakes


Teddy bear cakes seemed like the perfect thing to do for my baby's birthday... and, since my mum-in-law stopped by and was equally excited about the idea, we decided to pool our efforts and make a few instead of buying a giant cake for the birthday festivities...

The nice thing was that D found these little teddy bear silicon moulds and bought about half a dozen of them so we didn't have to bake just one at a time. From there on, it was almost too much fun to stop us... and, even if we didn't quite know how the cakes would turn out, it was just a two-step process, how hard can that be, right?!

Step 1: bake as many teddy bear cakes as needed
Step 2: frost and decorate them, packing as much fun in the process as possible

For Step 1, any simple yellow cake recipe is good - we just looked one up - and got the cakes baked the previous night and allowed it to cool overnight. They turned out soft, fluffy and good.

For Step 2, it had to be chocolate frosting overall as we wanted to make brown bears; and then go crazy with powdered sugar, butter, milk and food coloring to make batches of colored frosting; find all the little cake decorations tucked away in cupboards and keep them handy; then, pick one cool teddy bear cake as the guinea pig before working on the "real" ones...

We almost had it down to assembly line perfection: first the chocolate frosting all over the bear, then, one of gets one color frosting and does the paws and nose; another does the almond sliver claws and cake decoration ears; then, start the second round of decoration, adding details like eyes and pads, the goal being: have as much fun as possible in the process.

And, since one of my little nieces is about 6 years old, I got her crafting food for the party as well and I think she had fun helping out: the little strawberry mice in the slideshow were made by her! I wanted black cake decoration for eyes, chocolate chip nose, and sliced almonds for ears, but, since I didn't plan ahead, we ended up with mutant mice sporting peanut ears and chocolate chip eyes :) The licorice lace tails were the most adorable part for me.

We couldn't help making one little flower cake (again a small silicon mould) specially for the birthday girl, frost it pink, and put her name on it. And since she can recognize the alphabets, if not her name, she liked it I think.

Some home-made vanilla ice cream complemented the cake. It is a basic ice cream, similar to fudgsicle pudding ice cream, except, this time we didn't use the pudding mix, just used regular wholesome ingredients.

All in all, it was a quiet, yet fun day. I am not a cake-baking aficionado with years of decorating experience. I just wanted to do something special for my baby and am glad I could do it this year, even if she doesn't quite understand it all...

Labels: ,

Saturday, April 28, 2007

collard greens "sushi" bites

easy recipe collard greens sushi bites wrap vegetarian cuisine

When I was little I remember my mom used to make several types of greens (keerai, in local language) - some pungent, some pretty bland, and some leaving me craving for more...

Greens, whether in salad, or cooked up as soup, or served as bite-size snacks, seem to be a favorite at home. So, for the JFI-WBB Going Green with Green Leafy Vegetables event, I thought it would be fun to cook up some Collard Greens in two simple ways, combining the ideas from two of my favorite bite-sized treats - viz., Dolma and Sushi .

easy recipe collard greens sushi bites wrap vegetarian cuisineCollard greens belong to the cabbage family and apparently have higher nutritional value when cooked than when raw due to the tough cell structure.

Good to know, because I am not sure I can eat collard greens raw :)

Dolmas are with grape leaves, stuffed and steamed; and sushi is with toasted nori, rolled up with cooked rice, among other things. Drawing inspiration from these, and knowing I like collard greens, I made one set of bite-sized treats with just rolled up cooked collards and the other set stuffed with flavored rice.


easy recipe collard greens sushi bites wrap vegetarian cuisine

Ingredients
6-8 collard greens leaves
for the flavor sauce:
2-3 Tbsp Ponzu or soy sauce
2-3 Tbsp Tabasco® sauce
1 Tbsp chipotle sauce
for the flavored rice stuffing:
1 cup raw jasmine rice
¼ cup raisins and dry cranberries
2 Tbsp finely chopped walnuts
1 Tbsp Madras curry powder
salt to taste
water as needed

Preparation

Bring water to a boil in a large pot; remove the thick stalk** from collard greens, cut the leaves roughly in half and drop them in boiling water; cover and cook till collard greens are just cooked - they change color and get quite soft; remove from water and drain
**I usually save the stalk for using in sambar or curries; similarly with broccoli, when i meed to use only the florets, I save the stalk for other dishes :)

combine the Tabasco sauce, ponzu or soy sauce and chipotle sauce in a bowl, stir well and keep this sauce handy

In a plate, add some of the blended sauce from above, layer the drained collard greens on the plate, add splashes of the sauce, and another layer of collard greens and so on; leave it to marinate while getting the rest of the things ready

In a pot, combine 1 cup raw jasmine rice with 2½ cups water, some salt, curry powder, the dry fruits and walnut, cover and cook till rice is done; taste and adjust flavors, keep handy for stuffing

For the Collard Greens Bites: Layer about 3 or 4 of the marinated collard greens, roll into a tight cylinder/log while squeezing out any of the marinade; cut into bite sized pieces and arrange in a serving plate

For the Collard Greens Sushi/Wrap: Place a marinated collard green leaf on a plate, add some rice stuffing, wrap it tight as you would a dolma, or a burrito; cut on a bias if desired before serving

Serve at room temperature or cold.

Labels: , , , , , ,

Friday, April 27, 2007

Pan-fried Polenta Cakes with Tomato Sauce


Polenta loaf or log is a convenient prepare-ahead item and it keeps in the fridge for 3 to 5 days. To serve, simply cut some 2 cm slices from the loaf or log and pan fry in olive oil till both sides are crispy and the inside is warm. Garnish with sauteed onions and serve with favorite sauce.

To make polenta log or loaf: Cook the polenta in a rice cooker. 1 cup fine cornmeal with 1.5 to 2 cups water or stock. Some olive oil, Italian herbs, salt as needed. Combine it all in the rice cooker and cook in the regular cycle. When done in the rice cooker, allow to cool a bit. Stir in some more olive oil and pack it into a loaf pan or make a log using aluminum foil. Store in the fridge till it hardens and is ready to be cooked.

Sometimes I like to prepare this tomato sauce when tomatoes are in season and home-can them and store in the pantry so it is handy.

Ingredients
For the tomato sauce:
8-10 sun dried tomatoes (not packed in oil), soaked in hot water
1 6oz can tomato paste
1 12oz home-canned stewed tomatoes (store-bought is good too)
1 celery stalk, diced finely
8-10 cloves of garlic minced
½ sweet onion, diced
4 Tbsp cayenne pepper powder (adjust to taste)
1-2 Tbsp brown sugar (adjust to taste)
4 Tbsp dried oregano leaves
4 Tbsp dried marjoram leaves
½ cup loosely packed fresh basil leaves
½ cup red wine
salt to taste
water as needed
2 Tbsp olive oil

Preparation

heat 1 Tbsp olive oil in a pan, add the garlic, onion, celery, basil, parsley, dry herbs/spices and a pinch of salt; sauté till aromatic

transfer the above into a blender or food processor, add all the tomatoes - sun dried, stewed and the paste, blend into a thick sauce adding some water as needed

heat 1 Tbsp olive oil in a pan, add the blended sauce, brown sugar, adjust salt to taste, add water as needed, and simmer for about 10 minutes on medium-low heat; then add the wine and simmer some more till flavors meld and the sauce feels rich and thick

Serve warm with baked polenta, or pan-fried polenta cakes, spaghetti or any favorite pasta.

Labels: , , , , , , ,

Wednesday, April 25, 2007

three bean salad in tortilla bowl

easy recipe tortilla bowl vegetarian three bean salad

The niggly thing for me about using the deep fat fryer is it requires a certain large amount of oil first, and then, as am sure I don't want to fry anything else, I have this large amount of used oil to consume somehow. And used oil starts tasting slightly off within a few short weeks.

Anyway, there was plenty of oil left over from making soy corn dogs and onion rings and I decided to make a few cute tortilla baskets/bowls and have them handy.

The deep fat fryer comes with a contraption - just drop the store-bought tortilla, or even home-made chapathi in it, dip in hot oil for a few minutes, and voilá, a beautiful tortilla basket/bowl is ready :)

Either simple green salad, or thick soup can be served in this edible bowl - no dishes to clean up, except the deep fat fryer and its peripherals of course. I just made a simple three bean salad here. The bean salad can be made ahead of time and stored in the fridge.

Ingredients
1 cup cooked fava beans
1 cup cooked black beans
1 cup cooked chick peas
½ cup cooked diced beets (optional)
½ medium red onion, diced finely
1-2 jalapeño, died finely (remove membrane and seed to reduce heat)
1 medium tomato diced finely
1 avacado, diced finely
cilantro leaves
flavoring:
1 Tbsp Shatta, an Arabic hot pepper sauce
1 Tbsp finely diced chipotle in adobo sauce
1 Tbsp lemon juice
1 tsp brown sugar
1 Tbsp avacado oil (or any other oil)
salt to taste

Preparation

combine the beans and flavoring, stir well, adjust to taste; let it sit for up to an hour to develop flavor; garnish with cilantro

Serve cold or at room temperature in a tortilla basket/bowl.

Labels: , ,

Tuesday, April 24, 2007

Navy Beans poduthuval

easy recipe navy beans palakkad palghat poduthuval indian vegetarian

Navy beans is versatile. I usually soak and cook up a large batch, freeze them, and conveniently forget about them :)

A handful in soups and stews, a cup or two mixed in with vegetable pulao, or cooked as in this poduthuval recipe here to be eaten as a snack, salad or a side, navy beans feels wholesome.

I like the navy beans to be cooked through, soft, but not mushy - still holds shape.

Poduthuval is a term I have heard my dad and grandpa use. I just use the term "curry" for everything - with gravy or dry as in this recipe :) I am not sure of the origin of the term, but, it fits the characteristics of this navy beans recipe here - dry spice powder (usually with coconut) used to flavor vegetables in Palakkad recipes my mom taught me.

Ingredients
1 cup cooked navy beans
1 cup frozen peas
½ medium onion finely diced
1 Tbsp grated ginger
1 tsp brown sugar
salt to taste

tempering: 1 tsp oil, 1 tsp mustard seeds, 1 tsp cumin seeds, 4-6 curry leaves

for the spice powder:
¼ cup grated coconut
¼ cup coriander seeds
3 Tbsp chana dal
1 Tbsp urad dal
4-5 dry red chilies


Preparation

toast the spice powder ingredients till aromatic, and grind to a fine powder, no water needed

tempering: heat oil in a pan, when shimmering add the mustard seeds and when they pop add the cumin seeds and curry leaves; throw in the onions and ginger, a pinch of salt, and sauté till onion turns translucent

add the navy beans, frozen peas, brown sugar and the spice powder, stir well, cover and cook till peas are soft; adjust salt to taste

Serve warm as a side with rice and sambar, or rice and mor-kozhambu, or just eat it as-is, like a salad, which is what I prefer :)

This Navy beans poduthuval is my 'N' dish for lovely Nupur's A to Z of Indian Vegetables event.

Labels: , , ,

Sunday, April 22, 2007

baked polenta

easy recipe polenta baked

I prefer making polenta at home as prepared polenta sold in supermarkets don't taste as good and fresh. I had a lot of coarse cornmeal that D had bought by mistake instead of fine cornmeal I had asked for corn bread muffins... and, polenta seemed like a great way to use it up:)

I use about 3 measures of water per measure of coarse cornmeal and cook the cornmeal in water with some garlic, onions, corn kernels and some flavoring spices. When almost done, mix in some Parmesan or Pecorino-Romano and finish cooking in the oven. Top with cheddar, if desired, and serve with thick tomato sauce.

Ingredients
1 cup coarse cornmeal
3 cups water
salt to taste
1 Tbsp ground black pepper (more or less)
½ medium onion chopped finely
3-4 garlic cloves, crushed
1 jalapeño, finely chopped
1 cup grated pecorino romano/parmesan
¼ cup grated cheddar
½ cup frozen corn kernels

2 or 3 small 4-inch or 5-inch ring mold non stick pans, or a cake tin
some cooking spray

tomato sauce


Preparation

combine water, onions, garlic, jalapeño, frozen corn kernels, some salt in a pan and bring it to boil, add the coarse cornmeal and stir well to remove lumps, cover and let it cook till almost all water is absorbed and it is cooked through; stir in ground black pepper and any other spices like parsley or oregano; off heat stir in the grated Parmesan

spray a little cooking spray in cake tin or individual ring molds; heat oven to 375°F

fill the cake tin or ring mold with the cooked polenta, bake in 375°F oven for about 10 minutes until it sets well, top with grated cheddar and bake 5 mins more until cheese melts

Serve warm with home-made tomato sauce.

easy recipe polenta baked

Labels: ,

Friday, April 20, 2007

soy corn dogs

easy soy corn dog onion rings recipe

It is not every day that I feel like having corn dog and onion rings, so, when the craving hits, say once in 4 to 6 months, we indulge:) Besides, we received a deep fat fryer as gift about four years ago and have hardly used it a dozen times so far, so, any excuse to use it this year is welcome.

Some light el Salvadorian Caguama™ cerveza with a dash of lime, a setting sun, and a cheery backyard made these hot-off-the-stove corn dogs and onion rings seem like an exotic vacation for me!

Simple pleasures... Life if full of them.

Ingredients:
canola oil for frying
8 soy or veggie hot dogs
skewers to hold the corn dog
onion sliced and separated into rings
for the batter:
1 cup fine cornmeal
1 cup all-purpose flour
1½ tsp salt
1 tsp baking powder
¼ tsp baking soda
1 tsp cayenne pepper
1 (8.5-ounce) can cream-style corn
2 Tbsp finely minced onion
1 Tbsp finely minced jalapeño
1½ cups buttermilk
4 Tbsp cornstarch, for dredging

Preparation

heat the required amount of oil to 375°F for frying in a deep fat fryer or a convenient pan

run the cream-style corn through a blender briefly, then combine all the wet ingredients in a bowl; add in the dry ingredients and mix just well enough to form a batter, no lumps

insert skewer through the soy or veggie dog, dredge it with corn starch, dip in the batter to coat well, and deep fry till crisp on the outside; dredge the onion rings, batter coat and deep fry them as well

The main attraction to these soy/veggie corn dogs is the batter. It is unlike any other batter I use for making Indian fried snacks. It has a crisp outside from the cornmeal and soft thick fluffy layer of savory batter surrounding the rather plain and simple dogs.

Labels: ,

Wednesday, April 18, 2007

Vegetable Bread Pie


vegetable pot bread pie

I had some three day old Romanian bread that needed to be used up a few weeks ago. This dish was just thrown together without any specific end-product in mind. And since it turned out fine, it gives me a chance to write about it here :-)

Basically, it is like a vegetable pot pie, but, instead of pie dough, I used old bread soaked in some milk; the vegetable filling is just held together by a mixture of cheeses.


Ingredients
6-8 slices of old bread
some milk
cooking spray
filling:
frozen peas, frozen spinach, onions
1 tsp cumin powder
1 tsp cayenne pepper powder
salt to taste
1 tsp oil

some cream cheese, grated mozzarella, grated cheddar

Preparation

heat oil in a pan, sauté the onions, then add the frozen veggies and the spices, cover and cook till done; off heat, stir in the cheeses

spray a cake tin with some cooking spray; heat the oven to 375°F

remove the crust from the old bread and soak it in a small amount of milk - just enough to get it wet but not soggy; squeeze out excess milk and push some slices of bread down at the bottom of the cake tin; add a layer of filling; then another layer of wet bread on top

spray a little cooking spray on top and bake in the 375°F oven for 10-15 minutes until top is crisp and brown


Labels: , ,

Tuesday, April 17, 2007

Mango Pachadi

mambazham mango pachadi chutney indian a to z of indian vegetables

Pachadi is a south indian side which can either be yogurt-based or tamarind-based. It is usually sweet-sour if made with tamarind, and cool-bland if made with yogurt.

I like unripe green mango as much as juicy sweet mango fruit. This mango pachadi recipe is not quite traditional. Driven by my usual spirit of experimentation, and, not finding all the traditional ingredients handy, I ventured to come up with a rather unusual and yet surprisingly tasty pachadi :)

As always, taste is very personal, so, the ingredients and quantities can be adjusted to your liking. The tang from the vinegar in the pickled jalapeño and the smoky heat from the ancho-pasilla chilies combined with the mild sweetness of the mango made this dish quite interesting for me.

Ingredients
1 large ripe mango
1 Tbsp fresh grated ginger
6 rings/slices of pickled jalapeño
2 dried ancho-pasilla chilies, reconstituted
1 cup chopped cilantro leaves
¼ cup plain yogurt
salt to taste

tempering: 1 tsp oil, 1 tsp urad dal, 1 tsp mustard seeds

partially peel the skin, remove the seed and coarsely chop the mango; remove the skin completely if preferred - i like the texture and taste the skin adds

combine all the ingredients except yogurt in a blender or food processor and blend to a smooth paste; fold in the yogurt gently, adjust flavors to taste; garnish with tempering

tempering: heat oil in a pan, when shimmering add the urad dal and when it turns golden brown add the mustard seeds and when they pop turn off heat

Serve at room temperature with rice and molagoottal, or dosai, even with simple roti.

This Mango pachadi is my 'M' dish for lovely Nupur's A to Z of Indian Vegetables event.

Labels: , , , , ,

Sunday, April 15, 2007

arachu vitta sambar

easy recipe tamilnade cuisine south indian meal thali RCI

On an average day, if you dropped by to visit my parents unexpectedly, my mom would offer you a meal pretty close to the one pictured here. Perhaps not in the same presentation as above; I believe there is some unwritten rule about placement of the various dishes on a plate or banana leaf which I have not learnt well yet.

Of course, on a festival day, or if you called ahead, the meal above would pale in comparison to the one she would offer then:)

When I read about RCI - Regional Cuisine of India event, I was quite excited as this month's featured region was Tamil Nadu. There are so many distinct flavors just from this region alone, and all of them incredibly mouth-watering, but, I decided to fall back on my favorite comfort food, the food I grew up with, the food my mom would make on an average day...

The picture above shows, from left bottom clockwise: paal paisam, thayir pachadi, arachu vitta sambar, cabbage koottu and home-made chili-lime pickle. Plus, of course, rice.

Paal Paisam

Paal Paisam: This is basically a simple kheer recipe made with milk, sugar and rice, cooked together till well thickened and syrupy. I usually take a short-cut when I make this: 1 cup jasmine rice cooked in 3 cups water, and when rice is done, add 1 can of condensed milk and 1 cup of whole milk and let them cook till well combined and as thick as you prefer. Garnish with raisins and cashew nuts, preferably fried in ghee. Serve at room temperature.

Thayir Pachadi:This is a side usually, made with yogurt, grated or finely diced cucumber, salt and some tempering. There are several versions of it that I hope to make a separate post on just thayir pachadis someday :)

Cabbage Koottu

Cabbage Koottu: The cabbage koottu is pretty much the same recipe as green papaya koottu - just replace green papaya with cabbage:)

Arachu Vitta Sambar: roughly translates to sambar or stew that has some ground spice paste adding the flavor. I saved the best for the last here, as arachu vitta sambar is one of my favorites to eat with plain rice. It is similar to regular sambar recipe, except, this uses a ground spice paste rather than spice powder for the flavoring.

Arachu Vitta Sambar with Pearl Onion


A few different vegetables can be used to make arachu vitta sambar, but my favorite is made with red pearl onions.

Ingredients
12-15 small pearl onions, whole, peeled
salt to taste
1½ cups cooked toor dal
2 Tbsp tamarind concentrate*
1 Tbsp brown sugar¹

for the spice paste:
¼ cup coriander seeds
¼ cup dry grated coconut (or fresh)
2 Tbsp chana dal
4-6 dry red chilies

Tempering: 1 Tbsp canola oil, 1 tsp urad dal, 1 tsp mustard seeds, 4-6 curry leaves

*there are so many varieties of packaged tamarind product available these days, each varying in strength, price and consistency; the Vietnamese tamarind concentrate is my favorite and is the one used in this recipe, but tamarind paste is available at Indian stores which is more intense and thick than the Vietnamese one I prefer; of course, if handy, i always prefer to use tamarind fruit, just shell one or two pods, soak the pulp in water, remove the tamarind seeds, and extract the "juice" :) Experimenting with different versions helped me settle on which one I like, and how much to use to suit my taste...

Preparation

place the whole peeled pearl onions in a pot with 6 cups of water, some salt, tamarind and cook till onions lose the raw flavor

meanwhile, dry toast the spice paste ingredients till aromatic, then combine them in a blender or food processor and grind to a fine smooth paste, adding just enough water to make a smooth paste

when pearl onions are cooked add the spice paste mix, cooked toor dal, brown sugar, adjust salt to taste and let it simmer till flavors meld and the sambar is thicker; garnish with tempering

Tempering: heat oil in a pan, when shimmering, add the urad dal, when it turns golden brown add the mustard seeds, and when they pop add the curry leaves and turn off heat

Stir well before serving with fresh plain hot rice.

¹ Many of my friends and family leave out the brown sugar in the sambar recipe. In fact, in some households it is a strict no-no to add brown sugar or jaggery to sambar and rasam. I have always done it - ever since I found out I like the taste that a hint of brown sugar adds to spicy dishes :P

Labels: , , , , ,

Wednesday, April 11, 2007

green papaya koottu

easy recipe green papaya koottu indian cuisine

Koottu, usually served as a side in south indian meals, is a comfort food for me. Koottu is quite flexible: a couple of vegetables, some moong dal, and tempering is all it takes to make this dish. It is usually mild-tasting, and can be eaten as a snack by itself :)

Ingredients
1 small green papaya
1 carrot
½ cup moong dal
salt to taste
4-5 curry leaves (optional)
1 Tbsp grated ginger
½ tsp turmeric powder (optional)
Tempering: 1 Tbsp canola oil, 1 tsp mustard seeds, 1 tsp urad dal

Preparation

cook the moong dal in a pan adding enough water, and a bit of salt; cook till dal is just done, not mushy, still holds shape, sort of al dente

meanwhile, skin the green papaya, scoop out the innards and dice them; slice the carrot as well

tempering: heat oil in a pan, add the urad dal, when it turns golden brown, add the mustard seeds, and when they pop, add the curry leaves and ginger

add the green papaya and carrots, some salt, turmeric powder, some water and cook the veggies till well done but not mushy

add the cooked moong dal, stir well, adjust salt to taste

Serve warm as a side with rice, and pepper rasam, or kozhambu

Labels: , , , ,

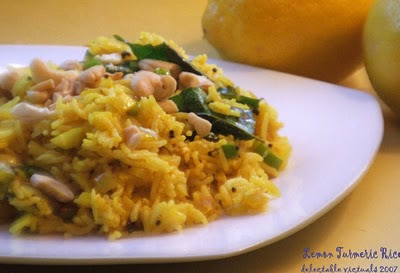
lemon rice

A to Z of Indian vegetables event easy recipe lemon turmeric rice indian cuisine

Whether taking the G.T Express, or the Bangalore Mail, or the Charminar, as a little kid in India, one thing that still lingers in my mind is the food my mom used to pack for the trip. Hearty, simple, sturdy idlees, fortified and enhanced yogurt rice plus good old Lemon Rice.

And Lemon Rice is my 'L' post for lovely Nupur's A to Z of Indian Vegetables event.

This is a very simple dish that is easy to throw together with leftover plain cooked rice, if handy; and, has always withstood the scorching heat during our train rides without spoiling - thanks to the lemon juice that provides enough acidity to keep this for a few days.

Ingredients
3 cups cooked basmati rice
1 medium onion diced finely
1-2 serrano chilies chopped finely
1-2 Tbsp grated ginger
1 tsp turmeric powder
1 tsp brown sugar
4-5 curry leaves (optional)
salt to taste
4 Tbsp lemon juice
Tempering: 1 Tbsp canola oil, 1 tsp chana dal, 1 tsp urad dal, 1 tsp mustard seeds

garnish: toasted cashew nuts, toasted peanuts

Preparation

tempering: heat oil in a pan, when shimmering, add the chana dal, when it turns golden brown add the urad dal, and when urad turns light brown add the mustard seeds, and when they pop add the curry leaves, ginger, chilies, turmeric, onion, a pinch of salt and brown sugar, and sauté till onions turn translucent

stir in the rice till well incorporated; off heat, stir in the lemon juice; garnish with toasted peanuts and/or cashew nuts

preferably, add a little lemon juice at a time, stir well, taste and add more to suit your taste - i like it mildly tangy, not too strong:)

Serve warm or at room temperature, with pappadam or favorite chips.

Labels: , , , ,

Monday, April 09, 2007

rotini with squash, rosemary and chives

easy recipe squash pasta green herb blogging GHB
There's rosemary, that's for remembrance.
-- Shakespeare's Hamlet to Ophelia

I came across Green Blog Project at Ahaar today and wanted to write about two little perennials we have in our garden: Rosemary & Chives.

This pasta recipe came about as a result of trying to find Various Ways To Use Up Squash From Last Year, that we grew in our garden.


Rosemary (Rosmarinus officinalis) is a perennial evergreen shrub, having pine-needle like leaves, and a strong aroma, which is an effective memory stimulant.

Some medicinal uses, sourced from garden guides:
  • Rosemary helps to relax muscles, including the smooth muscles of the digestive tract and uterus - and can be used to soothe digestive upsets and relieve menstrual cramps. When used in large amounts it can have the opposite effect, causing irritation of the intestines and cramps.
  • A tea made form the leaves is also taken as a tonic for calming nerves and used as an antiseptic: use one teaspoon of crushed dried leaves in a cup of boiling water and steep for ten minutes.
  • Use an infusion as a rinse to lighten blond hair, and to condition and tone all hair. Try mixing an infusion half and half with shampoo to strengthen hair.
  • An infusion can also be used as an invigorating toner and astringent. Rosemary added to a bath strengthens and refreshes, especially when used following an illness.


Chives (Allium schoenoprasum) belong to the onions, leeks, garlic family. Chives are hardy, draught tolerant, perennials, eight to twenty inches tall, and they grow in clumps from underground bulbs.

Ingredients
2 Tbsp chopped fresh rosemary
2 Tbsp finely chopped chives
2 cups cooked rotini pasta (or, any other favorite pasta)
salt to taste
2 Tbsp extra virgin olive oil
4-6 cloves of garlic crushed
¼ cup grated cheddar
¼ cup grated mozarella
¼ cup grated parmesan
steamed broccoli florets, squash, peppers, yellow tomato (or red)- as much veggies as preferred

Preparation

heat oil in a pan, sauté the garlic and the cooked vegetables; add the chopped herbs (reserving some for garnish), adjust salt to taste; off heat, stir in the cheese

transfer to a casserole or baking dish and bake in a 350°F oven for about 10-12 minutes

Garnish with fresh chopped rosemary & chives, serve warm.

Labels: , , , , , , ,

potato leek soup

easy recipe potato leek soup

In its simple and earthy form, I had this soup for the first time when my fellow resident and room-mate at the International House made it for our dinner one night. I loved it right away and still love it, although over the years, I have added some of my personal touches to this very hearty and basic recipe.

I like the simplicity - just three basic ingredients, plus some flavoring - brings about a comforting and filling meal, especially on cold winter nights.

As it is easy to throw together, I like to make a small batch fresh - the cheese doesn't do well on refrigerating and reheating. I've tried with and without sharp aged cheddar, and with other cheeses, but, prefer the strong flavor cheddar imparts.

Ingredients
1-2 medium potato, peeled
1 leek
a small hunk of cheddar, grated (limit the amount to taste)
1 Tbsp madras curry powder
1 Tbsp Tabasco® sauce
1 Tbsp black pepper powder
salt to taste
1 Tbsp hazelnut oil (or canola oil)

easy recipe potato leek soup

Preparation

remove about an inch from root end, and clean the leeks - there is usually a bit of dirt hiding between the layers; then chop finely

heat oil in pressure cooker, sauté the chopped leeks, reserve some for garnish, and pressure cook the potatoes and rest of the leeks with a bit of salt till mushy

mash the pressure cooked potatoes and leeks, stir in the spices and grated cheese and simmer on medium low heat till well-combined

Garnish with reserved sautéed leeks and grated cheddar.

Serve warm with home-made cornbread muffins, or garlic bread, or favorite dinner rolls.

Labels: , ,

Saturday, April 07, 2007

moghrabiyah with zaatar chicken


I usually make some simple falafel, tabbouleh, dolmas, baba ghanouj, hummus and such, but, Meeta's Monthly Mingle theme "Arabian Nights" got me interested in making something different, something rare at my table, and I promptly went to Ya Hala store to get some supplies.

Ya Hala restaurant is in SE Portland. We've been there only a couple of times, despite enjoying the food a lot. We rarely eat out, especially after the wee one arrived. The restaurant has a grocery store next door, which is where I went to get some ready-made Zaatar and Moghrabiyah.

Zaatar, to me, in concept, is like Garam Masala: each family, each chef, has their own special proportion of spices so that, despite using the same ingredients, each batch can turn out different. Zaatar is a mixture of thyme, sumac, sesame seeds usually, and possibly some marjoram or fennel. Sumac gives it some tang, and thyme is usually the prominent flavor.


Moghrabiyah (mougrabiya, moghrabieh) is basically pasta: it is made of durum wheat and is usually sold as little round pearls/pellets, aproximately the size of tapioca pearls. It is cooked just like pasta or cous cous, in salted boiling water, until tender.


Ingredients
2-3 boneless skinless chicken breast
½ cup green zaatar (reserve some for rub, rest for cooking)
salt to taste
2 Tbsp oil
1 medium onion, sliced
1-2 green chilies, diced finely
1 medium leek, cleaned and chopped
6-8 pearl onions, peeled, whole (optional)
1 cup plain thick yogurt

½ cup dry moghrabiyah
1 cup water or vegetable/chicken stock, hot

Preparation

toast the moghrabiyah in a pan, and then add it to the measured hot water, and boil on medium low till all water is absorbed and it feels cooked to your taste; or, simply follow the package directions; cover and keep warm

rub the chicken breasts, with some zaatar, add some lemon juice and salt and let it marinate for an hour or so; then cut the chicken breasts into bite-sized pieces

heat 1 Tbsp oil in a pan, sauté the pearl onions (if using) with a pinch of salt and zaatar; set aside

heat 2 Tbsp oil in a pan, add the onions, chilies and leeks, a pinch of salt, and sauté for a bit, then throw in the chicken pieces, add more zaatar and cook till chicken is done; then fold in the yogurt off heat

Serve the zaatar flavored chicken with the moghrabiyah, or rice, or roti.

I am glad I came across Monthly Mingle, else I would not have thought of making this dish at home.

Labels: , , , , , ,

watermelon margarita

easy watermelon margarita recipe
I was debating whether this is worth a post here, as there is no real "recipe" to share, but, this drink fit so perfectly with yesterday's unusually warm weather that I decided to record it here:)

It was a long work week, an unusually warm Friday, and I had just come back from work, made dinner, then taken a long stroll to the park with my wee tot, so, I was aching for some restorative.

This watermelon margarita seemed like the perfect thing: "Amma's Juice" as my wee one likes to declare, and pretty close to the truth, actually; it has very little alcohol in it.

1 oz watermelon syrup*
2 oz sweet and sour mix
1 oz lemon juice
½ oz triple sec
1 oz tequila
8 medium ice cubes
* or some fresh watermelon, if in season

Blend all the above ingredients and serve cold :)

Labels: , ,

asparagus omelette rolls

easy recipe asparagus omelette rolls
Ever since we started getting farm fresh free range hen eggs, I have been making something with eggs for weekend breakfast or brunch.

This is a very easy dish to throw together if a jar of pickled asparagus is handy. Else, fresh asparagus can be used, but, they need to be steamed first.

Ingredients
3 eggs
some soy sauce & mirin (OR, kecap manis, OR, just salt & pepper)
4-5 pickled asparagus spears
1 Tbsp canola oil

Preparation

beat the eggs with soy sauce & mirin, heat oil in a pan and pour enough of the egg mixture to make a not-too-thick omelette

when the top side just sets, add a few asparagus spears along one end of the omelette, gently tilt the pan and roll the omelette, finish cooking

remove from pan, cut into bite-size 2-inch pieces, sort of like sushi rolls

Serve warm with chili sauce.

Labels: , ,

Thursday, April 05, 2007

tortilla parcels


Tortilla parcels are quite a filling snack, and even make a good sumptuous meal with some sides: some flavored rice, some fried bananas, some crisp tortilla chips, and maybe a margarita or two to wash it all down...

These tortilla parcels are easy to make, and are flexible regarding the filling & salsa.

Ingredients
3-4 large wheat tortilla
3-4 Tbsp canola oil
some grated cheddar

for the filling:
cooked black beans, minced garlic, cooked corn kernels, diced onions, diced tomatoes, cilantro, diced jalapeños and some crumbled queso panela; salt to taste, cayenne pepper powder, a splash of chipotle sauce & lemon juice

for the black bean & corn salsa:
pretty much the same ingredients as the filling, just leave out the queso, add more tomatoes, maybe some coriander powder and adjust flavors

Preparation

combine the filling ingredients, adjust flavors to taste, keep handy

place some grated cheese on a tortilla, add some filling, fold one end up and then two sides, and then the last open side - like making a little parcel or gift wrap :)

heat a tablespoon of oil in a pan, place the tortilla parcel gently, folded side down, and let it brown; then flip and brown the other side, and possibly brown the edges by holding them up so they stand on end, taking care not to let the parcel open and spill

Serve warm with black bean & corn salsa.

Labels: ,

Tuesday, April 03, 2007

kovakkai paruppusili

easy recipe tindora kovakkai lentils paruppusili


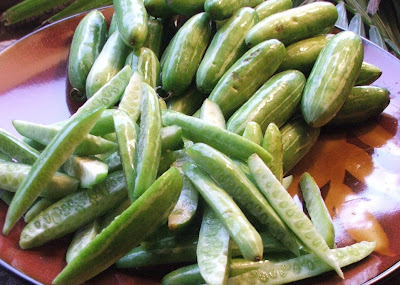
Coccinia grandis, Tindora, Kovakkai, Dondakaya, Ivy Gourd... whatever we call it, this is  one of my childhood favorites.

I don't make it often these days - it depends on whether my local Indian stores carry it when I feel like having some, but, as it happened, D bought a pound of Kovakkai recently that I eagerly cooked up into my favorite dish here.

easy recipe tindora kovakkai lentils paruppusili

Paruppusili is basically, red gram lentils soaked with some dry red chilies, ground into a paste, steam-cooked and then pan fried and added to vegetable of choice, which in this recipe happens to be Kovakkai. The procedure is the same as my Green Beans Paruppusili recipe.

easy recipe tindora kovakkai lentils paruppusili

After soaking and grinding the red gram lentils (toor dal, tuvar dal), I like to shape it into small balls and steam the lentil balls. At this point, the steamed lentil balls can be frozen for future use - just thaw in microwave on low power as needed. The lentil balls can also be used to make a wonderful dish we relish in my family, called Paruppu Urundai Kozhambu.

Ingredients:
4 2"-diameter steamed lentil balls, if handy
OR
(1 cup toor dal, 2 dry red chilies, some water)
------------

1 pound kovakkai*, cut length-wise
salt to taste
* I prefer the green and unripe Kovakkai for this dish, not the ripe ones that are reddish inside

tempering: 2 Tbsp oil, 1 tsp mustard seeds, 1tsp cumin seeds, few curry leaves

Preparation:

to make lentil balls: soak the toor dal and dry red chilies in water for about an hour or two; drain, grind it to a thick paste; shape into 2" diameter balls; steam them and set aside

steam the kovakkai with a pinch of salt till cooked through but not mushy, drain, and set aside

heat oil in a non-stick pan, add the tempering: when mustard seeds pop and die down, add the cumin seeds and curry leaves, crumble the lentil balls and add them to the pan; stir fry till the lentils get slightly crispy and golden

add the steamed kovakkai to the pan, stir till well incorporated; adjust salt to taste

Serve warm with simple roti, or, with basmati rice and pepper rasam

This Kovakkai paruppusili recipe is my 'K' dish for A to Z of Indian Vegetables event hosted by Nupur of One Hot Stove. It takes hard work to do the round-up week after week and I really appreciate all the effort Nupur has been putting into hosting this event.

Labels: , , , , , ,

Monday, April 02, 2007

rhubarb scones

rhubarb scones easy recipe clotted cream

D likes scones. He likes to have scones with clotted cream. I got him a jar of clotted cream a while back, but, didn't get around to making the scones to go with it until now...

The gnarly dark green leaves along with their deep red stalks are unmistakably signaling the rise of the rhubarb again this year. This hardy perennial heralds the start of the growing season, usually the garden's first gift I look forward to each spring.


The first spring stalks are supposed to be the best, so, I wanted to use it for making some baked goodies. I like its crisp tartness. Pie is not a favorite of mine, so, I decided to try something along the lines of scones, having tried a few other things with rhubarb before...

The leaves contain oxalic acid and are toxic; the deep red stalks are the only edible portion of this plant (Rheum rhabarbarum). Botanically, rhubarb is a vegetable.

And, rhubarb is the plant I would like to share for this week's Weekend Herb Blogging hosted by Anh at Food Lover's Journey.

A few uses of rhubarb (Rheum palmatum) that I found interesting:
  • can be used to make an environmentally friendly cleaner for pots and pans - rhubarb brings back the shine in burnt pots and pans
  • can be used as a hair dye
  • can be used to make organic insecticide


This rhubarb scone recipe is a sweet version of the flatter soda scone, rather than traditional scones which are closer to biscuit in thickness and texture.

Ingredients
1¼ cup all purpose flour
1 cup whole wheat flour
3 Tbsp wheat gluten flour
1 cup sugar (reserve 2 Tbsp of this for sprinkling on top)
¼ cup dried cranberries
2 tsp baking powder
½ tsp baking soda

½ cup ghee

1 cup rhubarb, cooked, drained and mushed
2/3 to 3/4 cup buttermilk*
*(add a little at a time to form a dough that is not runny or loose)

Preparation

microwave the rhubarb till it is soft;(no extra water needed - usually a cup of coarsely chopped rhubarb cooks in about 45 seconds to a minute); drain well, or reduce buttermilk quantity

combine the dry ingredients in a bowl, cut in the ghee till the flour mixture feels like breadcrumbs; gradually stir in the rhubarb, then buttermilk

either roll the dough into a ball and flatten to a one-inch thick disk, score the tops into wedge shapes, and place on parchment paper lined cookie sheet ; OR, just roughly make triangular shaped heaps on a parchment paper lined cookie sheet

bake in a 400°F oven for about 20 minutes or till done - toothpick inserted comes out clean; sprinkle some of the reserved sugar on top

Serve warm with clotted cream or butter.

rhubarb scones easy recipe clotted cream

Labels: , , , , ,

Newer›  ‹Older